 by
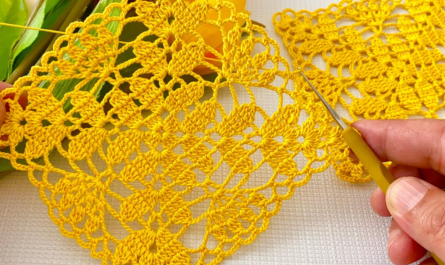
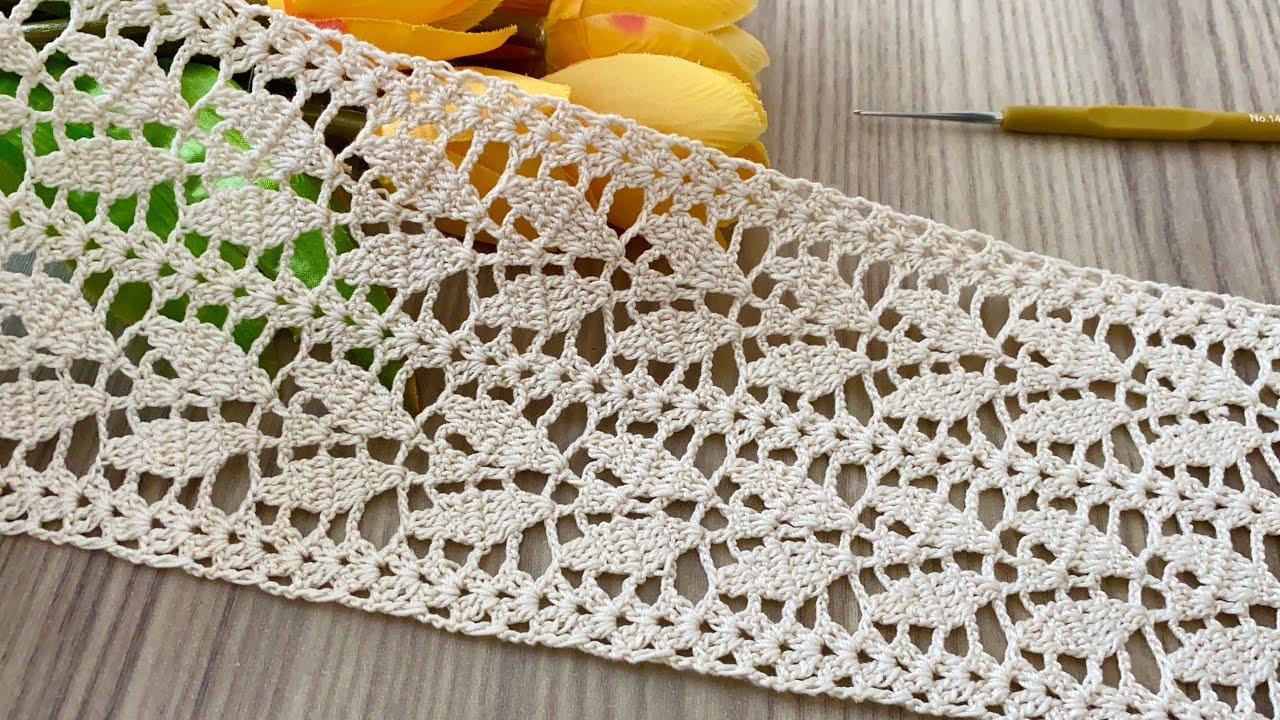
by That is an excellent skill to learn! A Crocheted Lace Strip (also known as edging or border trim) is incredibly versatile, perfect for adding a decorative finish to towels, pillowcases, curtains, blankets, or even clothing hems.1
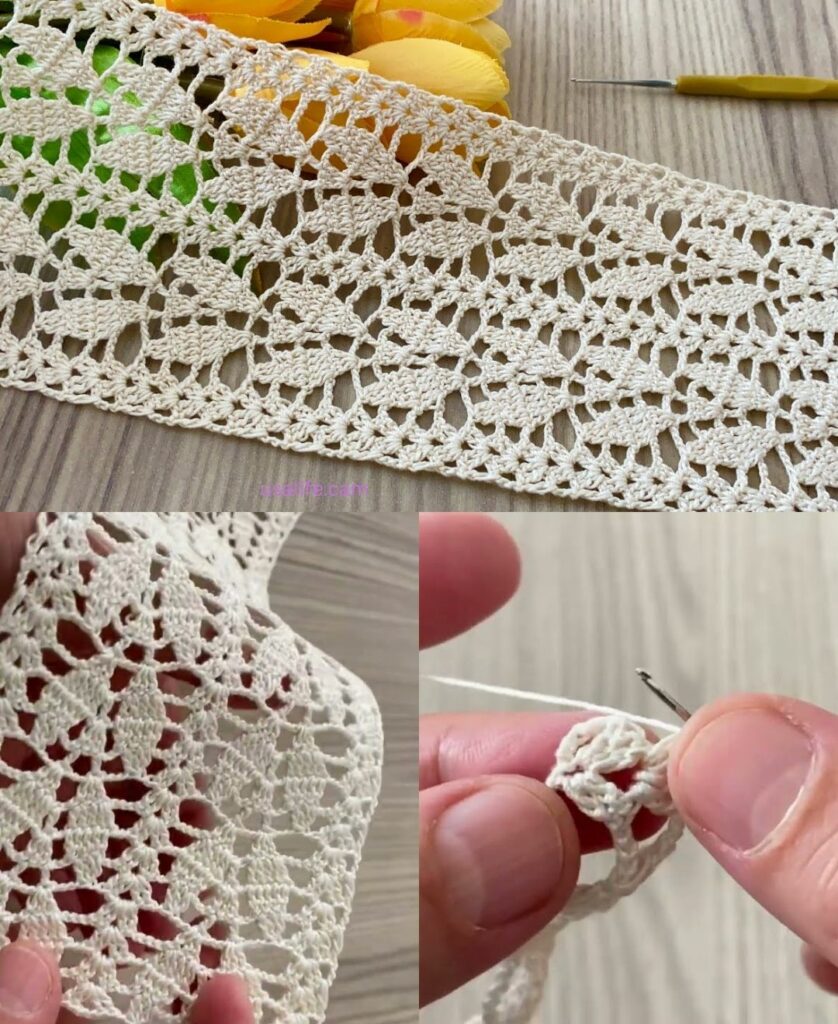
The best patterns for strips use a repeating motif and have a clean anchor edge that makes attachment easy. I will detail the Vintage Fan and Picot Lace Strip, which is elegant, easy to repeat, and perfect for straight edges.
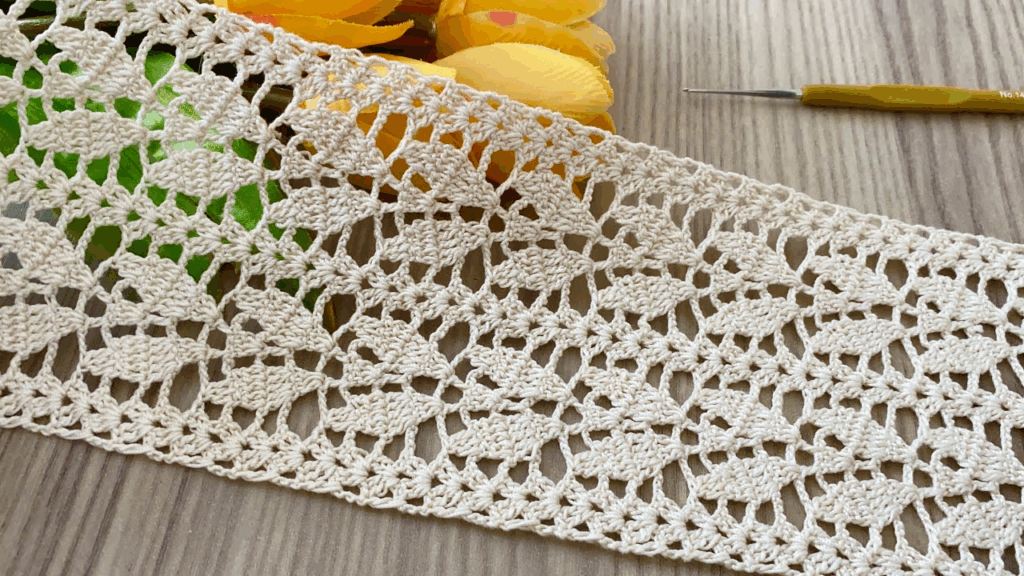
🎀 Vintage Fan and Picot Lace Strip Tutorial
This pattern uses the double crochet (DC) shell to create a fan or scallop shape, finished with delicate picots.
Materials You’ll Need
- Project: Your item (fabric edge, blanket edge, etc.) ready for the border.
- Yarn/Thread: Use fine Cotton Thread (Size 10 or 20) for fabric edges, or Fingering/Sport Weight Yarn for a blanket border.
- Crochet Hook: A size appropriate for your thread/yarn (e.g., 1.75 mm or 3.5 mm).
- Scissors, Tapestry Needle.
Key Crochet Terms
| Abbreviation | Stitch Name |
| ch | Chain |
| sl st | Slip Stitch |
| sc | Single Crochet |
| dc | Double Crochet |
| Picot | Ch 3, sl st into the first ch (creates a small loop/point) |
| Shell | A group of stitches worked into one space/stitch |
Foundation: The Anchor Row (Crucial!)
This row creates a stable foundation for the lace to attach to and ensures the correct stitch count.
- Preparation Round (Attachment): If attaching to a fabric edge, use a very small hook to work single crochet stitches along the fabric hem. If attaching to a crocheted/knitted edge, work a round of sc evenly along the edge.
- Count Check: The repeat for this lace pattern is 6 stitches. Therefore, the total number of single crochet stitches along the edge should ideally be a multiple of 6 + 1. Adjust the last few stitches if necessary to meet this count.
- Join with a sl st to the first sc.
Part 1: Creating the Repeating Lace Strip
We will work in rows back and forth along the edge you wish to trim.

Row 1: Establishing the Anchor Mesh
This row creates the base loops that the scallops will sit into.
- ch 1 (does not count as st). sc in the same st.
- Anchor Mesh: ch 3, skip 2 stitches.
- Repeat: [sc in the next st, ch 3, skip 2 sts] across the entire edge.
- Finish: Work the last sc into the final stitch of the edge (which should be the +1 from your count check). ch 1 and turn.
Row 2: Building the Fan Shells
We work the shells into the ch-3 loops created in the previous row.
- sc in the first sc stitch (anchors the round).
- Fan Shell: Work [5 dc] into the next ch-3 loop.
- Anchor: Work sc into the next sc stitch (the anchor point).
- Repeat: [5 dc Shell into the next ch-3 loop, sc in the next sc anchor] across the entire edge.
- Finish: Work the last sc into the final sc stitch. ch 1 and turn.
Row 3: Adding the Picot Detail (Finishing Row)
This row adds the decorative picot points and finishes the lace strip.
- sc in the first sc stitch.
- Sl st into the next 2 dc stitches of the shell (to move to the peak).
- Petal Point: Work sc in the 3rd dc (the center of the 5-dc shell).
- Work a Picot (ch 3, sl st into the first ch).
- Descent: Work sc in the next sc anchor between the shells.
- Repeat: Continue the sequence [sl st over the next 2 dc, sc in the center of the shell, Picot, sc in the sc anchor between the shells] across the entire edge.
- Finish: End with an sc in the final sc stitch. Fasten off.

Final Step: Blocking
Blocking is highly recommended for lace strips to ensure they lie perfectly flat and straight, and that the picots are clearly defined.
- Wet: Dampen the lace strip (or the entire project border).
- Pin: Pin the strip tautly and straight along its entire length to a mat or towel. Pin the little picot points outwards for the best effect.
- Dry: Allow the lace to dry completely before removing the pins.
The crocheted lace strip is now finished and ready to elevate your project!
Video tutorial: