 by
by That sounds like an exquisite and rewarding challenge! Crocheting a lace doily with floral motifs, layered petals, and intricate edging requires a good understanding of stitch placement, increasing, and structural balance.
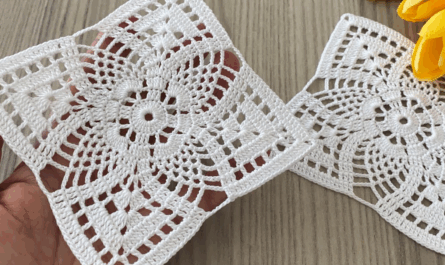
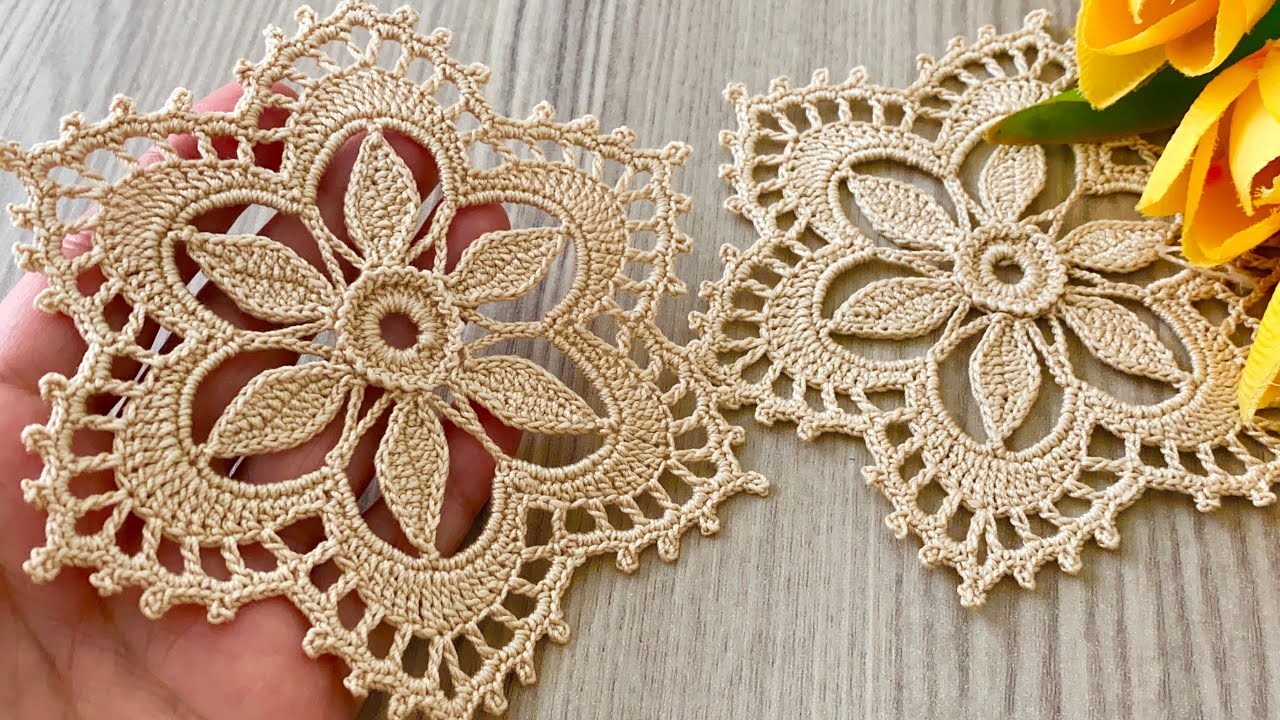
I will detail a pattern for a Layered Floral Doily Motif that starts with a central flower and builds outward into delicate lace using shell and picot work.
🌺 Intricate Layered Floral Lace Doily Tutorial
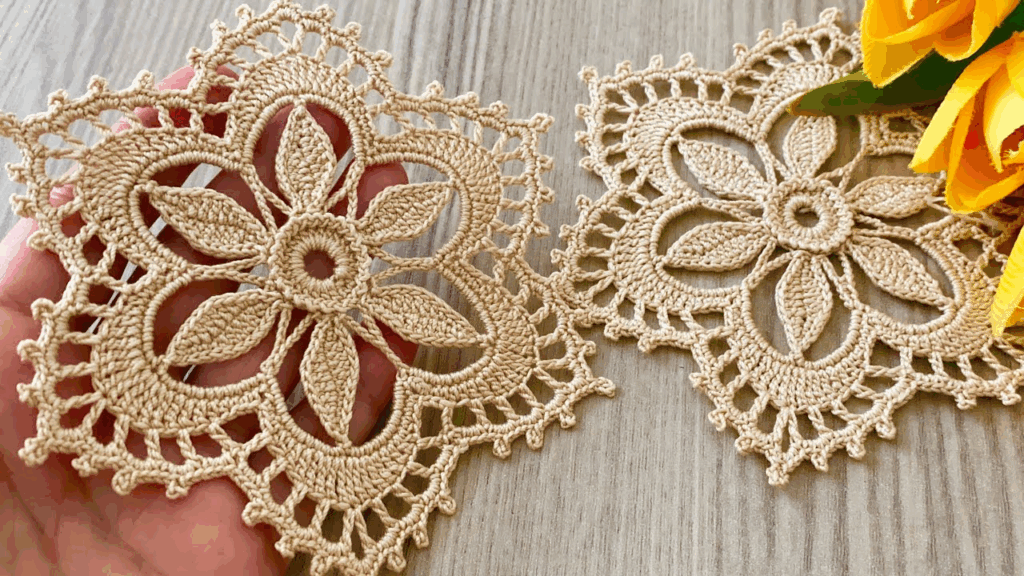
This pattern uses multiple rounds of petals (Shell and Puff stitches) to create the dimensional floral center, followed by a net-like structure leading into a final scalloped edge.
Materials You’ll Need
- Thread: Size 10 or 20 Cotton Thread (higher thread size means finer lace).
- Crochet Hook: A small size appropriate for the thread (e.g., 1.5 mm – 2.0 mm).
- Scissors, Tapestry Needle, Liquid Starch (for blocking).
Key Crochet Terms
| Abbreviation | Stitch Name |
| ch | Chain |
| sl st | Slip Stitch |
| sc | Single Crochet |
| dc | Double Crochet |
| tr | Treble Crochet |
| Puff | Puff Stitch (Special Stitch) |
| Picot | Ch 3, sl st into the first ch |
Special Stitch: Puff Stitch (PS)
Work (YO, insert hook, YO, pull up loop) 3 times into the same stitch/space (7 loops on hook). YO, pull through all 7 loops. Ch 1 to close.
Part 1: The Layered Floral Center
Round 1: Foundation
- Start: Make a Magic Ring. ch 3 (counts as dc). Work 15 dc into the ring.
- Finish: Pull tail tight. Join with a sl st to the top of the ch 3. (16 sts).

Round 2: Inner Petals (Puff Stitch)
- ch 1. sc in the same st. ch 2. Skip 1 st.
- Work [Puff Stitch (PS) in the next st, ch 2, sk 1 st, sc in the next st, ch 2, sk 1 st] 3 more times. (You will have 4 sc anchors and 4 puff petals).
- Join with a sl st to the first sc.
Round 3: Outer Petals (Layered Shells)
We work these petals behind the puff stitches, into the sc anchors from the previous round, using taller stitches to create the 3D layer.
- sl st into the next ch-2 sp. sc in the next sc anchor.
- Petal: ch 1. Work [Shell: 2 dc, 3 tr, ch 1, 3 tr, 2 dc] into the next sc anchor.
- Anchor: ch 1. Work sc into the next sc anchor.
- Repeat: [ch 1, Shell in the next sc anchor, ch 1, sc in the next sc anchor] 2 more times.
- Join with a sl st to the first sc. (4 large layered shells).
Part 2: Building the Intricate Lace Netting
This section transitions from the flower to the flat, open lattice of the doily.
Round 4: Beginning the Net
- ch 1. sc in the same st.
- Netting: ch 5. Work sc into the ch-1 space at the peak of the next shell.
- Repeat: [ch 5, sc in the sc anchor between the shells] 3 more times. Continue [ch 5, sc in the ch-1 peak of the shell] 3 more times.
- Join with a sl st to the first sc. (8 ch-5 loops).
Round 5: Expanding the Net
- sl st into the ch-5 loop. ch 3 (counts as dc). Work 4 dc into the same loop.
- Separator: ch 3.
- Work [5 dc into the next ch-5 loop, ch 3] 7 more times.
- Join with a sl st to the top of the ch 3.

Part 3: The Intricate Edging (Scallops and Picots)
We now create a defined, scalloped edge using the chain spaces from the previous round.
Round 6: Scallop Foundation
- sl st over to the center (3rd dc) of the 5-dc cluster. ch 1. sc in the same st.
- Scallop Loop: ch 5.
- Anchor: sc in the center (3rd dc) of the next 5-dc cluster.
- Repeat [ch 5, sc in center of next 5-dc cluster] around.
- Join with a sl st to the first sc. (8 ch-5 loops).
Round 7: The Final Picot Edge
- sl st into the first ch-5 loop. ch 1. Work sc into the loop.
- Petal Point: Work [3 dc, Picot, 3 dc] into the same ch-5 loop.
- Anchor: Work sc into the next ch-5 loop.
- Repeat: [Shell (3 dc, Picot, 3 dc) in next loop, sc in next loop] around the doily.
- Join with a sl st to the first sc. Fasten off.
Final Step: Stiffening and Blocking (Mandatory for Doilies)
- Stiffening: For the doily to hold its lace shape, it must be starched or stiffened. Soak the doily in a solution of liquid starch or white glue mixed with water.
- Pinning: Lay the wet doily on a blocking mat or heavy towel. Meticulously pin every petal point, every scallop peak, and stretch the lace gently to define the open spaces.
- Drying: Allow the doily to dry completely (up to 48 hours for thick starch) before removing the pins.
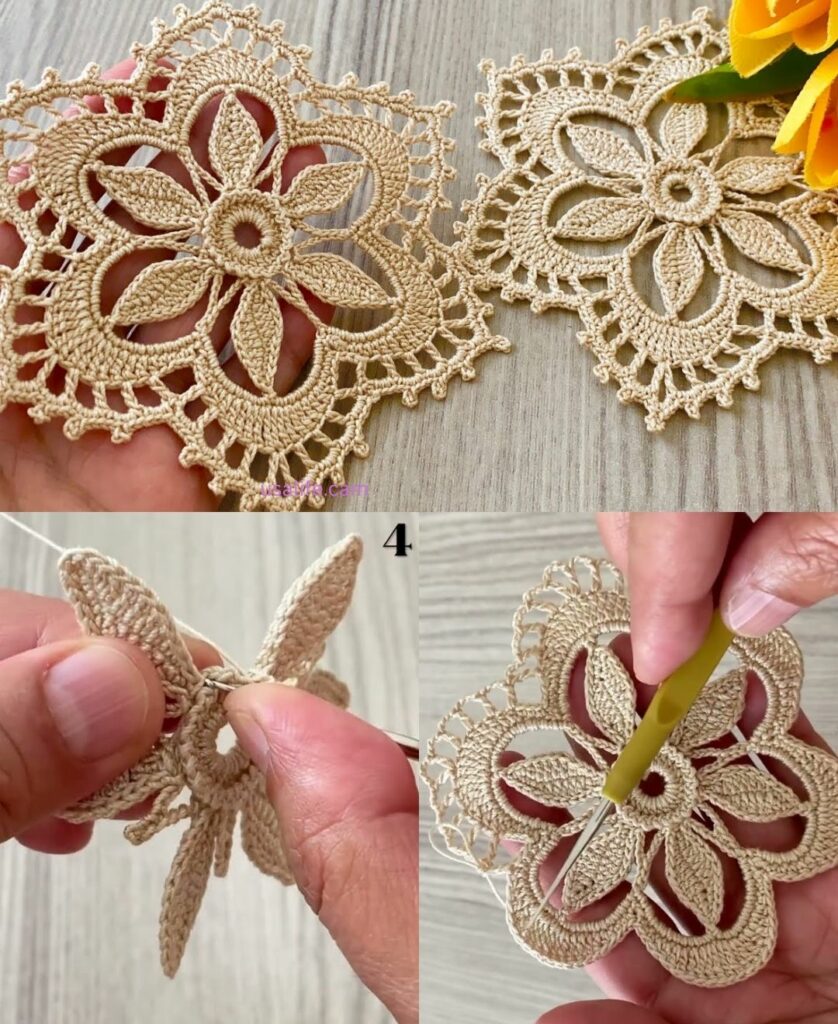
The resulting doily will have a pronounced 3D floral center and a stunning, intricate lace edge!
Video tutorial: