 by
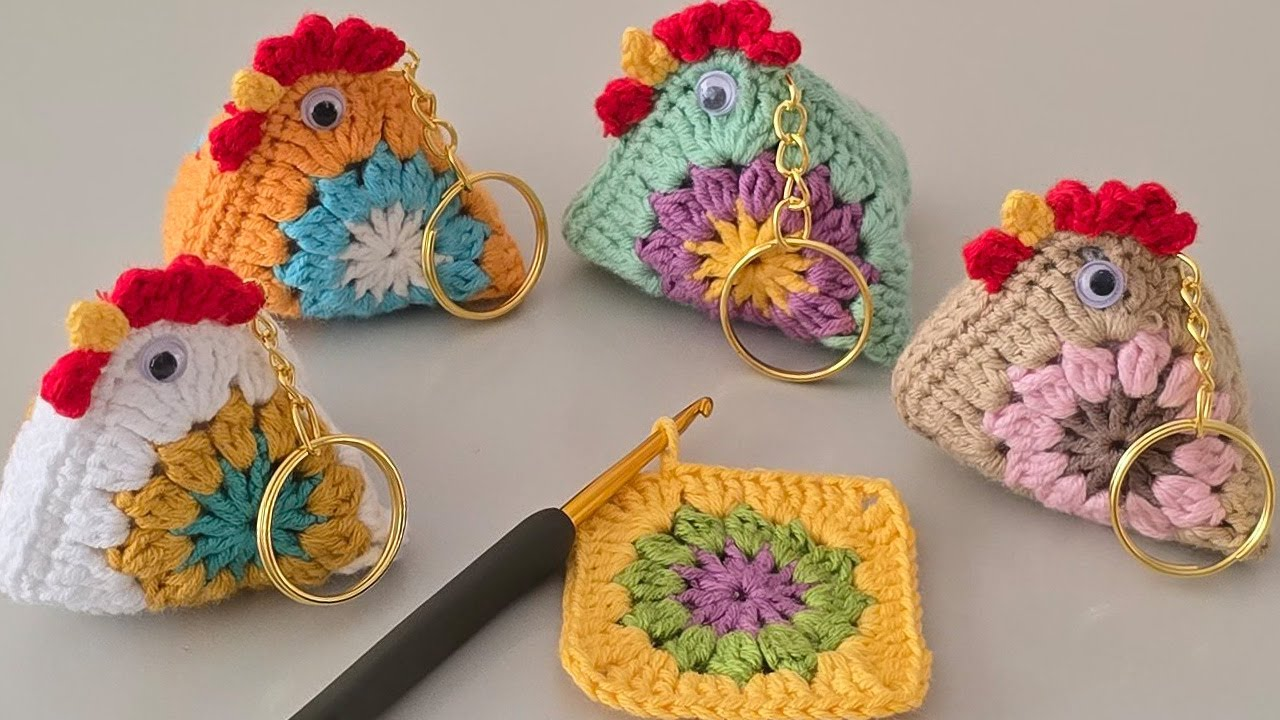
by It’s a fantastic idea to crochet a chicken keychain! These are incredibly cute, quick to make, and perfect for using up small yarn scraps. They also make wonderful little gifts or market items. Just to clarify the terminology, crochet uses a single hook, while knitting uses two needles. This tutorial will focus entirely on how to crochet a chicken keychain.
Given that you’re in Phnom Penh, where it’s warm, 100% cotton yarn is an excellent choice for a keychain. Cotton holds its shape well, is durable, and its stitch definition will really make the details of your chicken stand out.
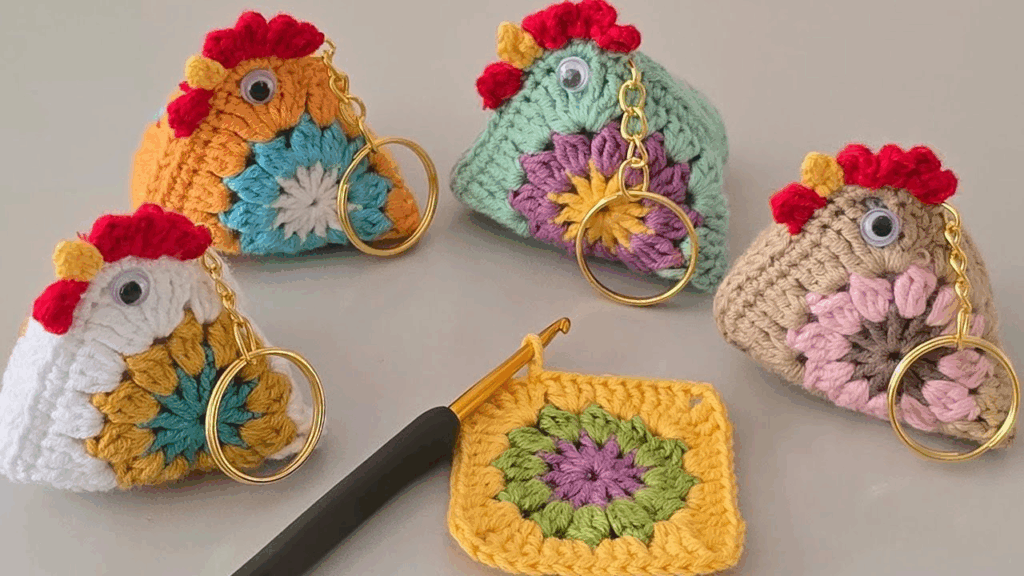
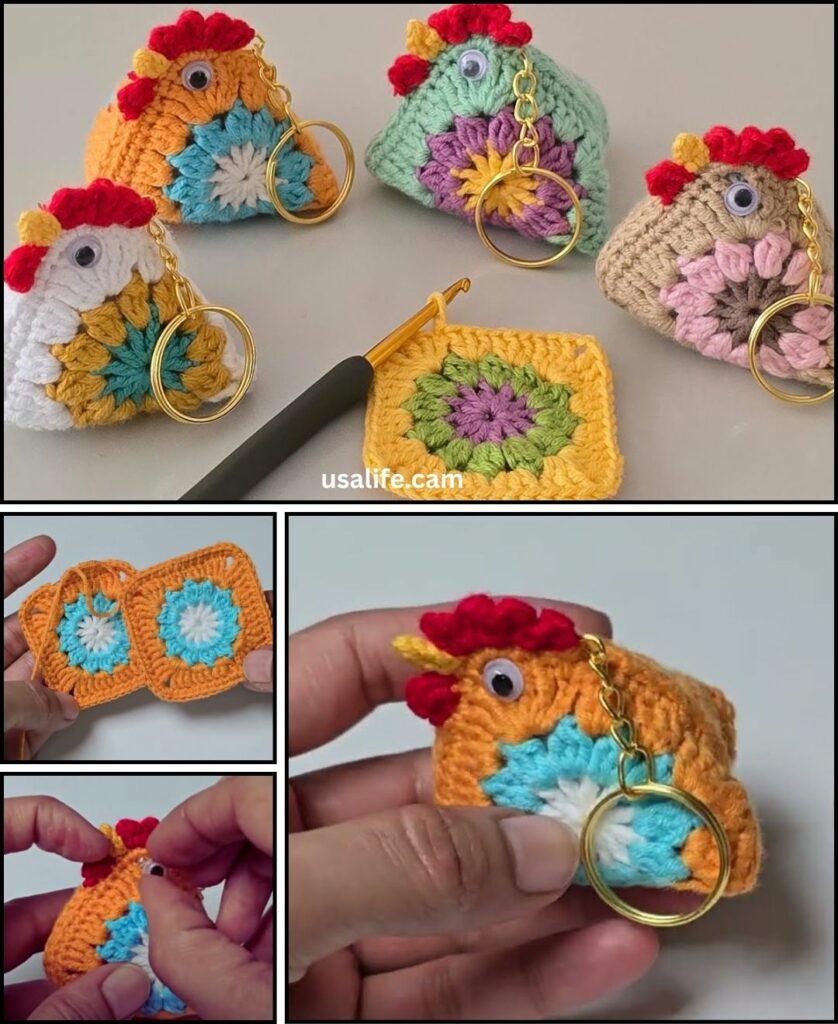
How to Crochet a Cute Chicken Keychain (Amigurumi Style)
This tutorial will guide you through creating a small, rounded chicken body with a tiny comb, wattle, wings, and a beak. It uses basic amigurumi techniques (working in continuous rounds, stuffing).
1. Essential Materials You’ll Need
- Yarn:
- Main Color (MC): For the chicken’s body (e.g., white, cream, light brown, yellow). Worsted Weight (Aran / Medium / Category 4) 100% Cotton or a soft Acrylic is ideal. You’ll need about 10-15g.
- Red Yarn: For the comb and wattle (small scrap).
- Orange or Yellow Yarn: For the beak and feet (small scrap).
- Black Yarn or Embroidery Floss: For the eyes (tiny scrap).
- Crochet Hook:
- A 3.0mm (US C/2) or 3.5mm (US E/4) hook. For amigurumi, you want a hook size slightly smaller than recommended for your yarn to create a tight fabric with no holes for stuffing to show through.
- Scissors: For cutting yarn.
- Yarn Needle (Tapestry Needle): Essential for weaving in ends, sewing parts together, and embroidering eyes.
- Stuffing: Polyester fiberfill (Poly-fil) or even small yarn scraps.
- Keychain Hardware: A split ring keychain or a swivel clasp.
- Stitch Marker (Recommended!): Very helpful when working in continuous rounds to mark the beginning of each round.
2. Basic Crochet Stitches & Techniques You’ll Use
This pattern uses fundamental amigurumi stitches and techniques:
- Magic Ring (MR): (Also Magic Circle/Adjustable Ring). Essential for a tight, hole-free start. (If new, watch a video tutorial!)
- Chain (ch): For starting and small elements.
- Slip Stitch (sl st): For joining and neatening.
- Single Crochet (sc): The primary stitch for amigurumi, creating a dense fabric.
- Increase (inc): Work 2 sc into the same stitch.
- Decrease (dec / sc2tog): Single Crochet 2 Together.
- Invisible Decrease (Recommended for Amigurumi): Insert hook into front loop only of first stitch, then into front loop only of second stitch, YO, pull through both front loops (2 loops on hook), YO, pull through both loops on hook.
- Working in Continuous Rounds: You don’t join with a sl st at the end of each round unless specified. Use a stitch marker to keep track of the first stitch of each round.
- Fasten Off: Securely ending your work.
- Weaving in Ends: Hiding tails for a neat finish.
Crochet Chicken Keychain Pattern
Let’s make this adorable chicken!
Abbreviations (US Crochet Terms):
- MC: Main Color
- Rnd: Round
- ch: chain
- sl st: slip stitch
- sc: single crochet
- inc: increase (2 sc in next st)
- dec: decrease (sc2tog)
- MR: magic ring
- st(s): stitch(es)
(...): work stitches into the same stitch/space[...]: repeat instructions in brackets
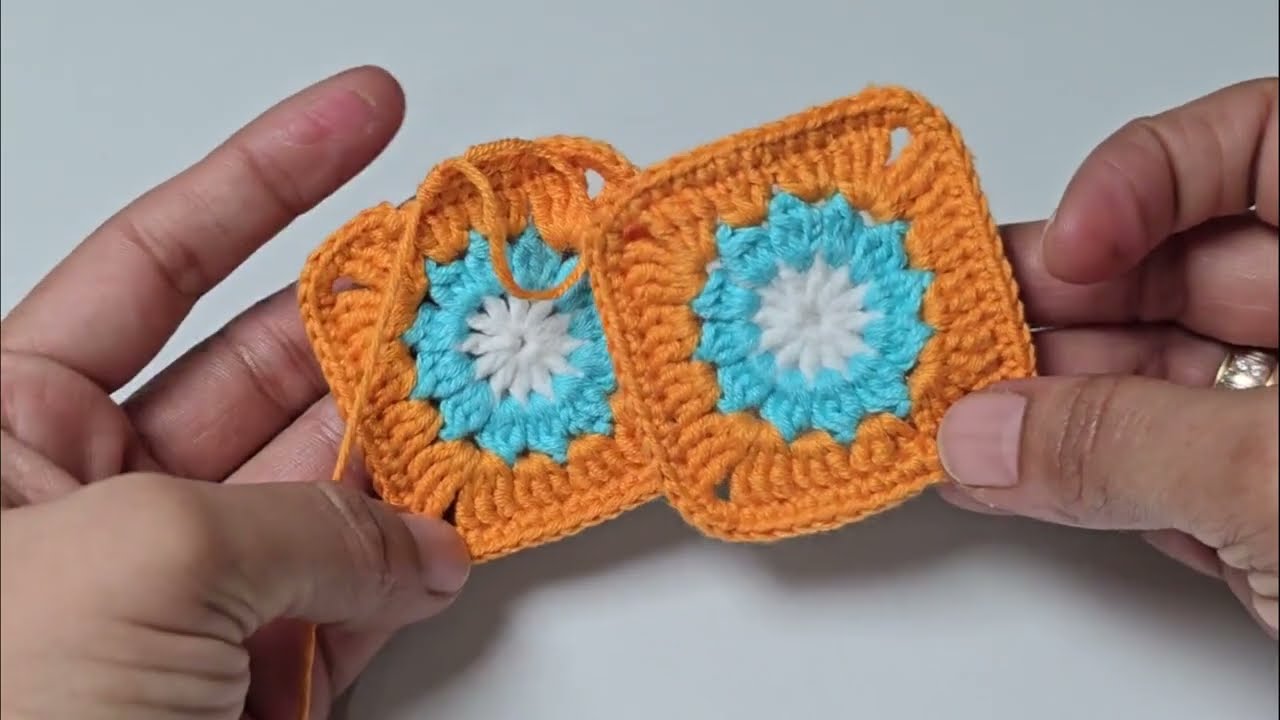
Part 1: Chicken Body (Main Color – e.g., White)
We’ll start from the top of the head and work down to the base. Work in continuous rounds.
- Rnd 1: Start with a MR. Work 6 sc into MR. (6 sts)
- Rnd 2: [Inc] 6 times. (12 sts)
- Rnd 3: [Sc 1, inc] 6 times. (18 sts)
- Rnd 4: [Sc 2, inc] 6 times. (24 sts)
- Rnd 5-9: Sc in each st around. (24 sts for 5 rounds)
- (At this point, you’ll have a small cup-like shape. If you want a slightly larger chicken, add another round or two of sc here.)
- Rnd 10: [Sc 2, dec] 6 times. (18 sts)
- Start Stuffing: Lightly stuff the head and top of the body, pushing it firmly but not overstuffing. Add more stuffing as you go.
- Rnd 11: [Sc 1, dec] 6 times. (12 sts)
- Rnd 12: [Dec] 6 times. (6 sts)
- Fasten off, leaving a long tail (about 6-8 inches / 15-20 cm).
- Close Hole: Thread the tail onto your yarn needle. Weave the needle through the front loop of each of the remaining 6 stitches. Pull tight to cinch the hole closed. Secure with a knot and weave in the tail. Your chicken body is complete!
Part 2: Comb (Red Yarn)
The spiky bit on top of the chicken’s head.
- Ch 5.
- Work sl st into the 2nd ch from hook.
- Work sc into the next ch.
- Work hdc into the next ch.
- Work dc into the last ch.
- Fasten off, leaving a long tail for sewing.
- (You’ll have a little spikey shape.)
Part 3: Wattle (Red Yarn)
The floppy bit under the chicken’s chin.
- Ch 3.
- Work dc into the 2nd ch from hook.
- Work sl st into the same ch (the 2nd ch from hook).
- Fasten off, leaving a long tail for sewing.
- (You’ll have a small, rounded flap.)
Part 4: Beak (Orange or Yellow Yarn)
- Ch 4.
- Work sl st into the 2nd ch from hook.
- Work sc into the next ch.
- Work sl st into the last ch.
- Fasten off, leaving a long tail for sewing.
- (This creates a small, pointed beak.)
Part 5: Wings (Main Color – Make 2)
Small rounded flaps for the sides of the body.
- Rnd 1: Start with a MR. Work 6 sc into MR. (6 sts)
- Rnd 2: [Inc] 6 times. (12 sts)
- Fasten off, leaving a long tail for sewing.
- (You’ll have two small, flat circles.)

3. Assembling Your Crochet Chicken Keychain
Now for the fun part – bringing your chicken to life!
- Sew Comb: Using the tail from the red comb and your yarn needle, position the comb on top of the chicken’s head (where Round 1 was). Sew it securely in place.
- Sew Wattle: Position the red wattle just under where the beak will go, on the front of the chicken’s head. Sew securely.
- Sew Beak: Position the orange/yellow beak over the wattle, slightly above it. Sew securely.
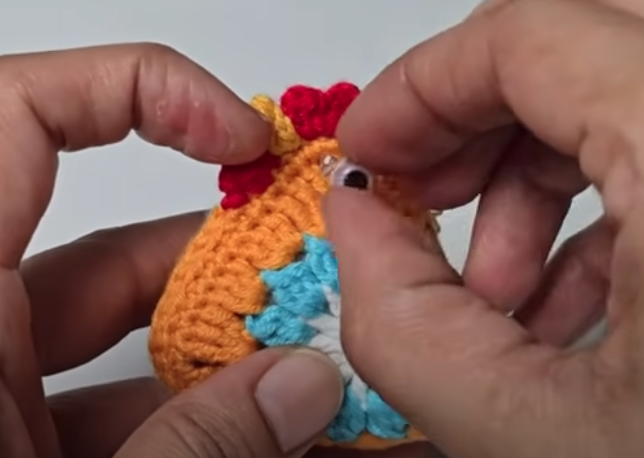
- Embroider Eyes:
- Thread a short piece of black yarn or embroidery floss onto your yarn needle.
- Make a small ‘V’ shape or a simple straight stitch on either side of the beak, where the eyes would be.
- Alternatively, for a quicker method, you can use safety eyes before closing up the body (if you prefer, but embroidery is safer for very small children).
- Sew Wings: Position a wing flat on each side of the chicken body, slightly towards the back. Sew securely around the edges of the wing circles.
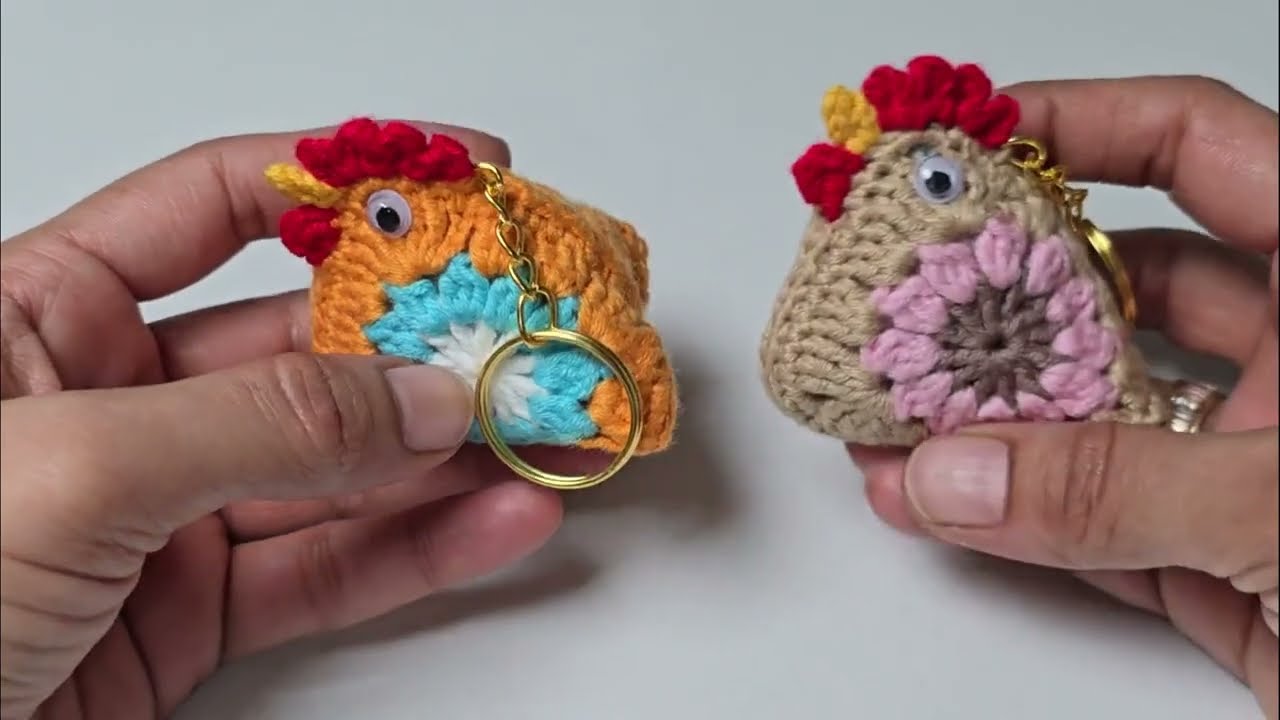
- Attach Keychain Hardware:
- Find the very top center of your chicken’s head.
- Using a strong stitch or by simply forcing the split ring through a few top stitches, attach your keychain hardware securely. You can also thread a separate piece of yarn through the top, knot it, and then attach the hardware to that loop.
- Weave in All Remaining Ends NEATLY: This is crucial for a polished, professional-looking keychain. Take your time to hide all tails securely within the chicken’s body using your yarn needle.
4. Tips for a Stylish & Durable Chicken Keychain
- Yarn & Hook: For amigurumi, always use a hook size that makes your fabric tight enough so the stuffing doesn’t show through.
- Stuffing: Stuff firmly but evenly. Overstuffing can distort the shape, while understuffing makes it squishy.
- Invisible Decrease: Learning the invisible decrease for sc (sc2tog) will make your decreases much neater and less noticeable, resulting in a smoother amigurumi surface.
- Embroidering: Practice your embroidery stitches on a scrap of fabric first if you’re new to it. Small, neat stitches make a big difference.
- Secure Attachments: Since it’s a keychain, it will get a lot of handling. Make sure all sewn-on parts (comb, wattle, beak, wings) and the keychain hardware itself are attached very securely.
- Variations:
- Stripes: Change colors every few rounds on the body for a striped chicken.
- Different Eyes: Use tiny beads (securely sewn for adults, avoid for kids), or French knots for different eye effects.
- Larger/Smaller: Adjust the starting ring size and number of increase/decrease rounds to make bigger or smaller chickens.
- Gift Idea: Package your chicken keychain with a little handmade tag!
You now have a detailed tutorial on how to crochet an adorable chicken keychain! Enjoy making these fun and expressive little creatures!