by
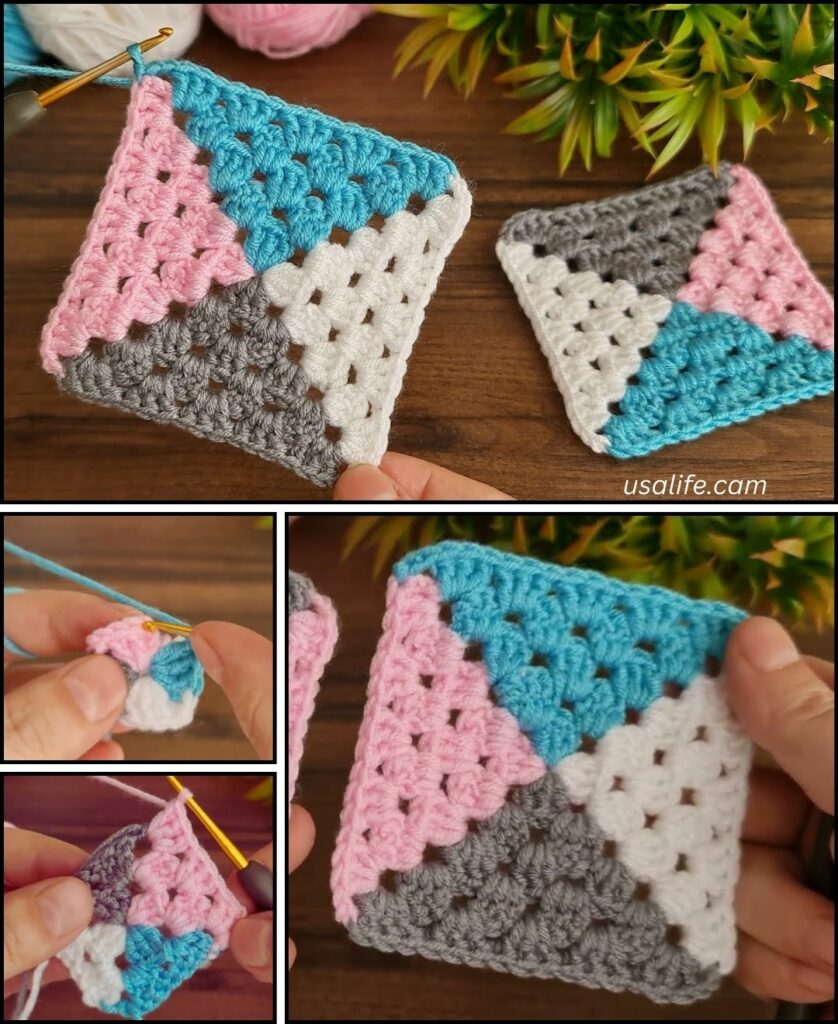
by How to Crochet a Classic Granny Square (4 Colors)
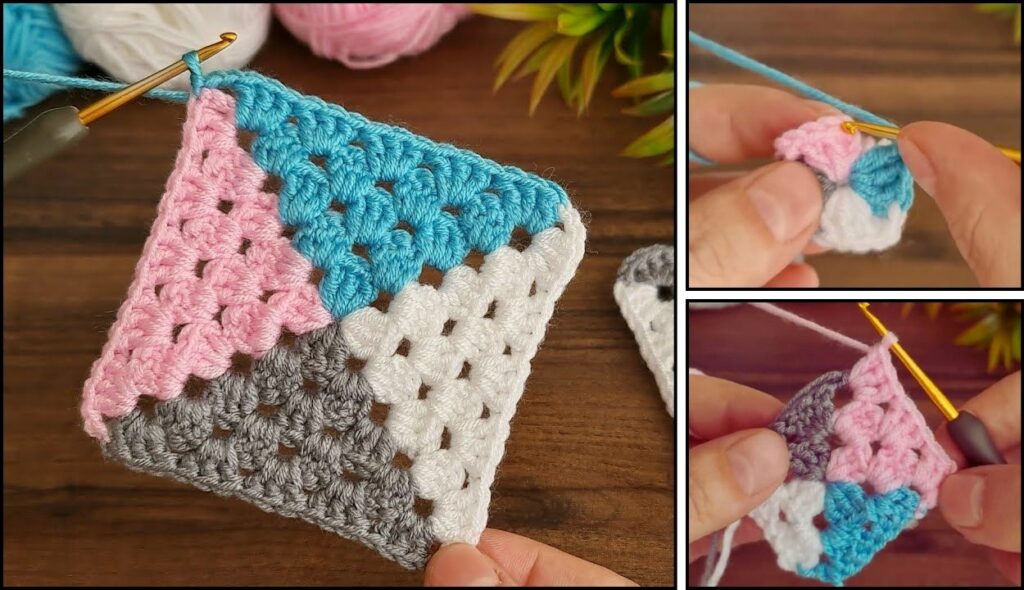
This tutorial will guide you through crocheting a classic 4-color granny square. The granny square is a fundamental crochet project and a great way to practice basic stitches and color changes.
Materials Needed:
- Four different colors of yarn: Medium-weight yarn is a good choice for beginners.
- A crochet hook: The size of the hook should match your yarn. Check the yarn label for the recommended hook size.
- Scissors: To cut the yarn.
- Tapestry needle: To weave in the ends.
Gauge:
- Gauge isn’t critical for this project unless you’re trying to match it to a specific pattern. Just try to maintain a consistent tension.
Abbreviations:
- ch: chain
- sl st: slip stitch
- dc: double crochet
- sp: space
- rnd: round
Pattern Instructions:
Start with Color 1
Rnd 1:
- Create a starting loop: You can use a magic ring or
ch 4andsl stto the first chain to form a ring. For this pattern, we’ll use thech 4method. ch 3(this counts as your firstdc).- Work
2 dcinto the ring. ch 2(this forms a corner).[3 dc, ch 2]three more times into the ring. You will have four groups of3 dcand fourch-2spaces.sl stto the top of the beginningch 3to join the round.- Cut the yarn and tie off.
Join Color 2
Rnd 2:
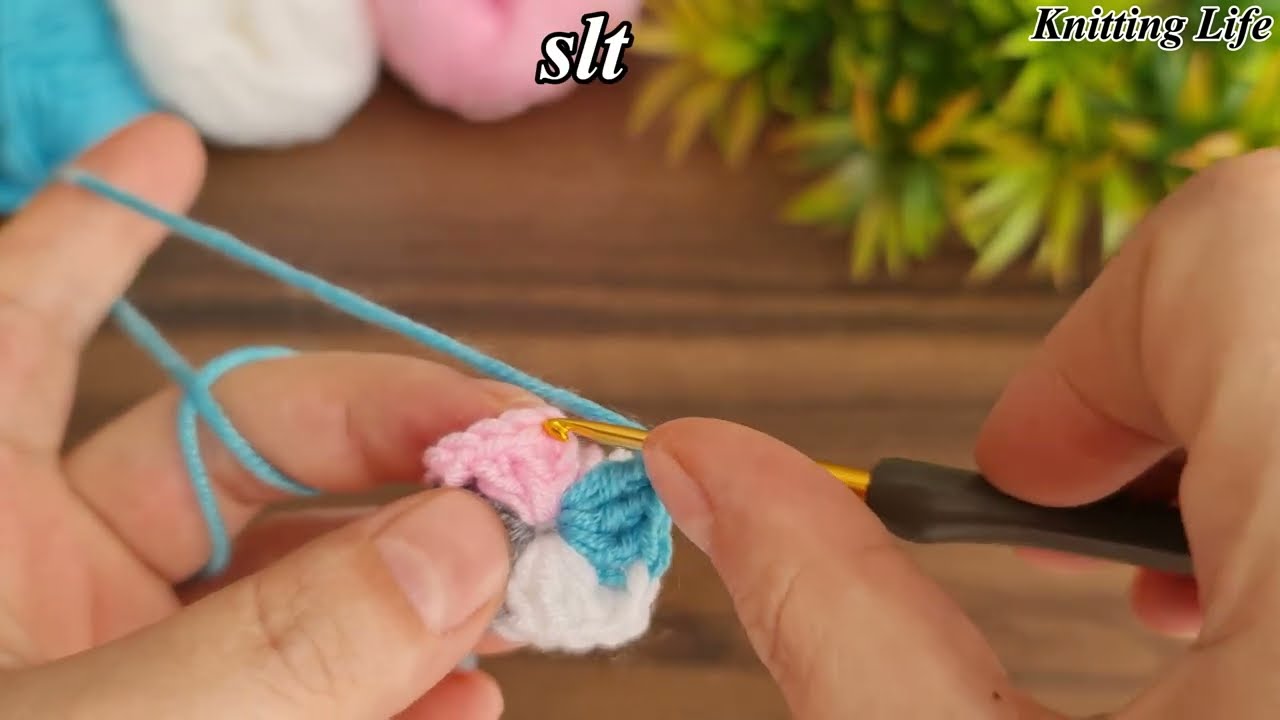
- Join your new color in any of the
ch-2corner spaces. You can do this by tying a knot or by simply looping the yarn onto your hook and pulling it through the space. ch 3(counts as your firstdc).- Work
2 dcinto the same corner space. ch 2(forms the new corner).- Work
3 dcinto the same corner space. You have now created your first corner(3 dc, ch 2, 3 dc). ch 1(this is the side chain between corners).- Move to the next corner space and work
(3 dc, ch 2, 3 dc)into it. ch 1.- Repeat steps 7 and 8 two more times.
sl stto the top of the beginningch 3to join the round.- Cut the yarn and tie off.
Join Color 3
Rnd 3:
- Join your new color in any
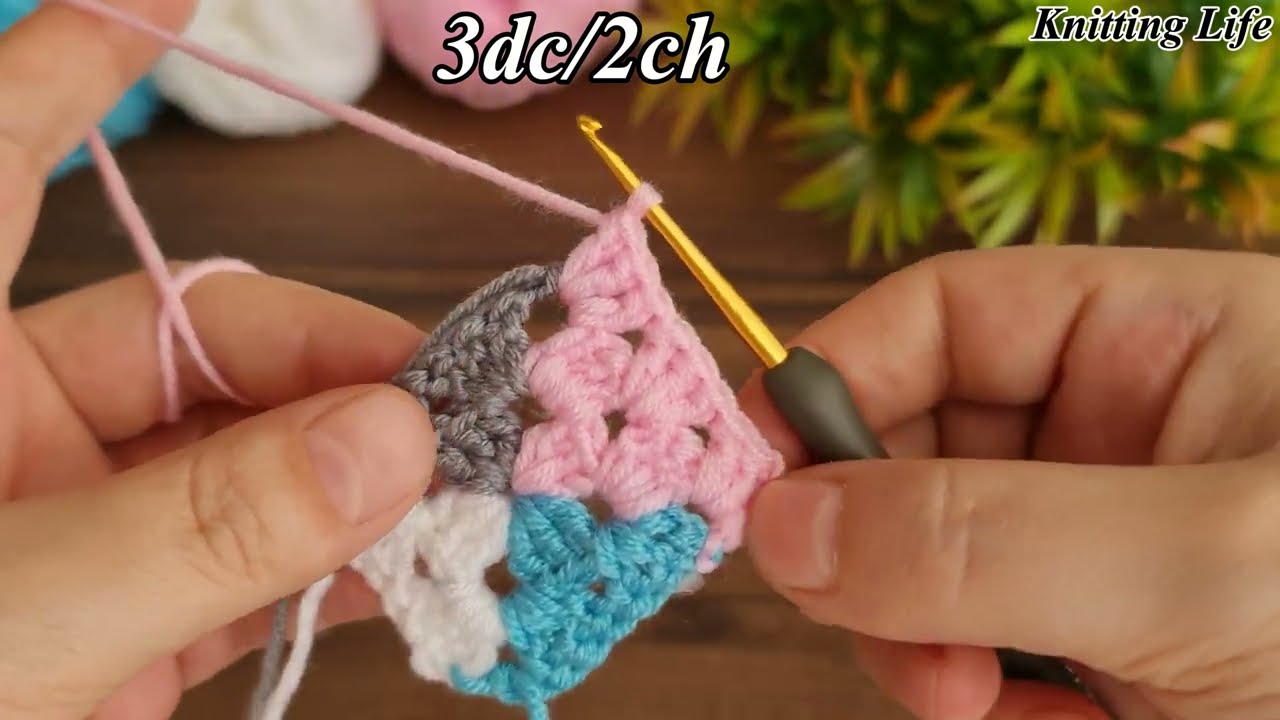
ch-2corner space. ch 3(counts asdc).- Work
2 dcinto the same corner space. ch 2.- Work
3 dcinto the same corner space. ch 1.- Now you’ll work into the side space. Work
3 dcinto thech-1space from the previous round. ch 1.- Move to the next corner space and work
(3 dc, ch 2, 3 dc). ch 1.- Repeat steps 7-10 two more times.
sl stto the top of the beginningch 3to join.- Cut the yarn and tie off.
Join Color 4
Rnd 4:
- Join your new color in any
ch-2corner space. ch 3(counts asdc).- Work
2 dcinto the same corner space. ch 2.- Work
3 dcinto the same corner space. ch 1.- Work
3 dcinto the nextch-1side space. ch 1.- Work
3 dcinto the nextch-1side space. ch 1.- Move to the next corner space and work
(3 dc, ch 2, 3 dc). ch 1.- Repeat steps 7-12 two more times.
sl stto the top of the beginningch 3to join.- Cut the yarn and tie off.
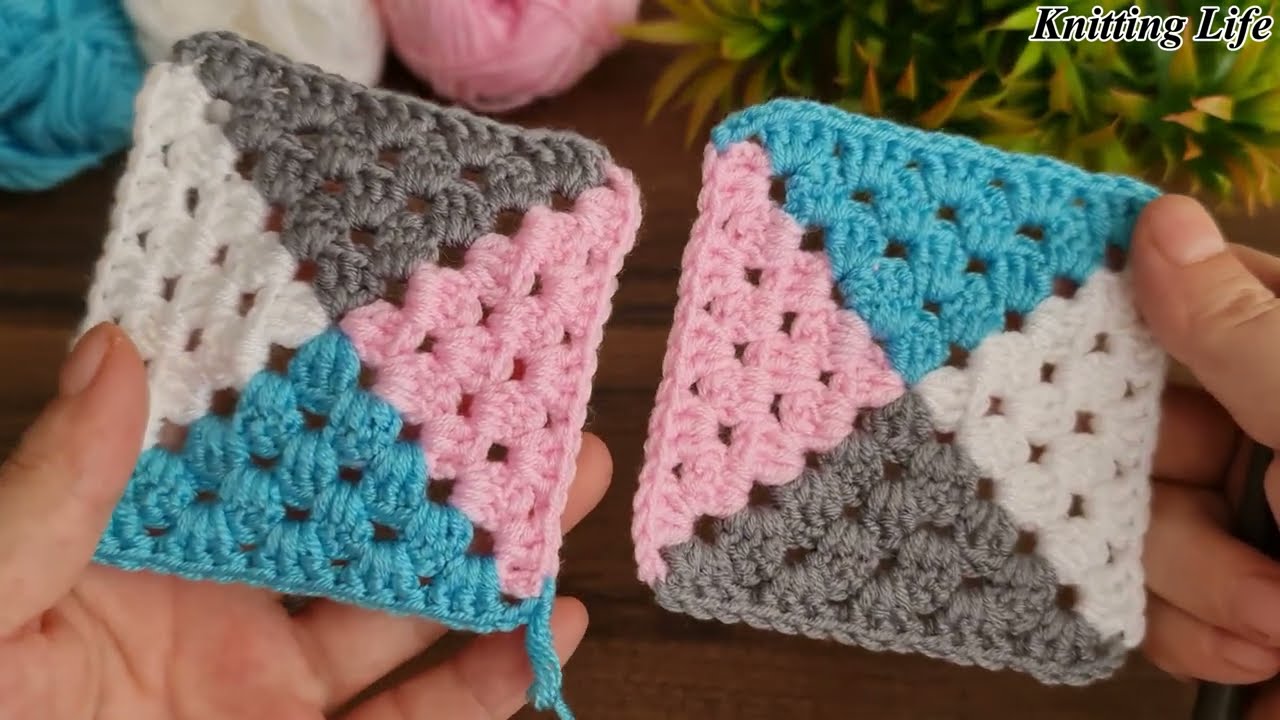
Finishing Touches:
- Carefully weave in all of your loose ends with a tapestry needle. This will make your finished project neat and prevent it from unraveling.
- Gently block your granny square to make it lay flat and to define its shape. This is an optional but recommended step, especially if you plan to join multiple squares together.
Pro-Tips for Success:
- Consistent Tension: Try to maintain an even tension on your yarn throughout the project. This will help keep your stitches uniform and the square from becoming lopsided.
- Practice Color Changes: The join for each new color can be a little tricky at first. Practice a few different methods to see which one gives you the neatest finish.
- Don’t Forget the
ch 1: Thech 1between the3 dcclusters on the sides is crucial for keeping the square flat and expanding it correctly. - Count Your Stitches: Especially in the beginning, it’s a good idea to count your
3 dcclusters andch-1spaces to make sure you’re not missing any.
Enjoy your beautiful, multi-colored granny square! This pattern is the foundation for countless projects, from blankets and bags to scarves and sweaters.