 by
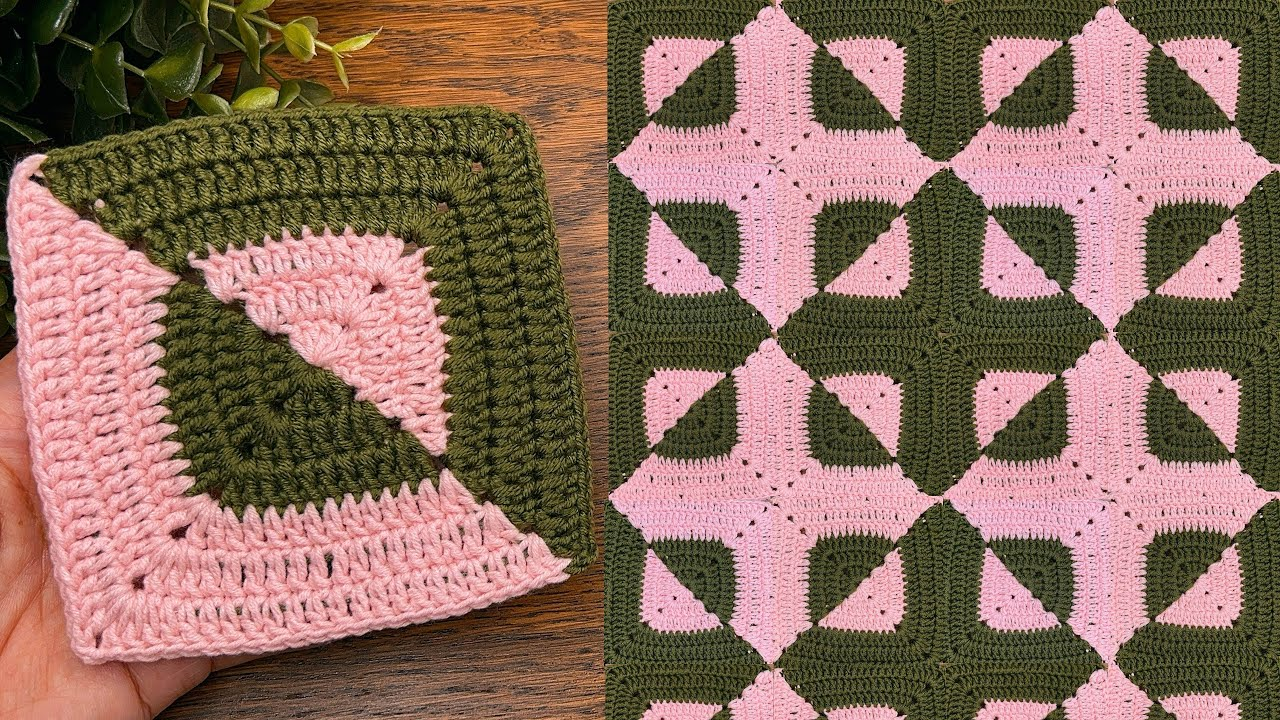
by The most rewarding project for a beginner is the “One-Big-Square” Blanket. Unlike traditional blankets that require you to sew dozens of small squares together (which can be frustrating), this pattern starts in the center and grows outward. You simply keep going until the blanket is the size you want!
Here is your detailed, step-by-step guide to the easiest crochet blanket you’ll ever make.

🧶 The Beginner’s Blanket Kit
For your first blanket, I recommend Worsted Weight (Size 4) yarn. It is thick enough to work up quickly but light enough to be comfortable.
| Material | Recommendation | Why? |
| Yarn | 3-5 skeins of “Self-Striping” yarn | Changes colors for you so you don’t have to join new yarn. |
| Hook | 5.5 mm (I/9) or 6.0 mm (J/10) | Larger hooks make it easier to see your stitches. |
| Notions | Scissors & Tapestry Needle | To cut and hide your yarn tails at the end. |
🛠 Basic Stitches You’ll Use
If you can do these three things, you can make this blanket:
- Chain (ch): Yarn over and pull through the loop.
- Double Crochet (dc): Yarn over, insert hook, pull up a loop, yarn over, pull through 2, yarn over, pull through 2.
- Slip Stitch (sl st): Insert hook, yarn over, and pull through everything on the hook.
🟩 Step-by-Step Pattern: The Continuous Square
Round 1: The Heart of the Blanket
- Start: Make a Magic Ring (or chain 4 and join with a slip stitch to the first chain to make a tiny circle).
- First Cluster: Chain 3 (this counts as your first dc). Work 2 dc into the ring. (Total of 3 stitches).
- Corner: Chain 2.
- Repeat: Work [3 dc into the ring, ch 2] three more times.
- Close: Pull your tail to tighten the ring. Slip stitch into the top of the very first “Chain 3.”Note: You should now have a tiny square with 4 clusters and 4 corner holes.

Round 2: The First Expansion
- Move to Corner: Slip stitch into the next 2 stitches and then slip stitch into the corner hole. (This puts your hook in the right spot).
- Corner: Chain 3. In the same corner hole, work (2 dc, ch 2, 3 dc).
- Transition: Chain 1.
- Next Corners: In each of the remaining 3 corner holes, work (3 dc, ch 2, 3 dc) followed by a ch 1.
- Close: Slip stitch to the top of the starting “Chain 3.”
Round 3: Building the Sides
- Move to Corner: Slip stitch over to the first corner hole.
- Corner: Chain 3. Work (2 dc, ch 2, 3 dc) in the corner.
- Side: Chain 1. Look at the space on the side between corners. Work 3 dc into that space.
- Repeat: Chain 1. Work a Corner (3 dc, ch 2, 3 dc) in the next corner hole. Repeat this all the way around.
- Close: Slip stitch to the top of the starting “Chain 3.”
🚀 The “Keep Going” Phase
The best part about this pattern is that Round 4 and all rounds after follow the same simple logic:
- In every Corner hole: Work (3 dc, ch 2, 3 dc).
- In every Side hole: Work 3 dc.
- Between every group: Always Chain 1.
Keep repeating this round after round. Your square will get bigger and bigger. You can stop when it’s a baby blanket size, or keep going until it covers a King-sized bed!

💡 3 Secrets for a “Magnificent” Blanket
- The Tension Check: If your blanket starts to look “wavy” or “ruffled,” you are likely adding too many stitches in the side holes. If it starts to “cup” like a bowl, your stitches are too tight—try using a larger hook.
- The Yarn Tail: When you start a new ball of yarn, leave a long tail (about 6 inches). Use your tapestry needle to weave this tail in and out of the stitches on the back. This ensures the blanket won’t fall apart in the wash!
- The Color Secret: If you don’t want to use self-striping yarn, try changing colors every 2 rounds. It makes the blanket look much more expensive and stylish.
🏁 Finishing Your Blanket
Once the blanket is the size you want:
- Finish your last round and join with a slip stitch.
- Cut the yarn, leaving a tail.
- Pull the tail through the last loop and tug it tight.
- Weave in that final tail with your needle.

Would you like me to suggest a few color combinations that would look great for a modern living room throw blanket?
Video tutorial: