 by
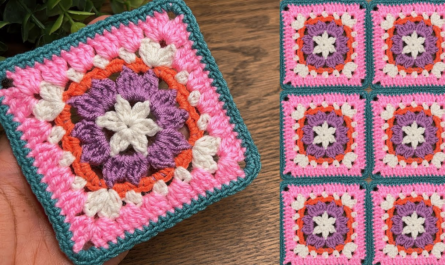
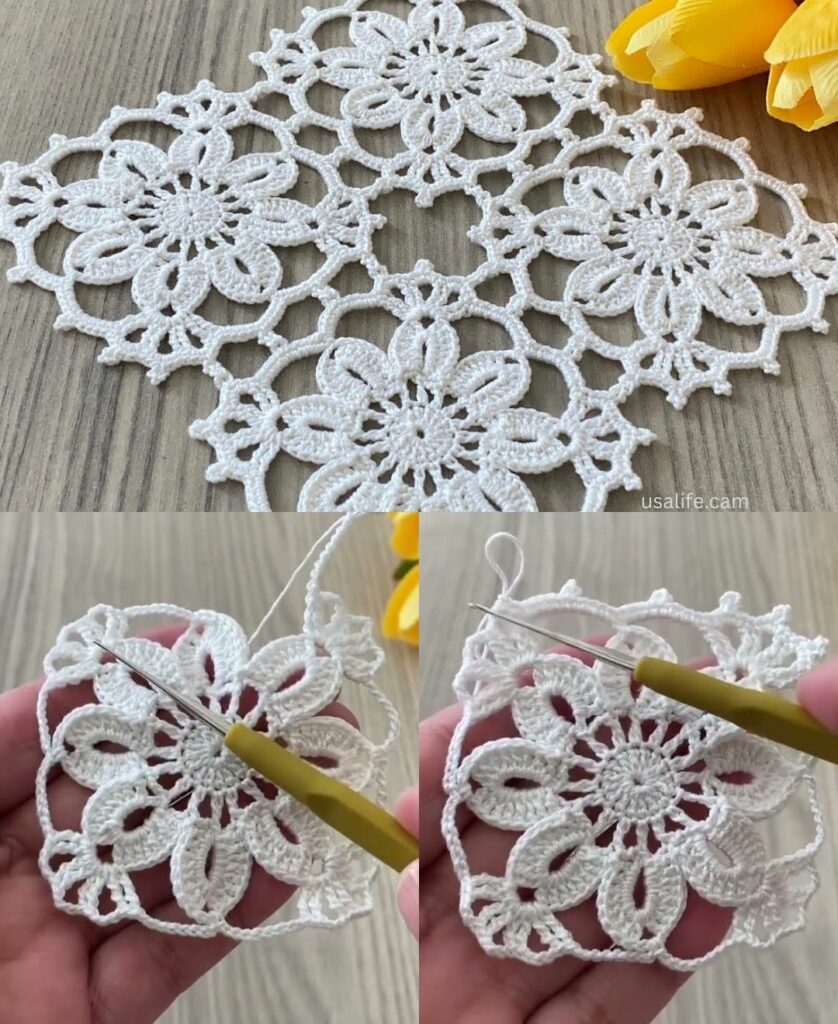
by The Modern Mesh Square is one of the most versatile motifs in crochet. It uses a “circle-to-square” technique that creates a sophisticated geometric look. This specific motif is perfect because it isn’t as “holy” as a traditional granny square, making it ideal for both high-end home decor and wearable garments.

🧶 Motif Preparation Guide
Before you start, choose your yarn based on your intended project. The “Step-by-Step” logic remains the same regardless of the yarn weight.
| Project Type | Recommended Yarn | Hook Size |
| Elegant Table Runner | Mercerized Cotton (Size 10 or 3) | 2.5mm – 3.0mm |
| Summer Blouse | Bamboo or Linen blend (DK) | 3.5mm – 4.0mm |
| Decorative Blanket | Soft Acrylic or Wool (Worsted) | 5.0mm – 5.5mm |
🛠 Step-by-Step Instructions (US Terms)
Round 1: The Solid Center
This creates a stable “hub” for the motif.
- Start: Make a Magic Ring (or ch 4, sl st to first ch to form a ring).
- Stitches: ch 3 (counts as dc), work 11 dc into the ring.
- Join: sl st to the top of the ch 3.

Check: You should have a flat circle with 12 dc total.
Round 2: Doubling the Count
- ch 3 (counts as dc). Work 1 dc in the same stitch.
- Increase: Work 2 dc in every stitch around.
- Join: sl st to the top of the ch 3.
Check: Your circle now has 24 dc.
Round 3: Squaring the Shape
This is the “Magic Round.” We use Treble Crochets to create the corners and shorter stitches for the sides.
- First Corner: ch 4 (counts as tr). In the same stitch, work (2 tr, ch 3, 3 tr).
- First Side: ch 1, skip 2 stitches. In the next stitch, work 3 dc. ch 1, skip 2 stitches.
- Second Corner: In the next stitch, work (3 tr, ch 3, 3 tr).
- Repeat: Continue the [Corner, Side] sequence two more times.
- Join: sl st to the top of the ch 4.
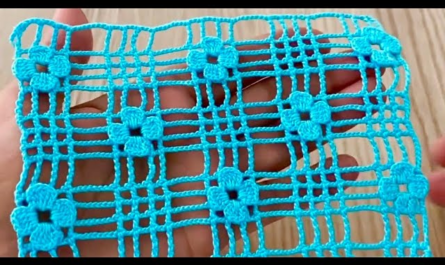
Round 4: The Mesh Expansion
- sl st across the tr stitches into the ch-3 corner space.
- Corner: ch 3 (counts as dc), (2 dc, ch 2, 3 dc) in the same space.
- Side Mesh: * ch 1, skip to the next ch-1 space. Work 3 dc.
- ch 1, skip to the next ch-1 space. Work 3 dc.
- Repeat: Work a Corner (3 dc, ch 2, 3 dc) in every corner and two 3-dc clusters on every side.
- Join: sl st to the top of the ch 3.

Round 5: The Finishing Edge
- sc in every dc stitch and every ch-1 space around.
- In Corners: Work (sc, ch 2, sc).
- Finish: Fasten off and weave in your ends.
🎨 How to Use Your Motifs
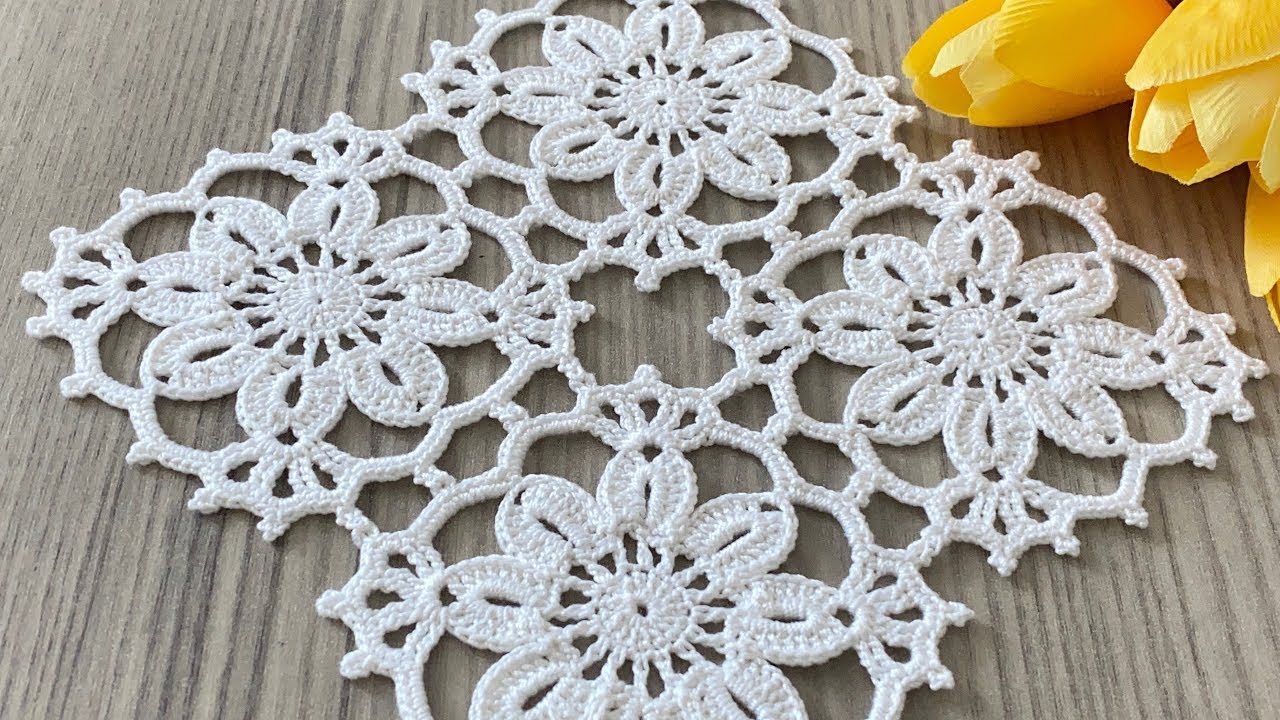
1. The Magnificent Table Runner
Join 10 to 12 squares in a single row. Because the center is solid, it provides a beautiful weight to the runner, while the mesh edges allow the table surface to peek through elegantly.
2. The Stylish Motif Blouse
Create two large panels (e.g., a 4 x 4 grid for each side). Use a “Join-As-You-Go” method (joining at the ch-spaces during Round 5) to ensure the seams are flexible. This allows the blouse to move with your body rather than being rigid.

💡 Pro-Tip: The “Blocking” Secret
Motifs often look a bit “ruffled” when they first come off the hook. To make them look professional:
- Soak the finished squares in lukewarm water with a drop of wool wash.
- Gently squeeze (don’t wring!) out the excess water.
- Pin them to a foam board in a perfect 10cm x 10cm square (or whatever your size is).
- Let them dry completely. This “sets” the stitches and makes joining much easier.
Would you like me to create a visual placement guide showing how to arrange these squares to form a flattering V-neck blouse?
Video tutorial: