by
by 
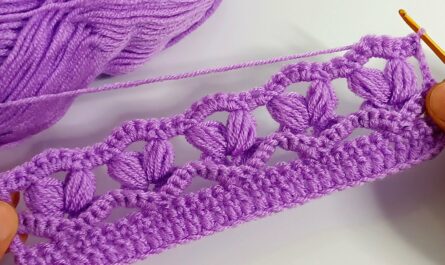
Adding a delicate lace edge to your crocheted cover can elevate it from simple to stunning. This tutorial will guide you through the process, step-by-step, regardless of your experience level.
Materials:
- Crochet hook (size appropriate for your cover yarn)
- Yarn suitable for your cover (cotton, acrylic, or blend)
- Scissors
- Tapestry needle (optional, for weaving in ends)
Choosing the right pattern:
There are countless cover lace edge patterns available online and in books. Consider the following factors when selecting one:
- Skill level: Choose a pattern that matches your comfort level. Beginners might start with simpler patterns with fewer stitches and repeats.
- Style: Do you prefer a classic, elegant look, or something more playful and modern?
- Matching the cover: Choose a pattern that complements the stitchwork and overall design of your cover.
Basic techniques you’ll need:
- Chain stitch (ch): The foundation stitch for most crochet projects.
- Single crochet (sc): The basic building block of many crochet projects.
- Double crochet (dc): Creates taller stitches than sc, adding texture and definition.
- Slip stitch (sl st): Used to join stitches or securely fasten the end of your work.
Tutorial:
- Prepare your cover: Finish the main body of your cover and leave a live edge (a row of unworked stitches) where you want to add the lace.
- Follow your chosen pattern: Most patterns will start with a foundation chain or row of stitches along the live edge. They will then detail each row of the lace pattern, specifying the number and type of stitches and any special techniques used.
- Work each row carefully: Pay close attention to the stitch count and instructions. Use stitch markers to keep track of your progress if needed.
- Turning corners: Most lace patterns involve turning corners to create the delicate design. The pattern will likely specify how to turn neatly, often using slip stitches or special turning techniques.
- Joining rounds: If your pattern is worked in the round, join each round with a slip stitch to the top of the previous round.
- Finishing touches: Once you’ve completed the desired length of lace, fasten off securely by weaving in the ends with your tapestry needle. You can also add additional embellishments like picots or beads for a personalized touch.
Video tutorial
Tips for success:
- Use a consistent tension: This will ensure your lace edge looks even and professional.
- Read ahead: Don’t just follow the current row; understand what’s coming next to anticipate any changes or special techniques.
- Don’t be afraid to experiment: If you’re comfortable, try substituting stitches or adding your own creative flair.
- Practice makes perfect: Don’t get discouraged if your first attempt isn’t flawless. Keep practicing, and you’ll be crocheting beautiful lace edges in no time!
Additional resources:
- Websites with free lace edge patterns:
- YouTube tutorials for visual learners:
Remember, the most important thing is to have fun and enjoy the process of creating something beautiful with your own hands!tunesharemore_vert