 by
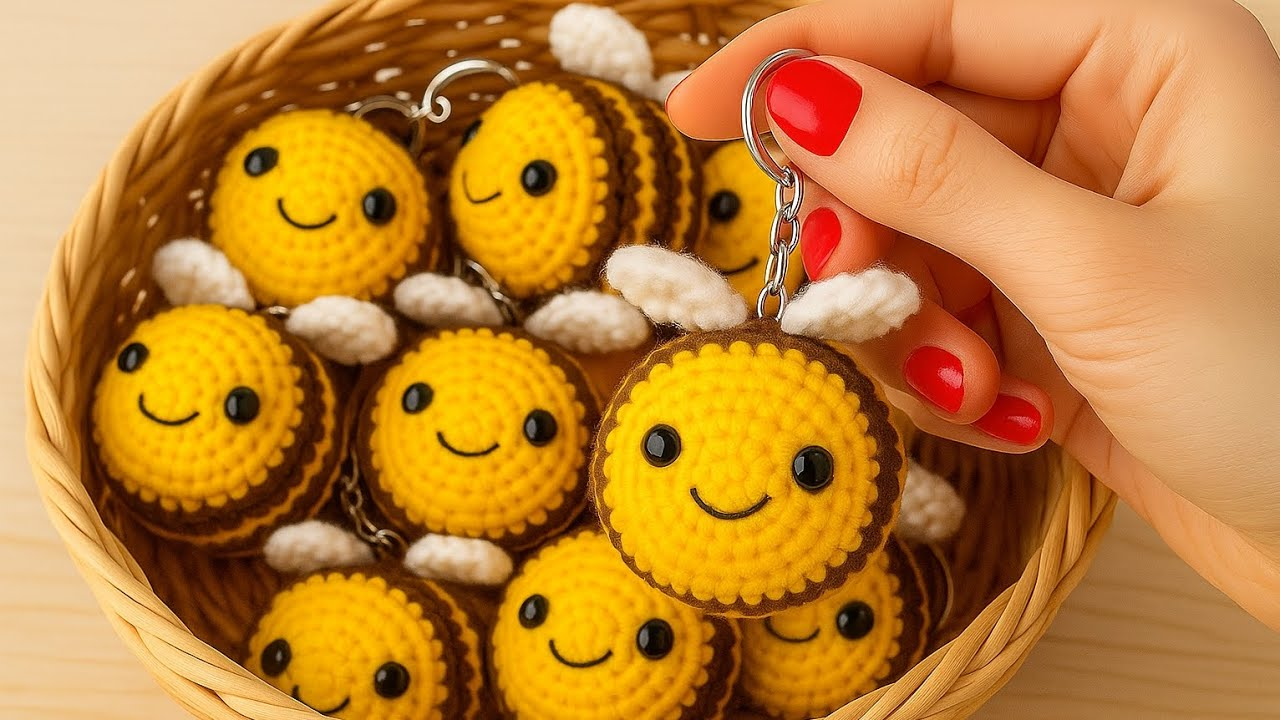
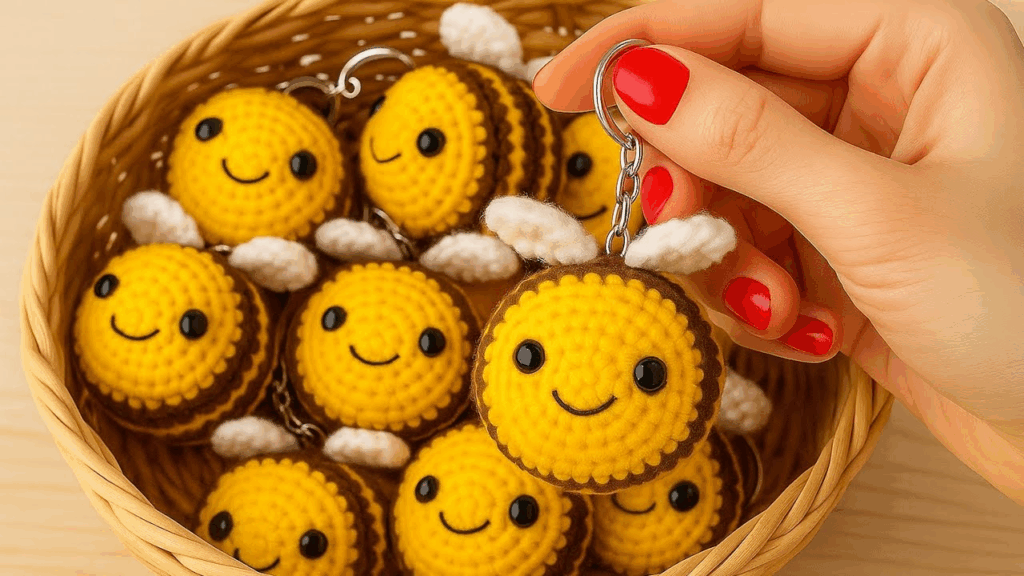
by Crocheting the viral bee keychain is a fun, quick project that’s perfect for beginners! It’s a great introduction to Amigurumi, using simple shaping with single crochet (sc) and color changes to create the iconic stripes. The finished bee is small, puffy, and instantly recognizable.
Here is a detailed, step-by-step guide to crocheting your own bee keychain.
Materials Needed
- Yarn: Medium-weight yarn (worsted/size 4). You’ll need small amounts of three colors:
- Color A (Body): Yellow
- Color B (Stripe): Black or Dark Brown
- Color C (Wings): White or Light Blue
- Crochet Hook: The size recommended for your yarn. Use a hook one size smaller than recommended to ensure a tight fabric, which prevents stuffing from showing through.
- Stuffing: Polyester fiberfill.
- Safety Eyes (optional): Small plastic eyes (about 6mm).
- Keychain Hardware: A key ring or clip.
- Scissors
- Tapestry Needle: For weaving in ends and sewing on the wings.
- Stitch Marker: Essential for marking the start of each round, as we work in a spiral.

Part 1: The Bee Body (Continuous Rounds)
The body is worked in continuous rounds using the single crochet (sc) stitch. You will carry the yarn for Color A and Color B inside the body while switching between them.
| Round | Stitch Pattern | Stitches (Sts) | Color |
| 1 | Start with a magic ring. Work 6 sc into the ring. | (6) | Yellow (A) |
| 2 | inc (increase: 2 sc in one st) in each st around. | (12) | Yellow (A) |
| 3 | [sc in the next st, inc] 6 times. | (18) | Yellow (A) |
| 4 | sc in each st around. | (18) | Black (B) |
| 5 | sc in each st around. | (18) | Yellow (A) |
| 6 | sc in each st around. | (18) | Black (B) |
| 7 | sc in each st around. | (18) | Yellow (A) |
| 8 | [sc in the next st, dec (decrease)] 6 times. | (12) | Yellow (A) |
Color Change Tip
To switch colors cleanly, work the last stitch of the round until you have two loops left on the hook. Drop the current color, pick up the new color, and pull it through the remaining two loops to finish the stitch.

Stuffing and Closing
- Insert Eyes (Optional): If using safety eyes, insert them between the 4th and 5th yellow stripes (Rounds 2 and 3), about 4-5 stitches apart.
- Stuff Firmly: Stuff the bee body with fiberfill. Continue to stuff as you close the final round.
- Round 9 (Closing): dec 6 times. (6 sts)
- Fasten off, leaving a long tail. Thread the tail onto your tapestry needle, weave through the remaining 6 stitches, and pull tight to close the hole. Weave the end securely into the body.
Part 2: The Wings (White/Light Blue – Color C)
The wings are crocheted flat and do not require stuffing. Make two.
- Ch 5.
- sl st in the 2nd ch from the hook.
- hdc in the next ch.
- dc in the next ch.
- Work 3 dc into the last ch.
- Pivot: Continue working up the other side of the starting chain. dc in the next available loop.
- hdc in the next available loop.
- sl st into the next available loop.
- Finish: sl st into the base of the wing to secure the shape.
- Fasten off, leaving a long tail for sewing.

Part 3: Assembly and Finishing
- Sew on Wings: Using the long tail and your tapestry needle, sew both wings securely to the top of the bee’s back, centering them on the second black stripe (Round 6). Overlap them slightly in the middle for a better look.
- Add Face Details (If no Safety Eyes): Use black yarn and your tapestry needle to embroider two simple vertical lines for eyes on the yellow section of the head.
- Attach Keychain Loop:
- Join the yellow yarn to the top center of the bee’s head.
- ch 12 (or the desired length of your loop).
- sl st back into the same stitch where you started the chain.
- Fasten off and weave in the end.
- Attach Hardware: Thread the key ring or clip through the loop you just created.
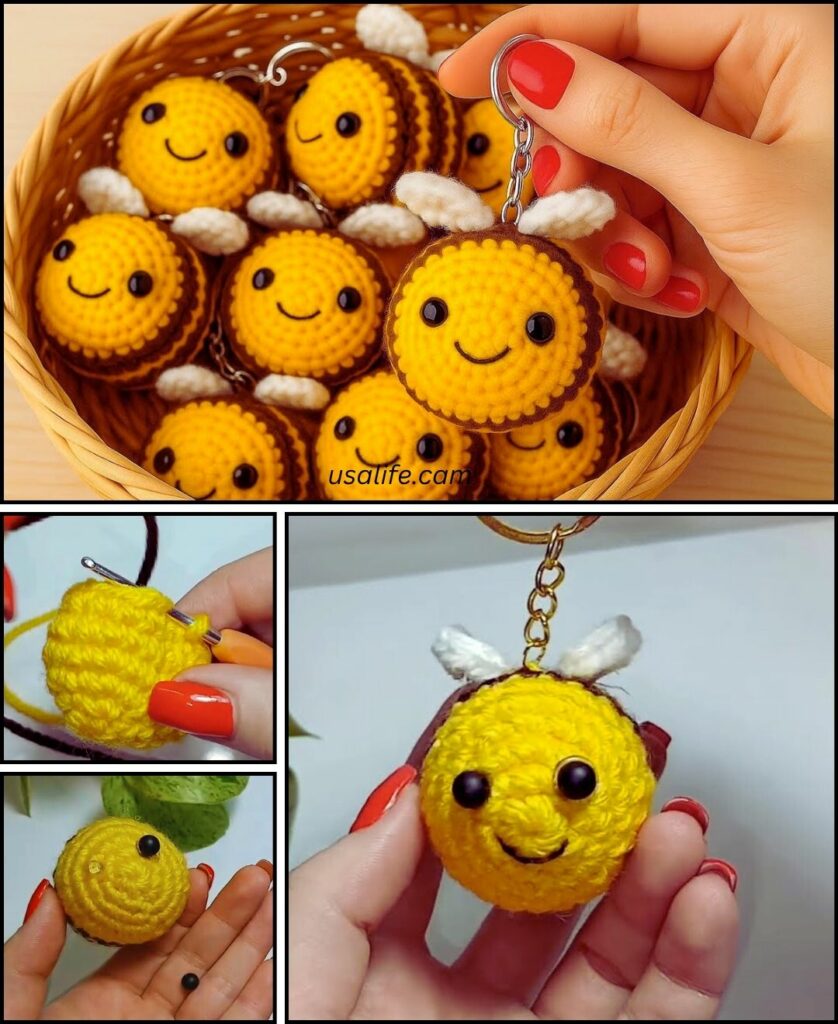
Your viral bee keychain is complete! It makes a fantastic zipper pull or a quick, thoughtful gift.
Video tutorial: