 by
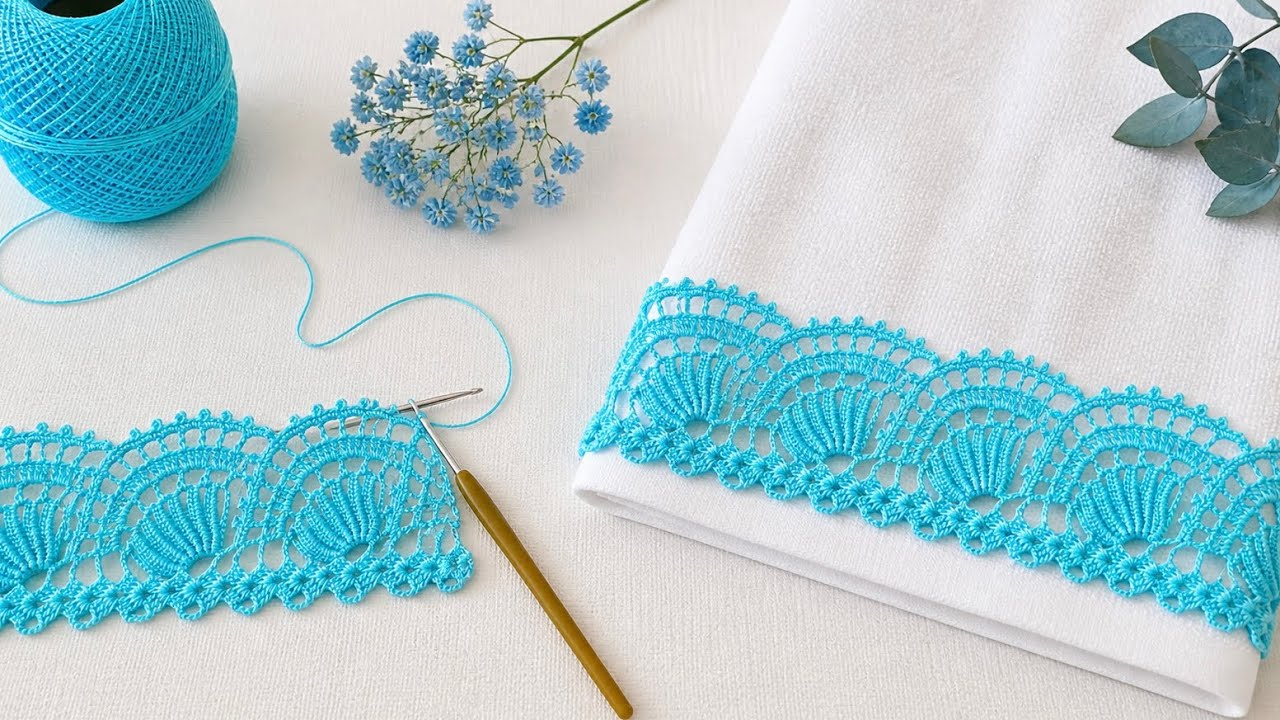
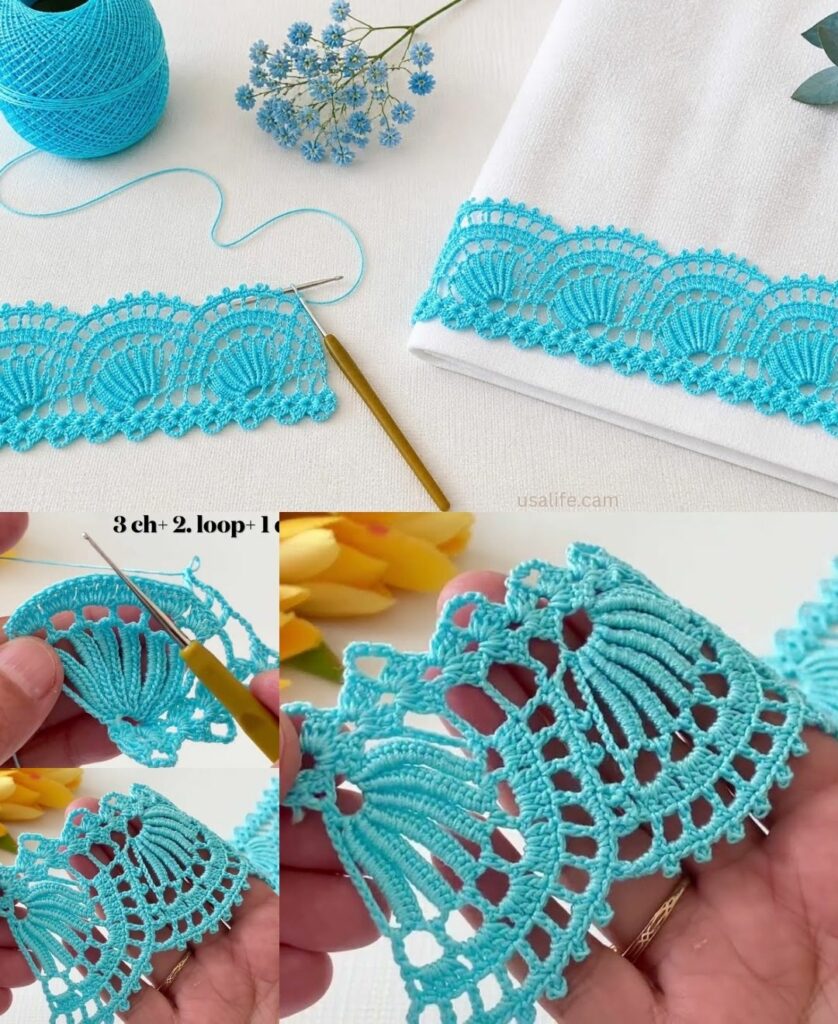
by To create an Extraordinary Crochet Edging Lace, we must move beyond the standard “scallop” and into architectural lace. This pattern, which I call the “Imperial Crown Lace,” uses layered heights and picots to create a dramatic, vintage-inspired finish.
This edging is perfect for elevating a simple baby blanket, finishing the hem of a bridal shawl, or adding a luxury touch to a table runner.

I. Preparation & Technical Specs
The “Golden Ratio” of Edging
The secret to extraordinary lace is the Foundation Row. If your base row is too tight, the lace will curl; if it’s too loose, it will ruffle.
- Stitch Multiple: 8 + 1 (This means your base project should have a total stitch count that is a multiple of 8, plus 1 extra stitch).
- Yarn: For high-definition lace, use Mercerized Cotton (Size 10 thread for delicate work, or Sport Weight for blankets).
- Hook: Use a hook $0.5\text{mm}$ smaller than you usually would. This keeps the picots sharp and the “arches” crisp.
II. The Imperial Crown Lace Pattern
Row 1: The Anchor Row (Setting the Grid)
This row prepares the project for the lace.
- Join yarn to the edge of your project with a sl st.
- Ch 1. sc in each stitch across.
- Ensure your count matches the multiple of 8 + 1.

Row 2: The Foundation Arches
- Ch 1, sc in the first stitch.
- Ch 5, skip 3 stitches, sc in the next stitch.
- Repeat from * to * across.
- Turn. (You should have a series of loops).
Row 3: The Sculptural Base
- sl st into the first ch-5 loop.
- Ch 3 (counts as 1st dc). Work 4 dc in the same loop.
- Ch 2.
- sc in the next ch-5 loop.
- Ch 2.
- Work 9 dc in the next ch-5 loop (This is the base of your “Crown”), ch 2, sc in the next ch-5 loop, ch 2.
- Repeat from * to * across.
- End with 5 dc in the final loop. Turn.

Row 4: The Extraordinary Peak (The Masterpiece Row)
This is where we use Picots to create the “jewels” of the lace.
- Ch 1, sc in the first dc.
- Ch 3, sc in the next dc (Repeat this 3 times to create a small textured ridge over the first half-shell).
- Skip the ch-2 and sc spaces.
- Now, working into the 9 dc cluster:
- dc in the 1st st, Picot (Ch 3, sl st in the 1st ch).
- dc in the 2nd st, Picot.
- Repeat until you have worked 9 dc and 9 picots.
- Skip the ch-2 spaces and move straight to the next cluster.
- Repeat across the entire edge.
- Fasten off.
III. How to Style the Edging for Different Projects
| Project | Suggested Yarn | Styling Detail |
| Baby Blanket | Soft Bamboo/Cotton | Use a contrasting color (e.g., White lace on a Blue blanket) to make the picots pop. |
| Table Runner | Size 10 Cotton Thread | Starch the lace after finishing so the “Crowns” stand perfectly stiff on the table. |
| Shawl | Silk or Mohair | Work the Picots with Ch 5 instead of Ch 3 to create a longer, “dripping” lace effect. |
IV. The “Extraordinary” Finishing Details
1. The Double-Picot Secret
If you want the center of each lace “Crown” to look even more extraordinary, make the 5th picot (the very top one) a Large Picot (Ch 5 instead of Ch 3). This creates a central point that mimics a diamond in a crown.
2. Wet Blocking (Non-Negotiable)
Lace looks like “scrunchies” until it is blocked.
- Pin each “Crown” and each Picot individually to a blocking board.
- Pull them slightly tight to open up the holes in the lace.
- Spray with a mixture of water and a tiny bit of liquid starch.
- Result: Once dry, the lace will look like intricate wrought iron or fine jewelry.
3. The Corner Turn
If you are going around a corner (like a blanket), you must work three sets of clusters into the single corner stitch. This provides the “swing” needed to keep the corner from curling upward.
This lace takes a bit more time than a simple border, but the visual impact is significant. Are you planning to work this in a single color, or would you like to know how to weave a ribbon through Row 2 for a Victorian look?