by
by Creating a project that serves dual purposes—a table runner and a blouse—is a brilliant way to showcase the modular power of crochet. To make this work, you need a “Transitional Square”: a motif that is sturdy enough to sit on a table but has a light enough drape to wear.
Here is your detailed, step-by-step masterclass on creating this versatile piece.
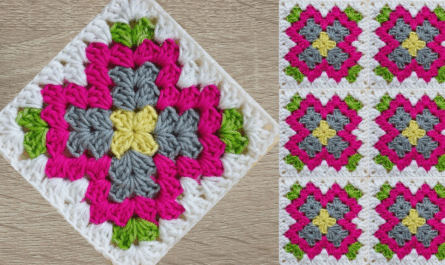
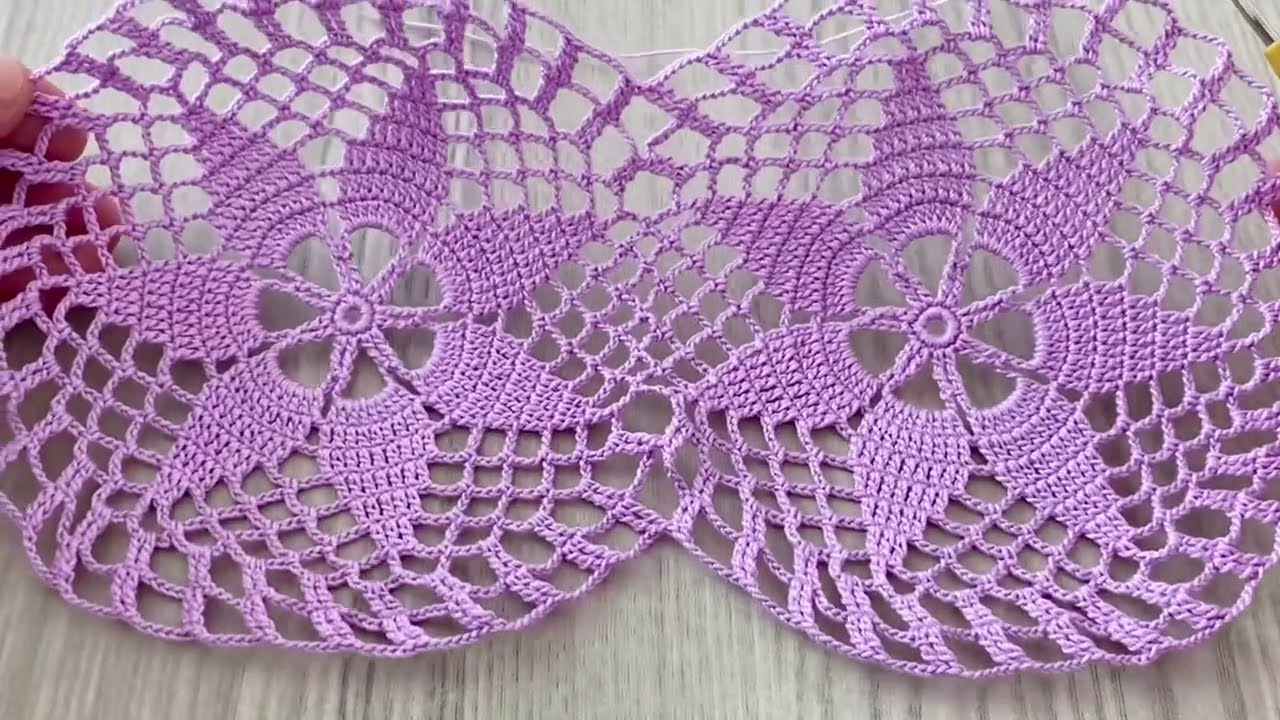
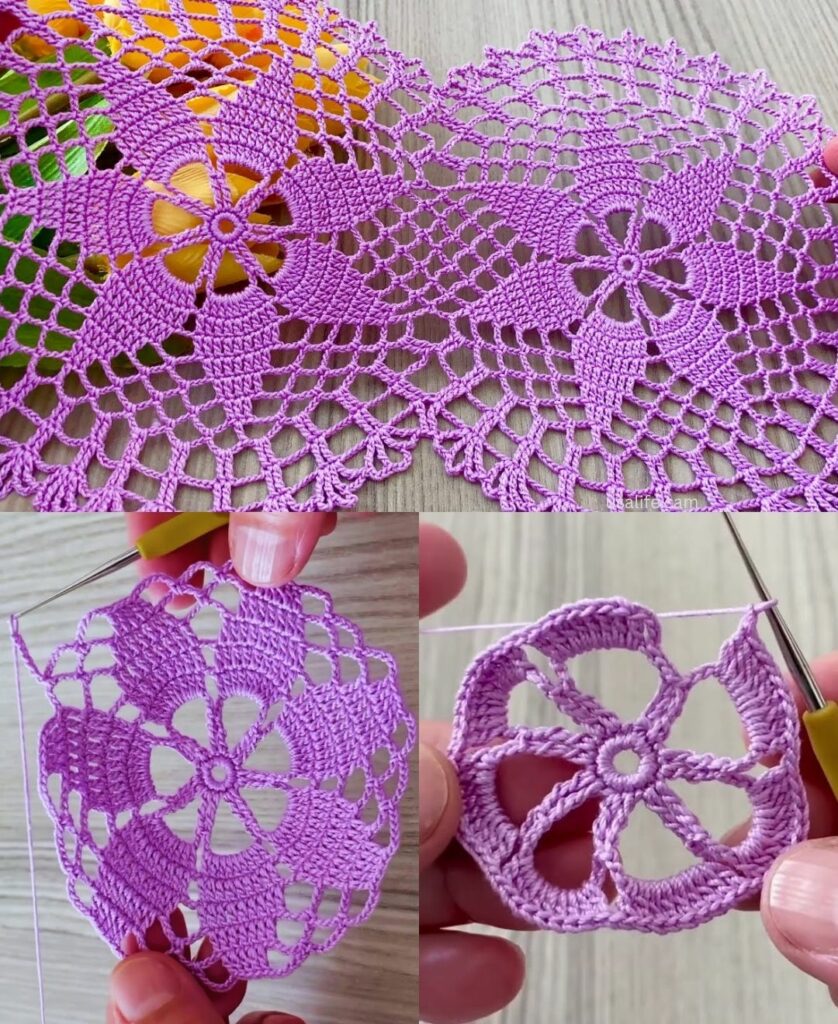
🧶 The Foundation: The “Transitional” Motif
We will use a modified solid square because it is gap-free (for the runner) but has a lightweight feel (for the blouse).
- Yarn: Mercerized Cotton (Size 3 or DK weight). It has a slight sheen, drapes beautifully for clothing, and is heat-resistant for table use.
- Hook: 4.0 mm.
- Stitch Key:
ch(chain),dc(double crochet),sl st(slip stitch),sc(single crochet).
The Step-by-Step Motif (Make as many as needed)
- Row 1:
ch 4, join to form a ring.ch 3(counts as dc),2 dc,ch 2,[3 dc, ch 2]3 times. Join toch 3. - Row 2:
sl stto corner.ch 3,2 dc,ch 2,3 dc(corner).ch 1.[3 dc, ch 2, 3 dc]in next 3 corners,ch 1between. - Row 3:
sl stto corner.ch 3,2 dc,ch 2,3 dc(corner).ch 1,3 dcin side space,ch 1. Repeat around. - Row 4 (The Edge): Same as Row 3, but work
1 dcinto every stitch along the sides for a cleaner, flatter finish.

🛠 Part 1: The Multi-Purpose Runner
This version focuses on stability.
- The Layout: Arrange your motifs in a long rectangle (e.g., 3 wide x 10 long).
- The Join: Use the Mattress Stitch. With right sides facing, sew through the back loops only. This makes the runner lay perfectly flat so glasses won’t wobble.
- The Border: To prevent the runner from looking like a collection of separate pieces, work a border of 2 rows of DC around the entire perimeter, putting
(2 dc, ch 2, 2 dc)in the outer corners. - Finishing: Block the runner using heavy starch to ensure it grips the table surface.

👗 Part 2: The Blouse (The Modular Transformation)
To transform the runner into a blouse, you will reconfigure the same motifs.
- The Layout: Take the motifs apart (if you used a temporary join) or create a new set. Arrange them into a “T-shape.”
- Bodice: 3 rows of 4 motifs.
- Sleeves: Attach 2 rows of 3 motifs to the sides.
- The Join (JAYG): For the blouse, use Join-As-You-Go (JAYG). As you finish the final round of a new motif,
ch 1,sl stinto the neighboring square, thench 1to complete. This creates a flexible “bridge” between squares, giving the blouse “stretch” that a table runner doesn’t need. - The Fit:
- Neckline: Do not add motifs to the top-center. Instead, work 2 rounds of
scalong the neck edge to create a soft, rounded collar. - Waist: Use a long crocheted chain as a drawstring threaded through the motifs at the waist to cinch the boxy shape into a flattering silhouette.
- Neckline: Do not add motifs to the top-center. Instead, work 2 rounds of
📐 Expert Pro-Tips for Dual-Use
- The “Storage” Secret: If you plan to switch between runner and blouse, never sew permanently. Use a “Slip-Stitch Join” which can be easily snipped with scissors later without damaging the motifs.
- The Blocking Rule:
- For the runner: Block it hard. Use starch and pins to make it stiff.
- For the blouse: Steam-block lightly. You want the fabric to be soft, not rigid.
- Color Strategy: Use a neutral color (Cream, Tan, or Slate Grey) for the joining yarn. This acts as a frame, making your motifs look like a high-end designer textile regardless of whether it’s on your dining table or your body.
💡 Quick Math Guide
- Runner: Most tables need about 12–16 motifs for a standard runner.
- Blouse: Most size Medium blouses require 20–24 motifs (depending on how loose you want the fit).
Would you like me to help you calculate the exact number of motifs you need based on your specific measurements, or would you like a pattern for a more decorative “lacy” edge to finish the blouse sleeves?