by
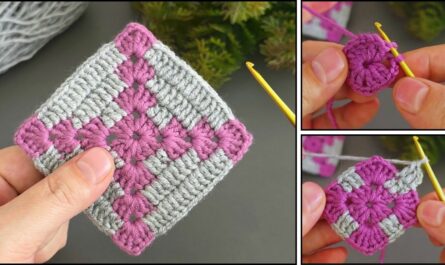
by Crocheting baby shoes is an incredibly heartwarming and practical project, perfect for gifting or for your own little one! These tiny shoes are quick to make, use very little yarn, and allow for endless customization with colors and embellishments. They’re also a fantastic project for practicing basic shaping and working in the round.
Since it’s warm in Phnom Penh, choosing the right yarn is important to ensure the baby’s comfort. Prioritize soft, breathable, and washable yarns.
Choosing the Right Yarn for Baby Shoes in a Warm Climate
For baby shoes, especially in a warm climate, you’ll want yarns that are gentle on delicate skin and won’t make tiny feet too hot.
- 100% Cotton: This is often the best choice for baby items in warmer climates. It’s breathable, absorbent, soft, and easy to wash. Cotton gives great stitch definition, which is nice for small, detailed projects.
- Cotton Blends (Cotton/Bamboo, Cotton/Acrylic):
- Cotton/Bamboo: Bamboo yarn is incredibly soft, has a beautiful drape, and is very breathable. A blend combines the best qualities of both fibers.
- Cotton/Acrylic: A good quality acrylic blended with cotton can offer softness, durability, and easy care (often machine washable and dryable) while maintaining some breathability from the cotton.
- Baby-Specific Acrylics: Many brands produce acrylic yarns specifically designed for babies. These are usually exceptionally soft, often anti-pilling, and hypoallergenic. Look for labels like “baby soft” or “DK baby.” While acrylic isn’t as breathable as cotton, these specialized versions are designed for comfort.
Yarn Weight: For most baby shoe patterns, DK (Double Knitting) weight / Light Worsted (Category 3) or Worsted Weight (Aran / Medium / Category 4) is commonly used. DK will result in daintier shoes, while worsted will create a slightly chunkier, more substantial shoe.
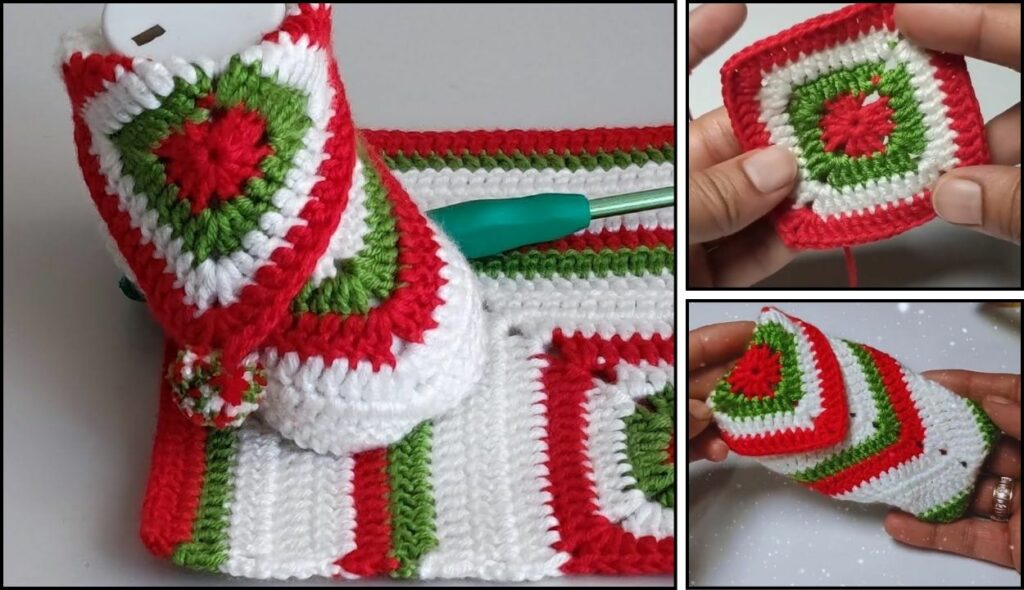
How to Crochet Baby Shoes: A Detailed Tutorial (Standard Loafer Style)
This tutorial will guide you through creating a simple baby shoe, often referred to as a “loafer” or “bootie,” which consists of a sole and an upper section. This design is excellent for beginners.
Sizing Note: Baby foot sizes vary hugely. It’s best to measure the baby’s foot if possible, or work to a general size. This pattern is for a newborn to 3-month size (approx. 3.5-3.75 inches / 9-9.5 cm sole length). You’ll need to adjust stitch counts for larger sizes.
1. Essential Materials You’ll Need
- Yarn: Your chosen baby-friendly yarn (e.g., DK or Worsted weight cotton). You’ll only need small amounts.
- Crochet Hook: Size appropriate for your yarn (e.g., 3.5mm (US E/4) for DK, 4.0mm (US G/6) for Worsted). Choose a hook that creates a fairly dense fabric to help the shoe hold its shape.
- Scissors: For cutting yarn.
- Yarn Needle (Tapestry Needle): Essential for weaving in ends.
- Stitch Markers (Optional but helpful): To mark the beginning of rounds or specific stitches.
2. Basic Crochet Stitches You’ll Use
- Chain (ch): For foundation.
- Slip Stitch (sl st): For joining rounds.
- Single Crochet (sc): Dense, sturdy stitch, good for the sole and shaping.
- Half Double Crochet (hdc): Medium height stitch, often used for the main body of the shoe.
- Double Crochet (dc): Taller stitch, can be used for the upper if you want a looser fabric.
- Increase (inc): Work 2 stitches into the same stitch.
- Decrease (sc2tog or hdc2tog): Work 2 stitches together into one.
- Working in Rounds: You’ll work in joined rounds for the sole and upper.
- Working around a Chain: The technique used for the sole.
- Fasten Off: To secure your work.
- Weaving in Ends: Hiding yarn tails for a neat finish.

Crochet Baby Shoe Pattern (Newborn to 3 Months)
This pattern makes one shoe. Repeat all steps to make a matching pair!
Abbreviations (US Crochet Terms):
- ch: chain
- sl st: slip stitch
- sc: single crochet
- hdc: half double crochet
- inc: increase (work 2 sc or hdc into the same stitch)
- sc2tog: single crochet 2 together (decrease)
- hdc2tog: half double crochet 2 together (decrease)
- st(s): stitch(es)
(...): work stitches into the same stitch or space[...]: repeat instructions in brackets- FO: Fasten off
Part 1: The Sole
We’ll work around a foundation chain to create an oval shape.
- Foundation Chain: Ch 10.
- Round 1:
- Work 2 sc in the 2nd ch from hook (first inc).
- Sc in the next 7 ch.
- Work 5 sc in the last ch (this forms the curve at the toe end).
- Now, working down the other side of the starting chain: Sc in the next 7 ch.
- Work 2 sc in the very first ch where you made your first 2 sc (this finishes the heel curve).
- Join with a sl st to the first sc. (23 sc)
- Round 2: Ch 1 (does not count as a stitch).
- Work 2 sc in the first st.
- Work 2 sc in the next st (total 2 inc).
- Sc in the next 7 sts.
- Work inc sc in the next 5 sts (total 5 inc at toe).
- Sc in the next 7 sts.
- Work inc sc in the next 2 sts (total 2 inc at heel).
- Join with a sl st to the first sc. (32 sc)
- Round 3: Ch 1.
*Sc in the next st, inc sc in the next st.*Repeat from*to*2 times.- Sc in the next 7 sts.
*Sc in the next st, inc sc in the next st.*Repeat from*to*5 times.- Sc in the next 7 sts.
*Sc in the next st, inc sc in the next st.*Repeat from*to*2 times.- Join with a sl st to the first sc. (42 sc)
- Check Sole Size: Lay the sole flat. It should be approximately 3.5-3.75 inches long. If it’s too small, add another increase round, continuing the pattern (e.g.,
sc in next 2, incetc. for next round). If too large, use a smaller hook.
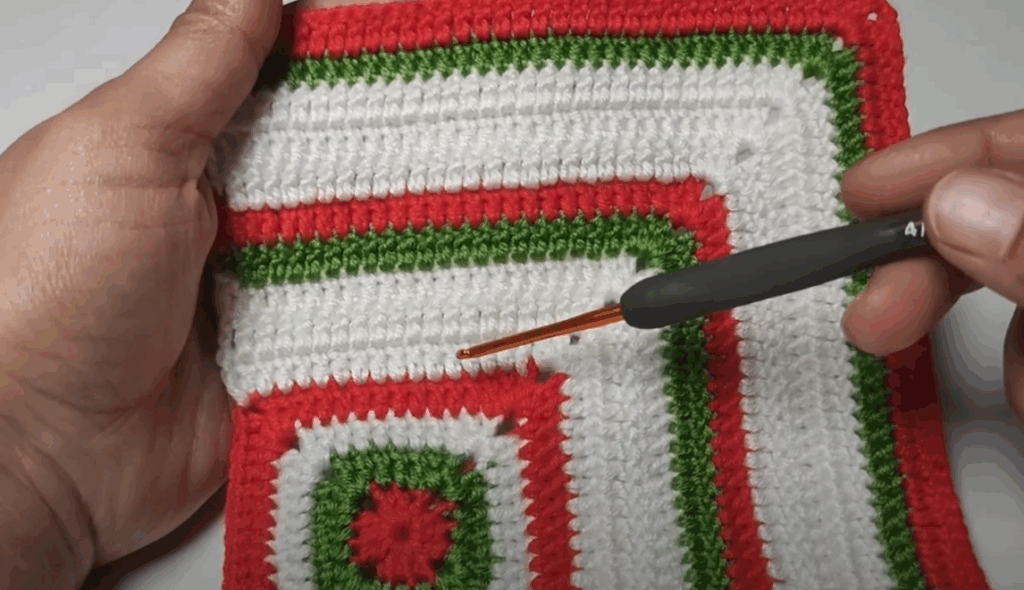
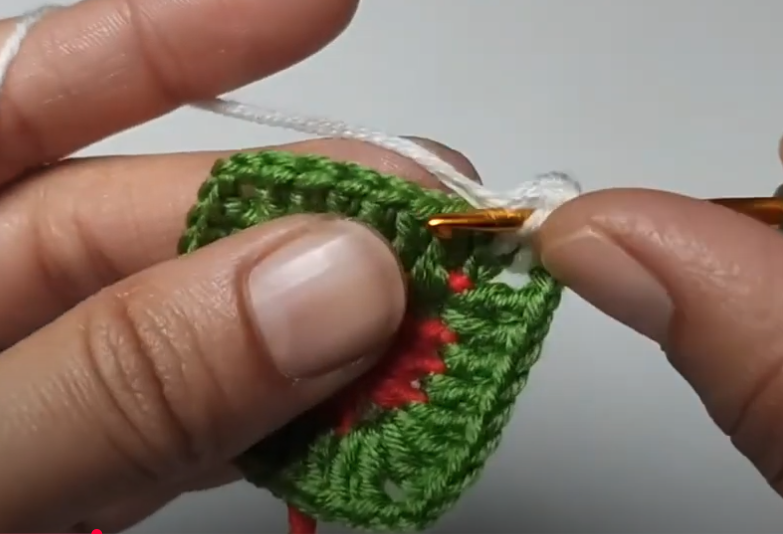
Part 2: Building the Sides of the Shoe
Now we’ll start working upwards to create the walls of the shoe.
- Round 4 (Creating the “Wall”): Ch 1.
- Sc in each st around, working into the Back Loop Only (BLO) of each stitch. This creates a neat ridge that defines the edge of the sole.
- Join with a sl st to the first sc. (42 sc)
- Round 5: Ch 1.
- Sc in each st around, working through both loops (standard sc).
- Join with a sl st to the first sc. (42 sc)
- Round 6: Ch 1.
- Hdc in each st around.
- Join with a sl st to the first hdc. (42 hdc)
Part 3: Shaping the Toe
This section uses decreases to shape the front of the shoe.
- Round 7 (Toe Shaping – Mark Center Front):
- Ch 1. Sc in the first 12 sts. (This positions you near the toe).
*Hdc2tog.*Repeat from*to*9 times. (9 decreases for the toe).- Sc in the remaining 12 sts.
- Join with a sl st to the first sc. (33 sts)
- Tip: Place a stitch marker in the very center of the top of the shoe (the middle of your 9 decreases) to help you keep track.
- Round 8 (Toe Shaping – Front Opening):
- Ch 1. Sc in the first 9 sts.
*Hdc2tog.*Repeat from*to*5 times. (5 decreases for the toe).- Sc in the remaining 9 sts.
- Join with a sl st to the first sc. (28 sts)
Part 4: Finishing the Shoe
- Round 9 (Ankle Border): Ch 1. Sc in each st around. Join with a sl st to the first sc. (28 sc)
- Fasten Off, leaving a long tail (about 6-8 inches / 15-20 cm).
- Weave in All Ends NEATLY: Use your yarn needle to carefully weave in every single yarn tail. Take your time, going back and forth through stitches several times on the inside of the shoe to ensure they’re hidden and won’t unravel.
Part 5: Embellishments (Optional)
This is where you can personalize your baby shoes!
- Ties/Drawstring: Ch a long string (e.g., 40-50 ch for a newborn size). Weave this chain through the stitches of Round 9 (the ankle border) or Round 6. Tie a bow in the front.
- Buttons: Crochet small single crochet circles and sew them on as decorative buttons, or sew on actual small, flat baby-safe buttons.
- Appliqués: Crochet tiny flowers, hearts, or stars and sew them onto the toe of the shoe.
- Ribbon: Thread a narrow ribbon through the ankle border instead of a crocheted tie.
- Color Blocking: Change yarn colors after the sole, or for the ankle border, to create different looks.
Tips for Crocheting Baby Shoes
- Gauge: While less critical than for garments, a consistent gauge helps the shoes hold their shape and fit correctly. A slightly tighter gauge is often better for structure.
- Softness: Always prioritize soft yarn for baby items. Tiny feet are sensitive!
- Safety: Ensure any embellishments (buttons, beads) are sewn on very securely so they cannot be pulled off and become a choking hazard. For newborns, embroidered details are often safer than sewn-on ones.
- Washability: Most parents appreciate baby items that are machine washable and dryable. Check your yarn label.
- Practice: The sole can be tricky for beginners. Don’t get discouraged if your first one isn’t perfect. Practice makes progress!
- Left vs. Right: For this loafer style, the shoes are identical and interchangeable, so you don’t need to worry about making a “left” and a “right.”
You’ve now got the detailed steps to crochet adorable baby shoes! They are truly cherished handmade gifts. Happy hooking!