by
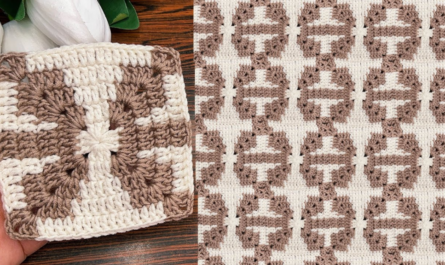
by The Classic Granny Square is the ultimate rite of passage for every crocheter. It is beloved because it is “modular”—you can make one for a coaster, or make 100 to join into a “magnificent” blanket or blouse.
Here is a foolproof, step-by-step guide to help you master your first square.

🧶 The Beginner’s Toolkit
Before we pick up the hook, let’s make sure you have the right supplies. For beginners, I recommend using a light-colored yarn so you can see your stitches clearly.
| Item | Recommendation |
| Yarn | Medium-weight (Worsted/Size 4) Acrylic or Cotton. |
| Hook | 5.0 mm (H/8). |
| Notions | Scissors and a large-eye tapestry needle. |
Abbreviations to Know
- ch: Chain
- sl st: Slip Stitch
- dc: Double Crochet
- sp: Space (the holes between stitches)
- Cluster: A group of 3 double crochets worked into the same hole.
🛠 Step-by-Step Instructions
Round 1: The Foundation
- The Center: Make a Magic Ring (or ch 4 and sl st to the first ch to form a ring).
- Start: ch 3 (this counts as your first dc).
- First Cluster: Work 2 dc into the ring. (You now have your first “3-dc cluster”).
- First Corner: ch 2.
- Repeat: [3 dc into the ring, ch 2] three more times.
- Close: Join with a sl st to the top of the starting ch 3.

Check your work: You should have 4 clusters and 4 corner holes (ch-2 spaces). It will look like a tiny, bumpy circle/square.
Round 2: Growing the Corners
In this round, we only work into the corners (the holes).
- Move Hook: sl st into the next 2 stitches and then sl st into the first corner hole. (This “slides” your yarn to the starting point).
- First Corner: ch 3 (counts as dc), work (2 dc, ch 2, 3 dc) all in that same corner hole.
- Transition: ch 1.
- Next Corners: In each of the next 3 corner holes, work: (3 dc, ch 2, 3 dc) followed by a ch 1.
- Close: Join with a sl st to the top of the starting ch 3.
Check your work: You now have 8 clusters total (2 in each corner).

Round 3: The First “Side” Stitches
Now we have corners AND side spaces.
- Move Hook: sl st across to the corner hole.
- Corner: ch 3, work (2 dc, ch 2, 3 dc) in the corner. ch 1.
- Side: Look at the space on the side between the corners. Work 3 dc into that side space. ch 1.
- Repeat: Work a Corner (3 dc, ch 2, 3 dc) in every corner hole and 3 dc in every side hole, always separated by a ch 1.
- Close: Join with a sl st to the top of the starting ch 3.

💡 3 Golden Rules for Beginners
- The ch-1 vs. ch-2 Rule: Use ch 2 for corners (it makes them sharper) and ch 1 for sides (it keeps them straight).
- Don’t skip the Sl St: Beginners often forget to slip stitch over to the corner hole at the start of a new round. If you don’t do this, your square will look “tilted.”
- Relax Your Tension: If your square is curling up like a bowl, you are pulling too tight. Try to let the yarn flow loosely through your fingers.
🏁 Finishing Your Square
When your square is as big as you want it (usually 4 or 5 rounds), cut the yarn leaving a 6-inch tail. Pull the tail through the last loop to knot it. Use your tapestry needle to weave the tail back and forth through the stitches on the back of the square so it doesn’t come undone.
Would you like me to show you how to change colors between rounds so you can make a multi-colored “rainbow” square?Granny Square Tutorial Step-by-Step Crochet for Beginners
Video tutorial: