 by
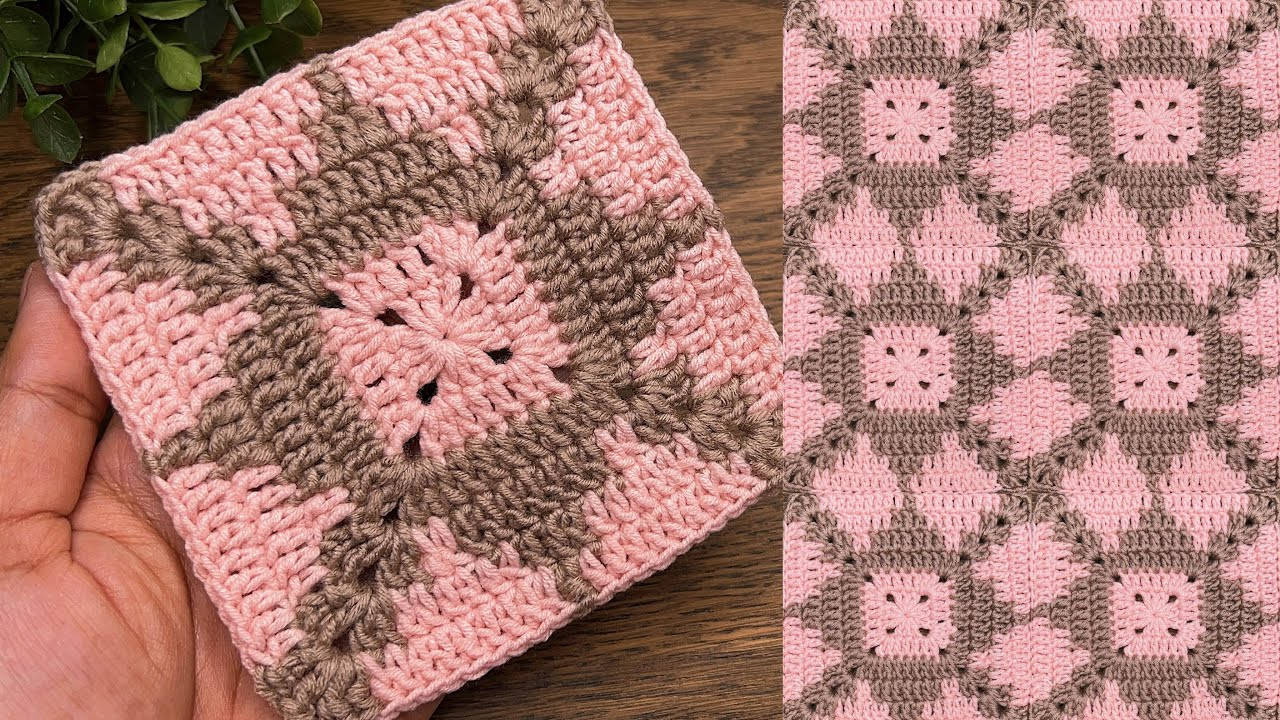
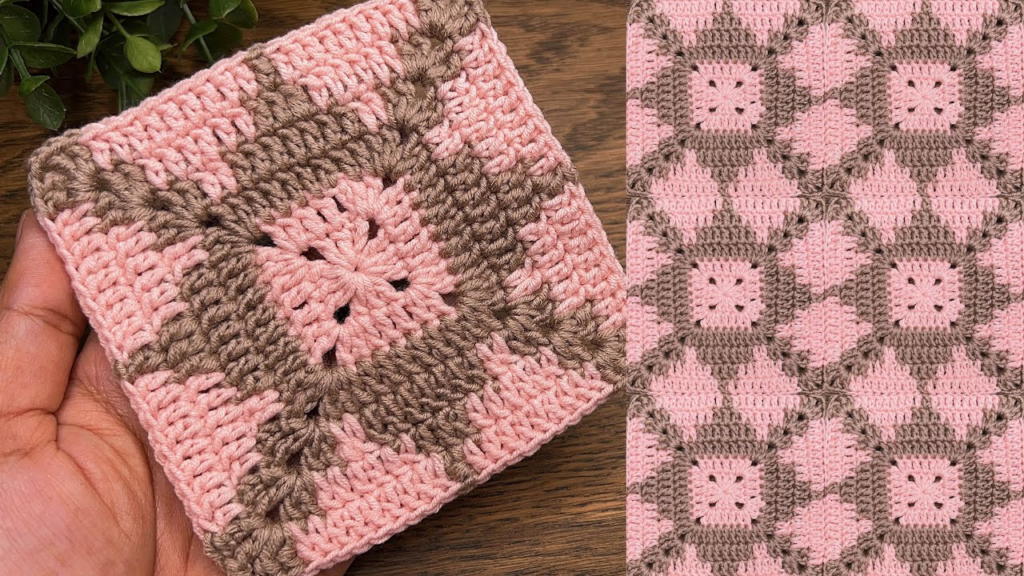
by This is a classic, “solid” square motif—it is the best project for beginners because it is sturdy, gap-free, and teaches you the fundamental mechanics of how to build a shape in the round.
🧶 The Beginner Toolkit
- Yarn: A smooth, medium-weight (DK or Worsted) cotton yarn in a light color (so you can see your stitches clearly).
- Hook: 4.0 mm or 5.0 mm.
- Stitch Key (US Terms):
- ch: Chain (Yarn over, pull through loop).
- dc: Double Crochet (Yarn over, insert hook, pull up loop, yarn over, pull through 2 loops, yarn over, pull through final 2 loops).
- sl st: Slip Stitch (Insert hook, pull through stitch and loop on hook to join).

🛠 The Step-by-Step Guide
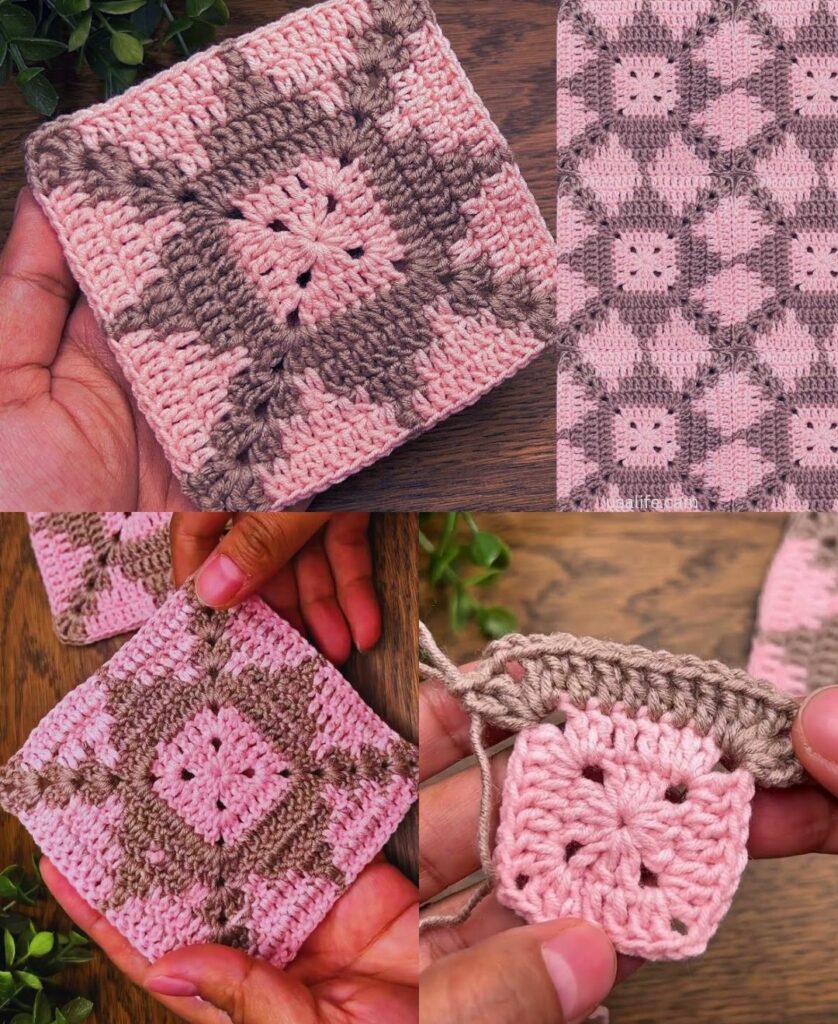
Round 1: The Center
- Start:
ch 4. Insert your hook into the first chain andsl stto join into a small ring. - The Start:
ch 3(this counts as your firstdc). Work 2 dc into the center of the ring. - The Corner:
ch 2. - The Pattern: Work 3 dc into the ring, ch 2. Repeat this 3 more times until you have 4 clusters total.
- Join:
sl stinto the top of your initialch 3.

Round 2: Growing the Square
- Move:
sl stacross the next two stitches and into the nearest corner space. - The Corner:
ch 3, 2 dc, ch 2, 3 dc all into that same corner hole. - The Side:
ch 1. - The Pattern: Move to the next corner hole and work 3 dc, ch 2, 3 dc. Repeat this in all 4 corners, remembering to
ch 1between each corner group. - Join:
sl stinto the top of your initialch 3.
Round 3: The Solid Frame
- Move:
sl stinto the corner. - The Corner:
ch 3, 2 dc, ch 2, 3 dcin the corner. - The Side:
ch 1. You will see a small gap between the clusters of the previous round. Work 3 dc into that side gap.ch 1. - The Pattern: Continue working (3 dc, ch 2, 3 dc) in every corner and 3 dc in every side gap.
- Join:
sl stinto the top of your initialch 3.

🌟 3 Pro-Tips for Success
- Tension: If your square is curling up like a bowl, you are crocheting too tightly. Try to keep your hands relaxed. If it is ruffling (wavy edges), you are crocheting too loosely.
- The “Turning” Secret: If your square looks like it’s spiraling, try turning your work over after each round. By working the next round in the opposite direction, you keep your stitches perfectly straight.
- Blocking: This is the magic step! Once you finish, your square might look a bit uneven. Lay it on a towel, pull the corners until it is a perfect square, and pin it down. Steam it lightly with an iron or steamer. Once it dries, it will be perfectly flat and professional.
💡 Your First Project
Once you have made 4 or 6 of these squares, you can place them side-by-side and use a tapestry needle to sew them together using the Mattress Stitch (sewing through the back loops only). This will give you a beautiful, handmade coaster set or a small decorative table mat!
Would you like me to explain how to join your squares together with a “hidden” seam, or are you ready for a more decorative pattern next?