by
by 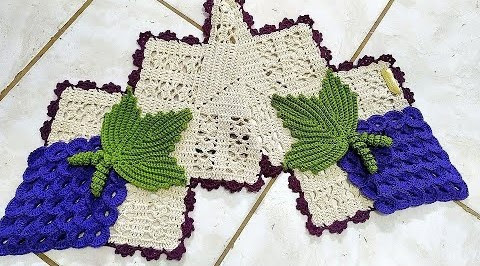
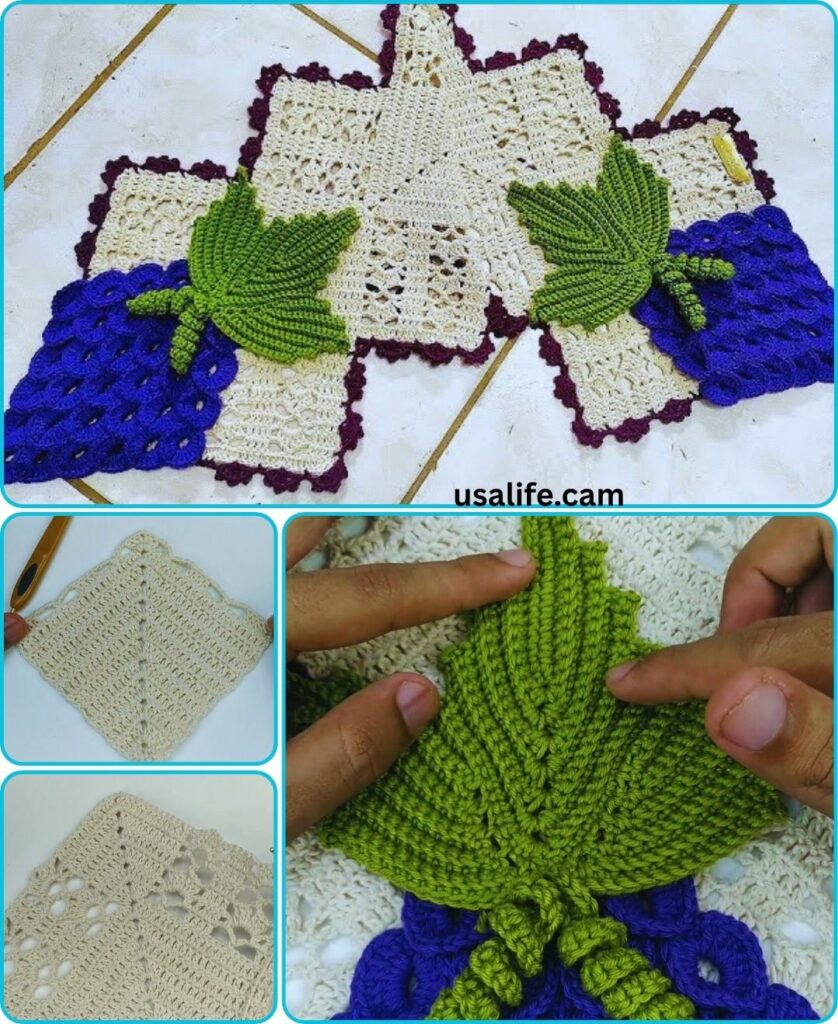
Calling all crochet enthusiasts and nature lovers! Today, we’re embarking on a delightful journey into the world of textured stitches and juicy colors: crocheting your very own Path of Grape Clusters. Imagine a vibrant trail adorned with plump, glistening grapes, beckoning you to follow its twisty turns. Sounds tempting, right?
This project is perfect for intermediate crocheters looking to hone their skills and create a unique, eye-catching home decor piece. Get ready to unleash your inner botanist and let’s stitch our way through a bountiful harvest!
Materials:
- Yarn: Choose an array of green and purple (or your favorite grapey hues!) DK-weight yarn. Consider variegated shades for added depth.
- Crochet Hook: Size appropriate for your chosen yarn weight (usually F/4 or G/5).
- Stuffing: Poly-fil or yarn scraps.
- Needle: For sewing in ends and attaching leaves (optional).
- Embroidery thread (optional): If you want to add “seeds” to your grapes.
Stitches You’ll Need:
- Chain Stitch (ch): The foundation of every row.
- Single Crochet (sc): Builds the base of your grapes.
- Double Crochet (dc): Adds plumpness and texture.
- Slip Stitch (sl st): Joins sections and hides ends.
- Increase (inc): Makes your clusters grow.
- Decrease (dec): Shapes the top of your grapes.
Let’s Get Crocheting!

1. The Grape Base:
Start with a magic ring or chain 4 and join, forming a circle. Work sc stitches around, increasing at regular intervals to establish the base of your first grape. Repeat this process for subsequent grapes, creating clusters of varying sizes to add natural charm.
2. Building the Bunches:
Once your base is solid, switch to dc stitches. Work around in increasing rounds, adding more dc’s in each round to create plump, rounded grapes. Don’t forget to stuff lightly as you go for that satisfying squishy feel!
3. Shaping the Clusters:
As your grapes reach their desired size, start decreasing to form a rounded top. Use a combination of dc and dec stitches to achieve a natural, organic shape. Remember, no two grapes are exactly alike, so embrace the imperfections!
4. Vines and Leaves (Optional):
Now, let’s connect your grapes into a winding path! Chain stitches will act as your vine, weaving between clusters. You can also crochet simple leaf motifs and attach them along the vine for an extra touch of greenery.
5. Finishing Touches:
Weave in all ends, add embroidered “seeds” to your grapes if desired, and admire your handiwork! Your Path of Grape Clusters is complete, ready to bring a touch of whimsical charm to your living space.
Video tutorial
Tips and Tricks:
- Play with yarn textures! Combine smooth acrylics with fuzzy mohair for added dimension.
- Experiment with color! Go for classic black and purple grapes, or try vibrant green clusters for a playful twist.
- Don’t be afraid to freestyle! Add tendrils, flowers, or even tiny ladybugs to personalize your vine.
- This project is incredibly versatile! Hang it as a wall decoration, drape it over furniture, or even use it as a playful table runner.
So, are you ready to embark on your own Path of Grape Clusters? Grab your hook, unleash your creativity, and stitch your way through a bountiful harvest of yarn-tastic grapes! And remember, the most important ingredient is fun. Enjoy the process, embrace the unique textures and shapes, and celebrate your own vinous masterpiece!
Feel free to share your grapey creations and crochet adventures in the comments below! Happy stitching!