 by
by 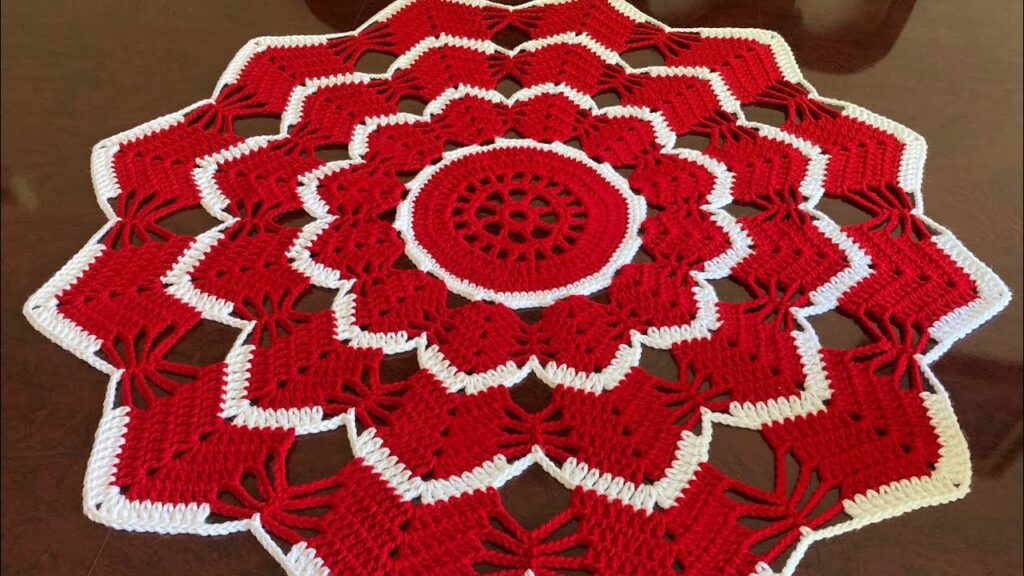
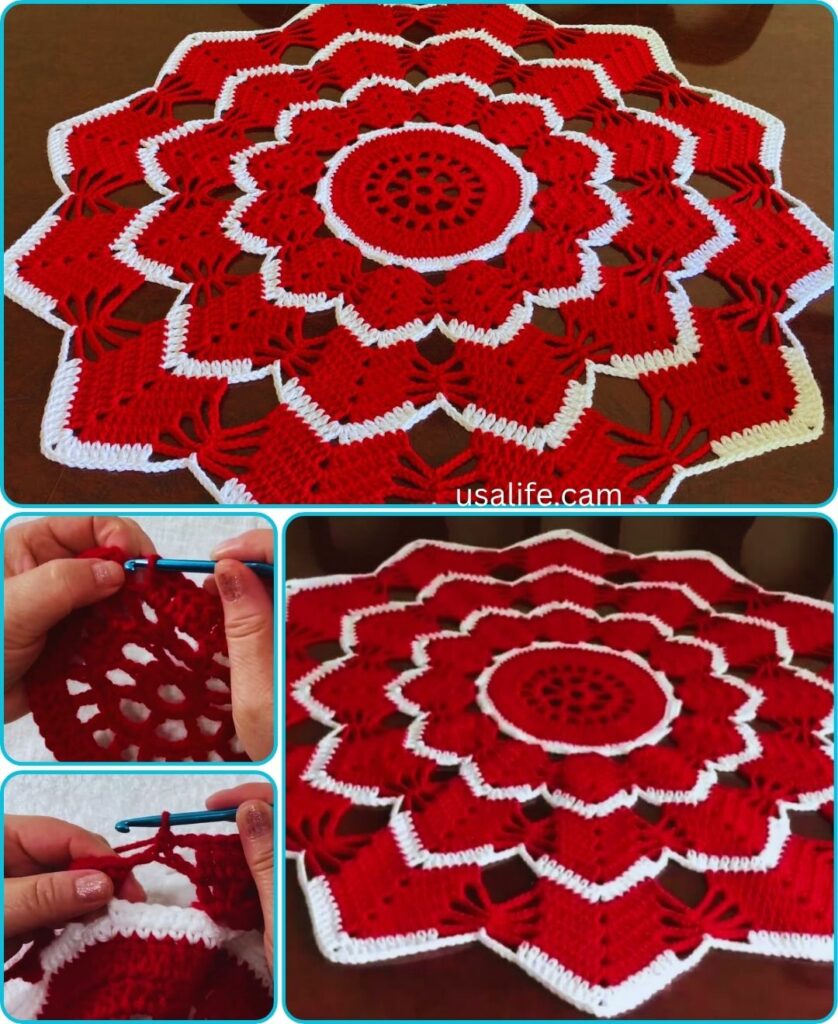
Welcome, crochet enthusiasts, to a journey of yarn and creativity! Today, we’ll delve into the delightful world of crocheting a beautiful centerpiece, adding a touch of handmade charm to your table.
Choosing Your Pattern:
First things first, pick your perfect pattern! The internet is a treasure trove of options, from simple doilies to intricate floral arrangements. Consider your skill level, desired size, and preferred stitch variety. Websites like Ravelry and Pinterest offer a vast collection to inspire you.
Materials Must-Haves:
- Yarn: Choose a yarn weight suitable for your pattern. Lighter yarns like cotton or acrylic are great for delicate doilies, while thicker weights like worsted or aran wool create bolder centerpieces.Opens in a new windowamazon.comcrochet yarn
- Crochet Hook: Select a hook size recommended for your yarn weight. Remember, a tight hook creates denser fabric, while a looser one yields airier results.Opens in a new windowamazon.comcrochet hook
- Scissors: A trusty pair for snipping yarn ends.
- Tapestry Needle: For weaving in ends and adding finishing touches.Opens in a new windowamazon.comtapestry needle
- Optional: Stitch markers, blocking mats, and embellishments like beads or buttons.
Let’s Get Hooking!:
- Chain it Up: Most patterns begin with a chain of stitches to form the base. Follow your pattern’s instructions carefully, ensuring even tension.
- Stitching Symphony: Dive into the world of crochet stitches! Your pattern will guide you through a sequence of stitches like single crochet, double crochet, and treble crochet, often combined to create beautiful textures and shapes.
- Rounds and Repeats: Many centerpieces are crocheted in rounds, working your way around in a spiral. Pay attention to stitch counts and repetitions to maintain the pattern’s structure.
- Shape it Up! As you progress, the magic unfolds! Your flat circle might transform into a flower, a star, or even a whimsical animal. Keep an eye on the emerging design and celebrate each completed round.
- Finishing Touches: Once you reach the final round, it’s time to tie off those loose ends. Weave them in with your tapestry needle for a neat and professional finish.
Voila! Your Masterpiece:
Congratulations, you’ve crocheted a stunning centerpiece! But the journey doesn’t end there. You can:
- Block your creation: This involves gently stretching and pinning the fabric to achieve the desired shape and size.Opens in a new windowwww.amazon.cablocking crochet
- Embrace the fringe: Many doilies have decorative fringes. Learn how to create them for an extra touch of elegance.
- Get creative: Embellish your centerpiece with beads, buttons, or ribbons to personalize it and match your decor.
Sharing the Joy:
Show off your crocheted masterpiece! Take a picture and share it with friends and family, or gift it to someone special. Remember, crocheting is a craft that brings joy not only to the maker but also to the beholder.
Beyond the Basics:
This guide is just a starting point. As you gain confidence, explore more complex patterns, experiment with different yarns and techniques, and let your creativity flow. Remember, the possibilities with crochet are endless!
So, grab your hook, choose your yarn, and embark on your own crocheted centerpiece adventure. With each stitch, you’ll weave not just fabric, but also a sense of accomplishment and the satisfaction of creating something beautiful with your own hands. Happy crocheting!
Additional Tips:
- Don’t be afraid to make mistakes! They’re part of the learning process. Simply unravel and try again.
- Take breaks when needed. Crocheting can be meditative, but it’s important to rest your eyes and hands.
- Join online crochet communities for support, inspiration, and troubleshooting.
- Most importantly, have fun and enjoy the process!
I hope this detailed guide inspires you to crochet a stunning centerpiece for your home. Remember, the key is to embrace the journey, celebrate each stitch, and let your creativity shine through!
Video tutorial