 by
by That is an excellent request! Creating a Tile-Patterned Multi-Purpose Item (like a blouse, shawl, or runner) is best achieved using a repeating geometric motif that can be easily joined. This look is stunning because it offers texture, definition, and versatility.
I will detail the pattern for the Textured Waffle-Mesh Square Motif and explain how to adapt the assembly for three different projects.
🧇 Textured Waffle-Mesh Square Motif Tutorial
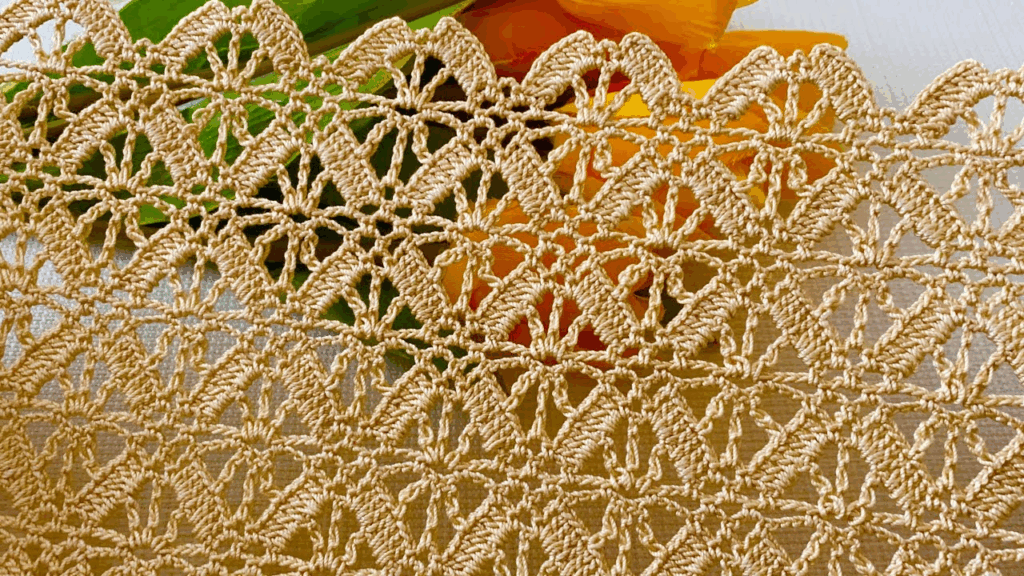
This square uses Front Post Double Crochet (FPdc) to create a raised, woven texture similar to a waffle, giving the “tile” a unique depth.
Materials You’ll Need
- Yarn: DK (Size 3) or Medium Weight (Worsted/Size 4) yarn. Cotton or a cotton blend is recommended for better stitch definition and drape in garments.
- Crochet Hook: The size appropriate for your yarn (e.g., 4.0 mm).
- Scissors, Tapestry Needle.
Key Crochet Terms
| Abbreviation | Stitch Name |
| ch | Chain |
| sl st | Slip Stitch |
| dc | Double Crochet |
| FPdc | Front Post Double Crochet (Special Stitch) |
| Corner | (dc, ch 2, dc) |
Special Stitch: Front Post Double Crochet (FPdc)
- Yarn over (YO), insert hook from the front side of the work, around the back of the specified stitch post, and out to the front again.
- YO, pull up a loop (3 loops on hook). YO, pull through 2 loops. YO, pull through the last 2 loops.

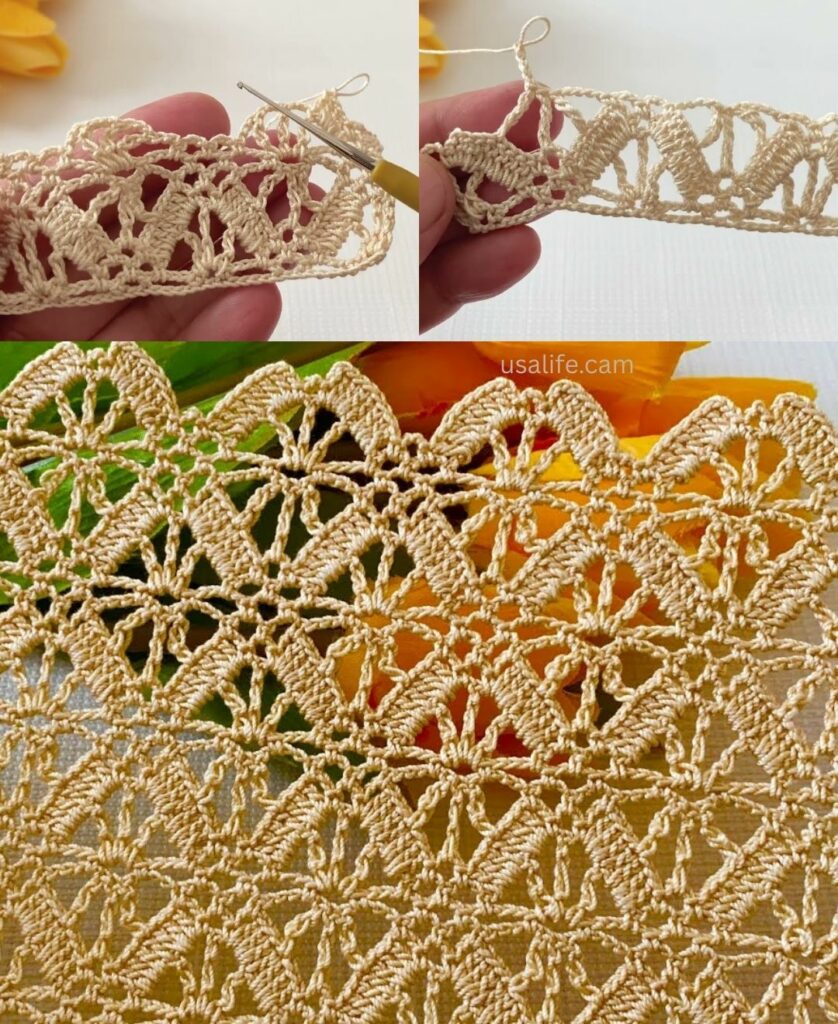
Part 1: Crocheting the Textured Tile Motif
Round 1: Foundation (Center)
- Start: Make a Magic Ring. ch 3 (counts as dc). Work [2 dc, ch 2] 4 times into the ring.
- Finish: Pull tail tight. Join with a sl st to the top of the ch 3. (12 dc, 4 corner spaces).
Round 2: Setting the Mesh Frame
- ch 3 (counts as dc). Work dc in the next 2 sts.
- Corner: Work (dc, ch 2, dc) into the ch-2 corner space.
- Repeat: Work [dc in the next 3 sts, Corner (dc, ch 2, dc) in the next ch-2 space] 3 more times.
- Finish: Join with a sl st to the top of the ch 3.
Round 3: Introducing the Waffle Texture (FPdc)
This round creates the raised, textured posts that will make the pattern pop.
- ch 3 (counts as dc). Work dc in the next st.
- Texture: Work FPdc around the post of the next dc stitch.
- Side: Work dc in the next 2 sts. Work FPdc around the next dc post.
- Corner: Work (dc, ch 2, dc) into the ch-2 corner space.
- Repeat: Continue the sequence [FPdc, dc 2, FPdc, dc 2, Corner] around the square.
- Finish: Join with a sl st to the top of the ch 3.
Round 4: Final Expansion
- ch 3 (counts as dc). Work dc in every stitch across the side until you reach the corner space.
- Corner: Work (dc, ch 2, dc) into the ch-2 corner space.
- Side: Work 1 dc into every FPdc and 1 dc into every regular dc from the previous round.
- Repeat: Continue the sequence [dc in every stitch across the side, Corner (dc, ch 2, dc)] around the square.
- Continue: Repeat Round 3 (introducing the FPdc texture again) and Round 4 (solid expansion) until the motif is the desired size (e.g., 4 to 6 inches).

Part 2: Multipurpose Assembly
1. Joining the Motifs
The easiest and neatest method for these solid tiles is the Whipstitch Join or Slip Stitch Join, worked through the back loops of the final round of stitches.
2. Project Assembly
| Project | Shape/Layout | Customization Tips |
| Blouse | Front & Back Panels: Two rectangles sized to fit the chest width. Sleeves: Two smaller rectangles or joined motifs tailored to the armhole. | Sizing: Ensure motif count matches bust circumference. Drape: Use cotton blend yarn. Neckline: Leave top center motifs unjoined. |
| Shawl | Shape: Large square, rectangle, or triangular layout. | Drape: Join 16-25 motifs total in a large square. Edging: Add a final 2-3 rounds of textured border (like FPdc rows) around the entire perimeter for weight. |
| Runner | Shape: Single, long strip (e.g., 3 tiles wide by 10 tiles long). | Consistency: Use a sturdy cotton thread (Size 3 or 5) for structure. Edging: Finish the short ends with a decorative scalloped edge or fringe. |
Final Step: Essential Blocking
Blocking is crucial for all tiled work. It ensures every motif is the same size, opens up the mesh, and makes the textured FPdc stitches lay flat and defined. Wet the finished piece, pin it to the final dimensions (especially critical for garments), and allow it to dry completely.
Would you like me to detail a different tile motif pattern, perhaps one with more lace or openwork?
Video tutorial: