 by
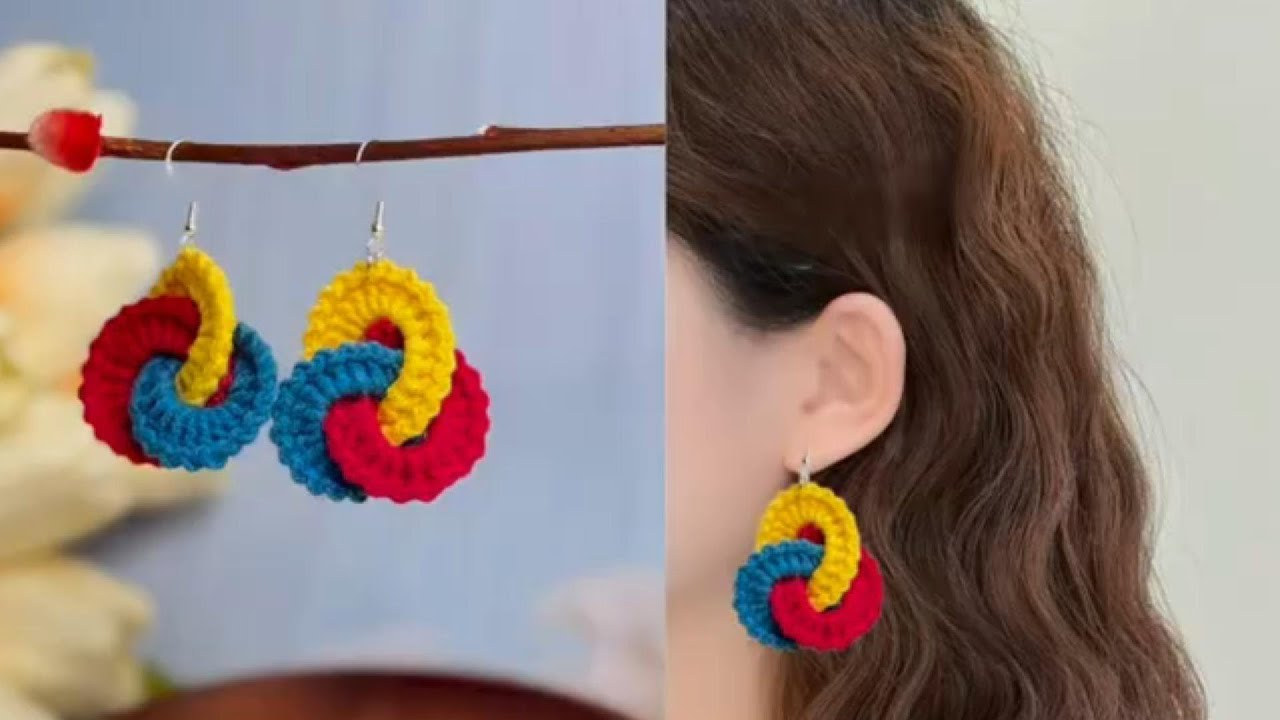
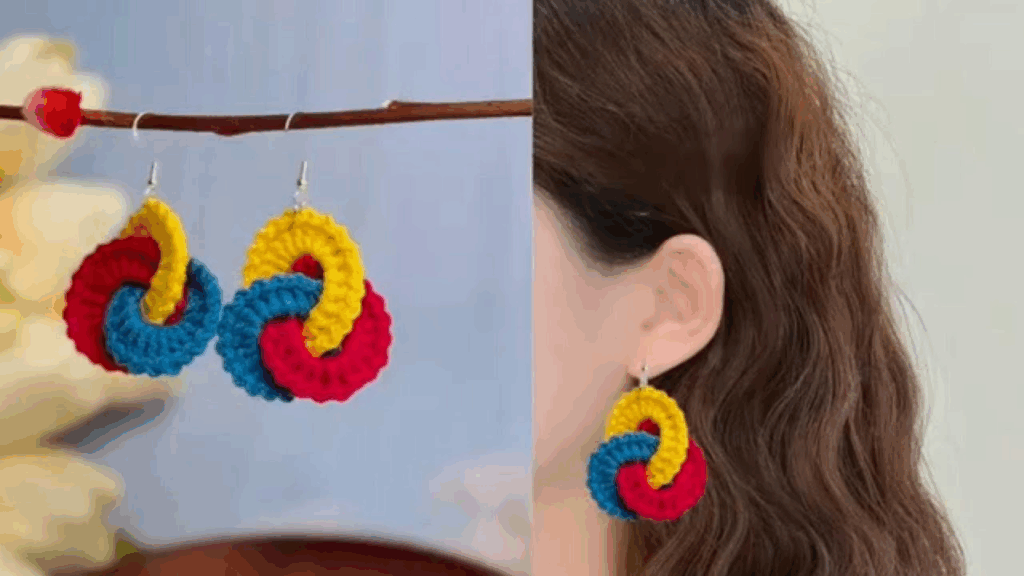
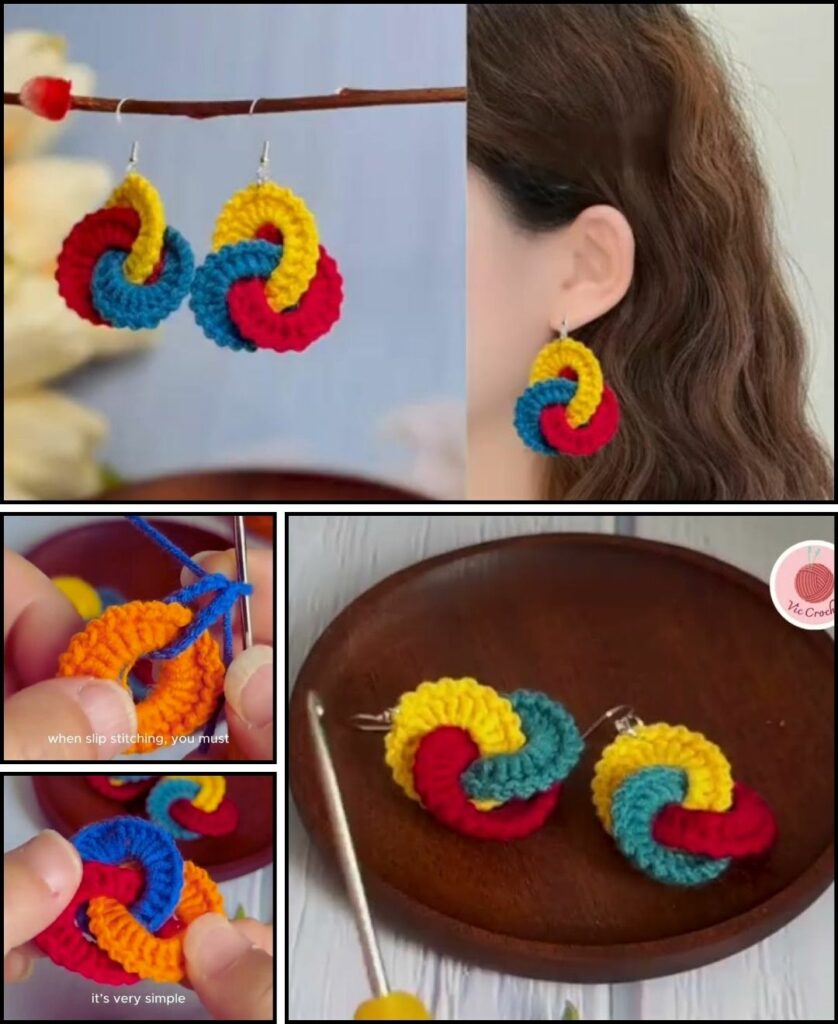
by Making your own crochet earrings is a fantastic way to create a unique, personalized accessory. For a vintage look, you can use fine thread and intricate stitches like the shell stitch or lace patterns. The key to successful crochet earrings is using the right materials and blocking them to hold their shape.
Here is a detailed guide on how to crochet vintage-style earrings.
Materials Needed
- Crochet Thread: This is crucial for small, delicate projects. Use a fine thread like size 10 cotton thread, or even a lightweight yarn like a lace or fingering weight.
- Small Crochet Hook: A steel hook is best for crochet thread. The size will depend on your thread, but a 1.5mm to 2.25mm hook is a good starting point.
- Earring Hooks: You can buy these at any craft store. They usually come in metal, like sterling silver or surgical steel for sensitive ears.
- Small Jewelry Pliers: To open and close the earring hooks.
- Fabric Stiffener or Liquid Starch: This is essential for a stiff, professional finish.
- Tapestry Needle: For weaving in ends.
- Scissors

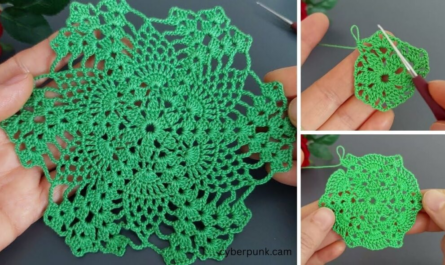
Pattern 1: The Vintage Doily Earring
This pattern creates a small, circular, doily-like motif that is perfect for a vintage look.
Abbreviations
- ch: chain
- sl st: slip stitch
- sc: single crochet
- dc: double crochet
- tr: treble crochet
- st(s): stitch(es)

Instructions
- Round 1: Start with a magic ring.
ch 3(counts as firstdc), work 11 dc into the ring. Join with asl stto the top of the beginningch 3. (12 sts) - Round 2:
ch 1,scin the first stitch.ch 3, skip the next stitch,scin the next stitch. Repeat[ch 3, sk 1, sc]around. You will have 6ch-3spaces. Join with asl stto the firstsc. - Round 3:
sl stinto the firstch-3space.ch 3(counts asdc), work2 dcinto the samech-3space.ch 1. Work3 dcinto the nextch-3space,ch 1. Repeat[3 dc, ch 1]into eachch-3space around. Join with asl stto the top of the beginningch 3. - Round 4:
sl stto the next stitch,sl stinto the nextch-1space.ch 3(counts asdc). Work 3 tr and1 dcinto the samech-1space.sl stinto the nextch-1space. Repeat[ch 3, 3 tr, 1 dc, sl st]into eachch-1space around. - Finishing: Fasten off, leaving a short tail. Weave in all ends on the back of the earring.
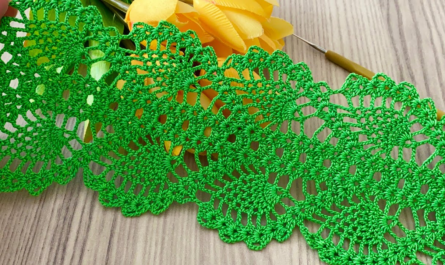
Pattern 2: The Vintage Fan Earring
This pattern creates a delicate fan shape using shell stitches.
Instructions
- Foundation:
ch 4.sl stinto the firstchto form a ring. - Row 1:
ch 3(counts asdc), work4 dcinto the ring.ch 3and turn. - Row 2: Work
5 dcinto the firstch-3space.sl stinto the top of the turning chain from the previous row.ch 3and turn. - Row 3: Work
scinto the firstdc.ch 3,scinto the lastdc. Repeat this until you have 5scin a row.ch 3and turn. - Row 4: Work
5 dcinto eachch-3space across.sl stinto the lastscfrom the previous row. - Finishing: Fasten off, leaving a short tail. Weave in all ends.

Finishing Touches: Stiffening and Assembly
This step is critical for giving your earrings a durable, professional look. Without stiffening, they will be floppy and won’t hold their shape.
- Prepare a Stiffening Solution: Follow the instructions on your fabric stiffener bottle. If you’re using liquid starch, you may need to dilute it with water.
- Submerge the Earrings: Place your finished crochet pieces into the stiffening solution. Make sure they are fully saturated.
- Shape and Pin: Lay the earrings on a piece of foam board or corkboard. Gently stretch and pin them into their desired shape. Ensure they are symmetrical.
- Dry: Let the earrings dry completely. This can take several hours or overnight.
- Attach the Earring Hooks: Once the earrings are completely dry and stiff, use your jewelry pliers to gently open the loop on your earring hook. Thread the loop through a stitch at the top of the earring. Use the pliers to close the loop securely.
You’ve now created a pair of beautiful, vintage-inspired crochet earrings.
Video tutorial