by
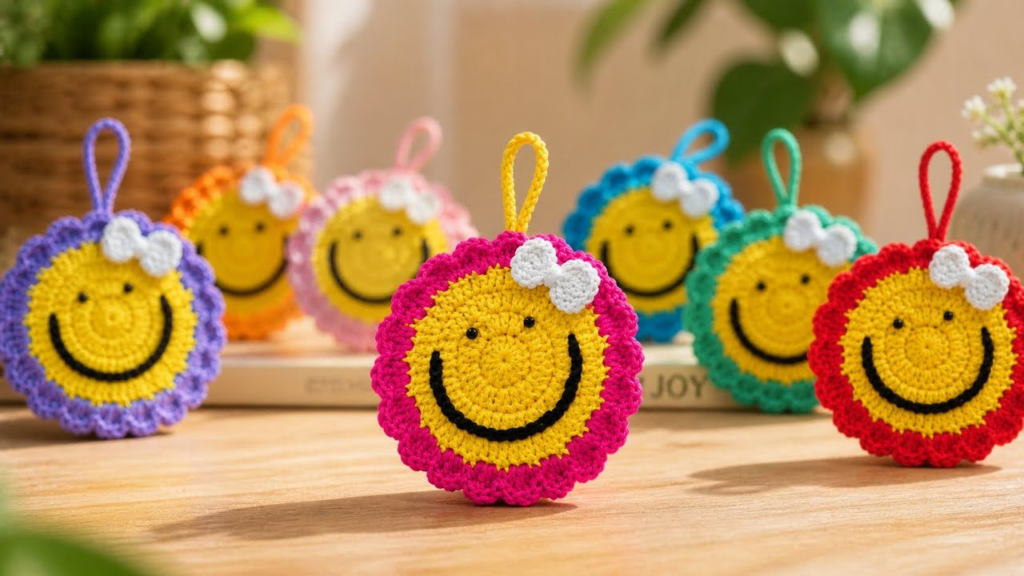
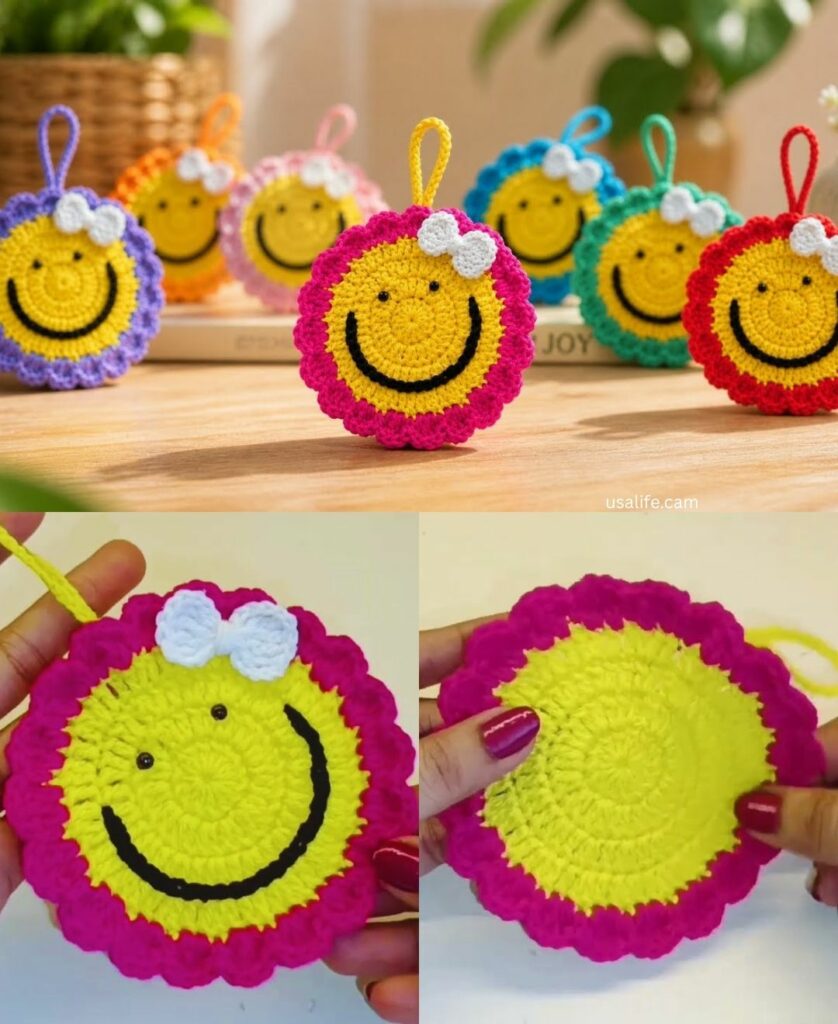
by Making a Smiley Flower Keychain is all about achieving that perfect “kawaii” (cute) look. To make this extraordinary, we will use a 3D stuffed center rather than a flat one, giving it a squishy, high-end toy feel.
Here is the detailed blueprint for a unique, double-sided Smiley Flower.
I. Technical Specifications
- Yarn: 100% Cotton or “Amigurumi” style acrylic. Cotton is best for keychains because it resists pilling and stays clean.
- Color A: Sunny Yellow (The Petals)
- Color B: Cream or Pale Yellow (The Face)
- Color C: Black (For the Smile)
- Hook: 2.5mm. You must use a small hook to keep the stitches tight so the stuffing doesn’t peek through.
- Filling: A small handful of polyester fiberfill.
II. The Pattern (Step-by-Step)
Part 1: The Smiley Face (Make 2)
We make two disks: one for the face and one for the back of the head.
- Round 1: Using Color B, make a Magic Ring. Ch 1, work 6 sc into the ring. (6 sts).
- Round 2: Work 2 sc in every stitch around. (12 sts).
- Round 3: 1 sc, 2 sc in next st. Repeat around. (18 sts).
- Round 4: 2 sc, 2 sc in next st. Repeat around. (24 sts).
- Round 5:3 sc, 2 sc in next st. Repeat around. (30 sts).
- Detail: Fasten off the first disk. Keep the second one on your hook.
Part 2: Embroidering the Expression
Do this on one disk before joining them. It is much easier when the piece is flat!
- The Eyes: Use Color C (or 6mm safety eyes). Place them between Rounds 3 and 4, about 4 stitches apart.
- The Smile: Using a tapestry needle and Black yarn, make a wide “V” or “U” shape below the eyes.
- Pro-Tip: Add tiny pink “blush” lines just under the eyes for extra cuteness.
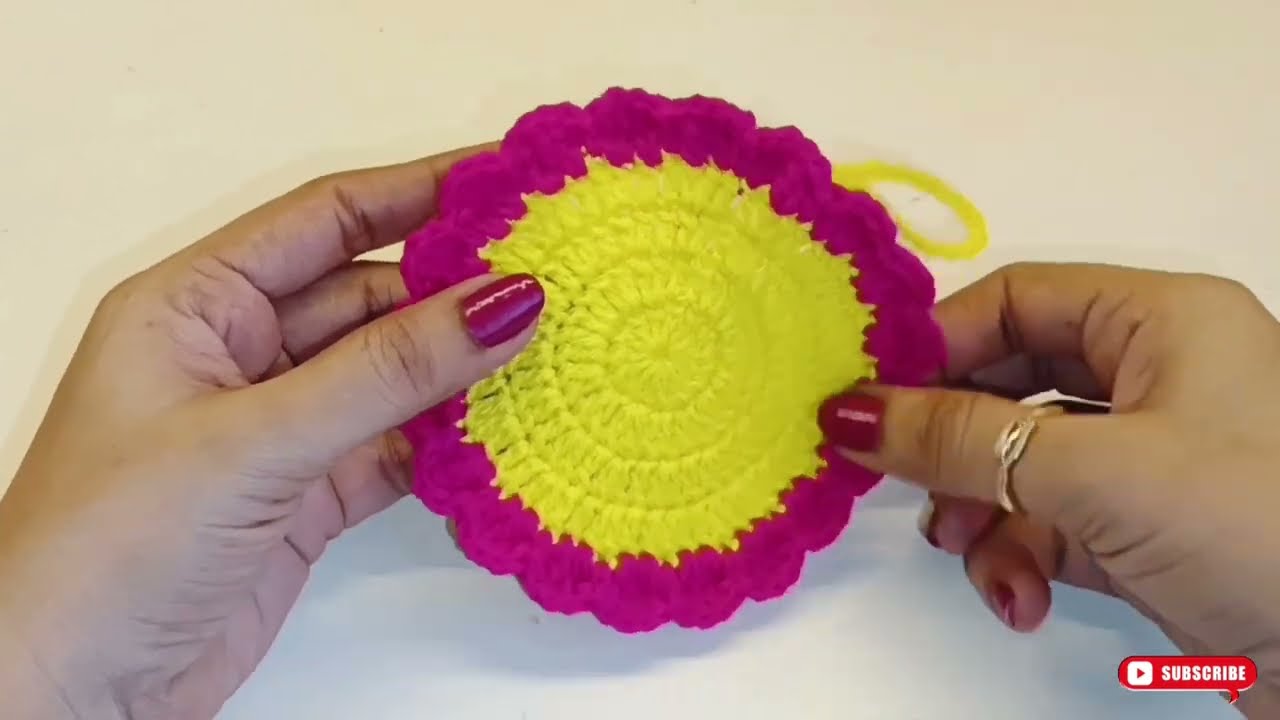
Part 3: Joining & The Petals (Color A)
- Place the two disks together (wrong sides facing).
- Joining: Using Color A, insert your hook through both disks. sc together around the edge.
- Stuffing: When you are 3/4 of the way around, stop and lightly stuff the center. Finish the sc join.
- Round 6 (The Petals):
- In the first stitch: Sl st.
- In the next stitch: 5 dc (this creates a rounded petal).
- In the next stitch: Sl st.
- Repeat [Sl st, 5 dc, Sl st] all the way around.
- Result: You will have approximately 10 bouncy petals.
III. “Detail and Detail”: The Extraordinary Finish
1. The “Non-Twist” Keychain Loop
Don’t just sew the metal ring to a petal—it will eventually tear the yarn.
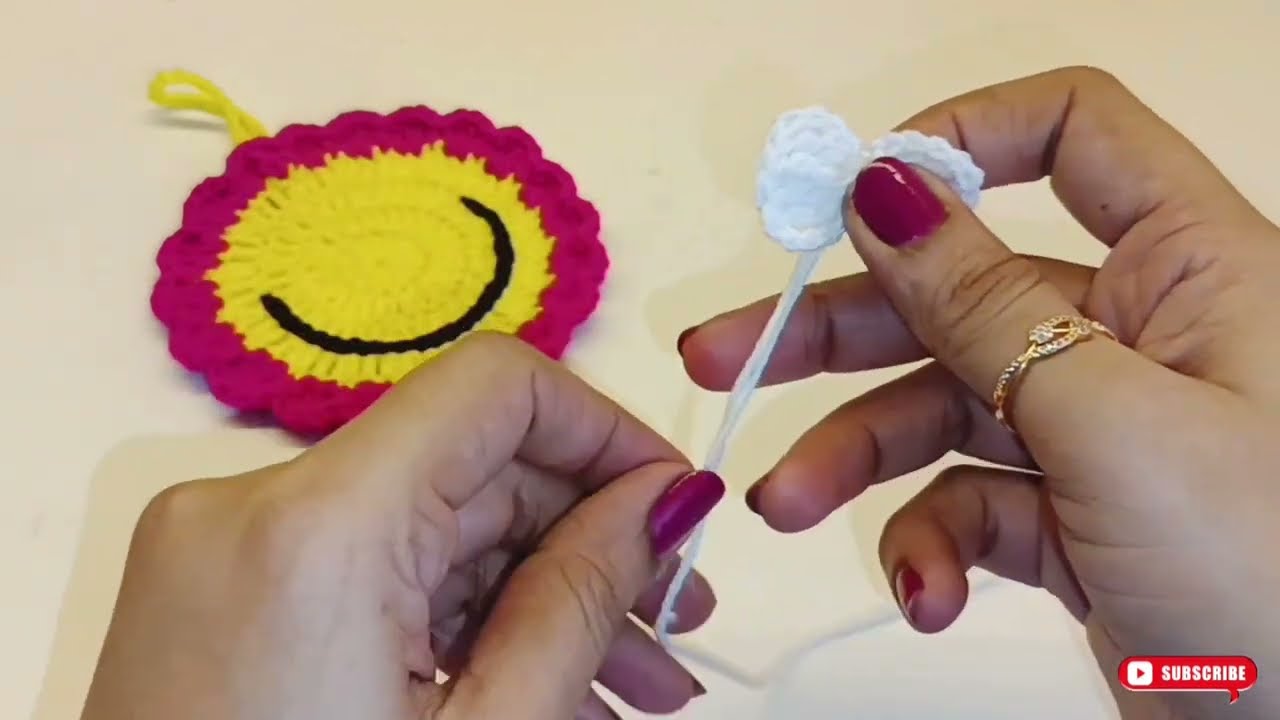
- Join Color A between two petals.
- Ch 6.
- Sl st back into the same spot.
- Work 10 sc around the chain loop to reinforce it.
- Slide your metal keyring through this reinforced loop.
2. Shaping the Petals
To make the petals look “extraordinary” and not just floppy:
- After finishing the 5 dc, pull the yarn slightly tight on the slip stitch. This “pinches” the base of the petal, making the curve look more dramatic and professional.
3. The “Blush” Secret
Instead of using pink yarn for the cheeks, use a real pink cosmetic blush and a Q-tip. Lightly dab it onto the yarn. It creates a soft, airbrushed look that looks much more professional than embroidered lines.

IV. Summary Table
| Feature | The Professional Choice |
| Yarn Type | Mercerized Cotton (for a “clean” look). |
| Stuffing Level | Medium-Firm (to keep the face flat but 3D). |
| Face Alignment | Eyes should be centered vertically for the “kawaii” look. |
| Keyring Placement | Top center petal for balanced hanging. |
V. Final Flourish
If you want to make this a “Multipurpose” item:
- Add a tiny drop of essential oil (like Lavender) to the stuffing inside.
- Now, your smiley flower is not just a keychain, but a scented car or bag freshener!
Would you like to add a small green leaf to the side of the keychain to complete the flower look?