by
by Certainly! Here’s a detailed article on how to crochet a pumpkin table decor piece — perfect for fall and Halloween decorating. This includes a step-by-step pattern, materials, helpful tips, and customizations. Whether you want to create a cozy autumn centerpiece or a playful Halloween touch, this project is ideal for all skill levels — especially beginners and intermediate
crocheters!
🎃 How to Crochet Pumpkin Table Decor | Fall & Halloween Idea | Step-by-Step Pattern
Fall is a season full of cozy textures, warm colors, and festive decorations — and what better way to celebrate it than with a hand-crocheted pumpkin? Whether you’re decorating your dining table, mantel, or porch, a crochet pumpkin adds that perfect handmade, rustic charm. These pumpkins are quick to make, perfect for beginners, and completely customizable.
In this article, you’ll learn how to crochet a pumpkin table decor piece, step by step. This pumpkin is made using basic crochet stitches, stuffed for volume, and shaped with yarn to give it that classic pumpkin form.
🍂 Why You’ll Love This Project
- 🎃 Perfect for Fall, Halloween, and Thanksgiving
- 🧶 Beginner-friendly with simple stitches
- 🕰️ Quick to make – one can be completed in 1–2 hours
- 🎁 Makes great gifts or craft fair items
- 🧵 Customizable in size and color (think white, orange, green, even black for Halloween!)
🧺 Materials Needed
To crochet your pumpkin table decor, gather the following:
| Item | Description |
|---|---|
| Yarn | Worsted weight (Category 4) in pumpkin color (orange, white, or your choice) + small amount of green or brown for stem |
| Hook | 4.0 mm (G-6) or 5.0 mm (H-8), depending on your tension |
| Stuffing | Polyester fiberfill or cotton stuffing |
| Tapestry needle | For sewing and shaping |
| Scissors | For trimming ends |
| Stitch marker | Optional, to keep track of rounds |
✅ Recommended yarns: Red Heart Super Saver, Caron Simply Soft, or Paintbox Yarns Cotton Aran.
🧶 Stitches Used
All stitches are in US terminology.
| Abbreviation | Stitch Name |
|---|---|
| ch | Chain |
| sc | Single Crochet |
| sl st | Slip Stitch |
| st(s) | Stitch(es) |
| inc | Increase (2 sc in one stitch) |
| dec | Decrease (sc 2 stitches together) |
This pattern is worked in continuous rounds, so use a stitch marker if needed to mark the beginning of each round.
📐 Finished Size
- Approximately 4–5 inches wide and 3–4 inches tall, depending on yarn and tension.
- Easily adjustable for larger or smaller pumpkins.
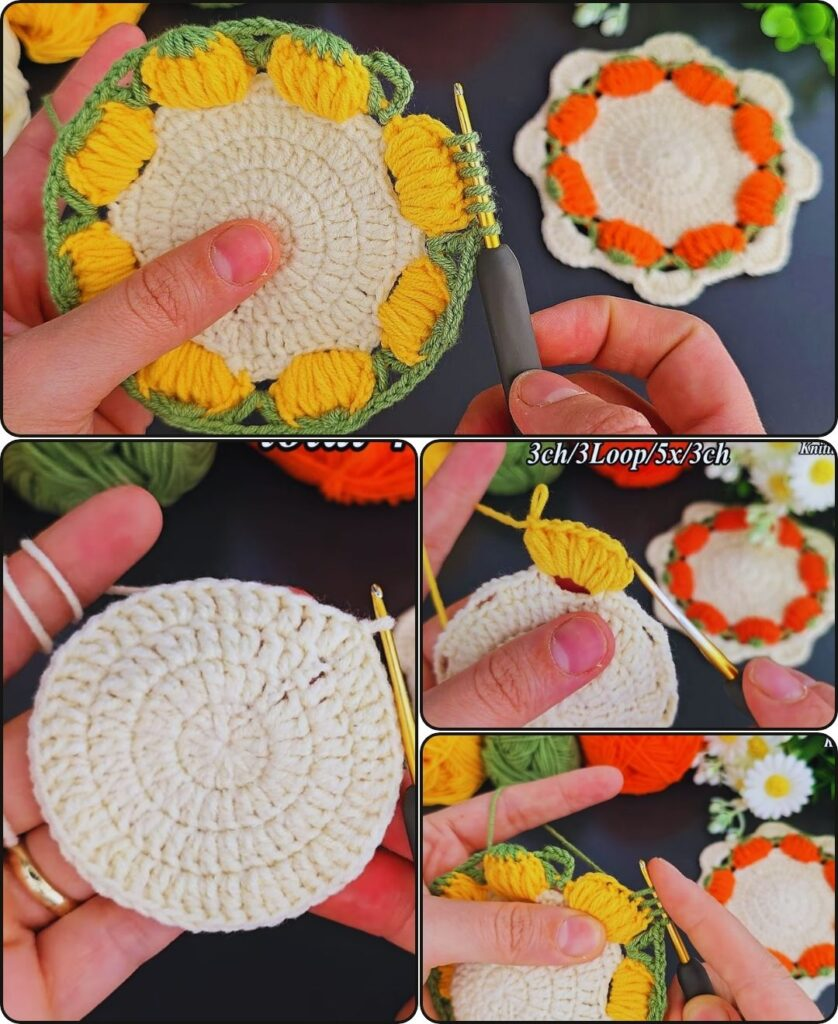
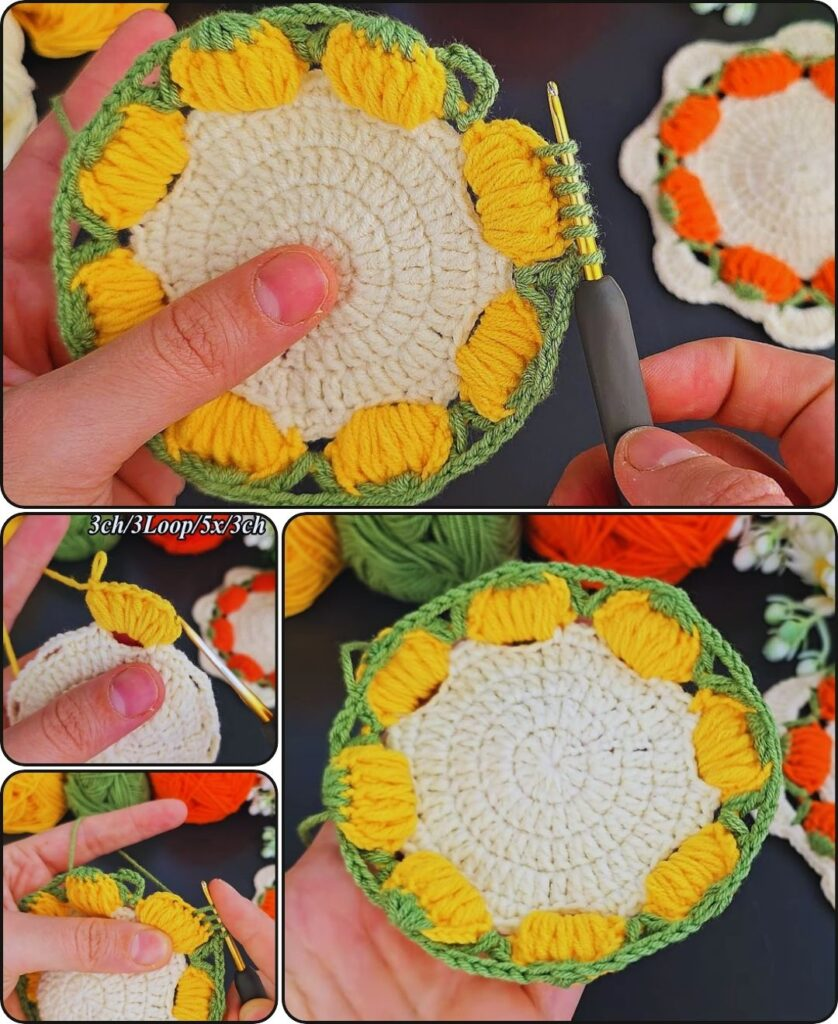
🎃 Step-by-Step Crochet Pumpkin Pattern
Let’s get started making your adorable pumpkin!
🧡 Part 1: Crochet the Pumpkin Body
We’ll begin by making a round, ball-like base using increases and decreases.
R1:
- Make a magic ring.
- 6 sc into ring. (6 sts)
R2:
- 2 sc in each st around. (12 sts)
R3:
- Sc in next st, 2 sc in next, repeat around. (18 sts)
R4:
- Sc in next 2 sts, 2 sc in next, repeat around. (24 sts)
R5:
- Sc in next 3 sts, 2 sc in next, repeat around. (30 sts)
R6:
- Sc in next 4 sts, 2 sc in next, repeat around. (36 sts)
R7:
- Sc in next 5 sts, 2 sc in next, repeat around. (42 sts)
R8–16:
- Sc in each st around. (42 sts)
🧵 TIP: If you want a taller pumpkin, add more rounds here (e.g., R8–R18 instead of R8–R16).
🟠 Part 2: Shape the Top (Decreasing Rounds)
Now we’ll decrease the stitches to close up the pumpkin.
R17:
- Sc in next 5 sts, dec over next 2 sts, repeat around. (36 sts)
R18:
- Sc in next 4 sts, dec, repeat around. (30 sts)
R19:
- Sc in next 3 sts, dec, repeat around. (24 sts)
R20:
- Sc in next 2 sts, dec, repeat around. (18 sts)
R21:
- Sc in next st, dec, repeat around. (12 sts)
✨ Stuff the pumpkin firmly with fiberfill before it gets too small to reach inside.
R22:
- Dec around (6 sts)
Fasten off, leaving a long yarn tail (12–18 inches) for shaping the pumpkin.
Use the tapestry needle to weave through the front loops of the last round, pull tightly to close the hole.

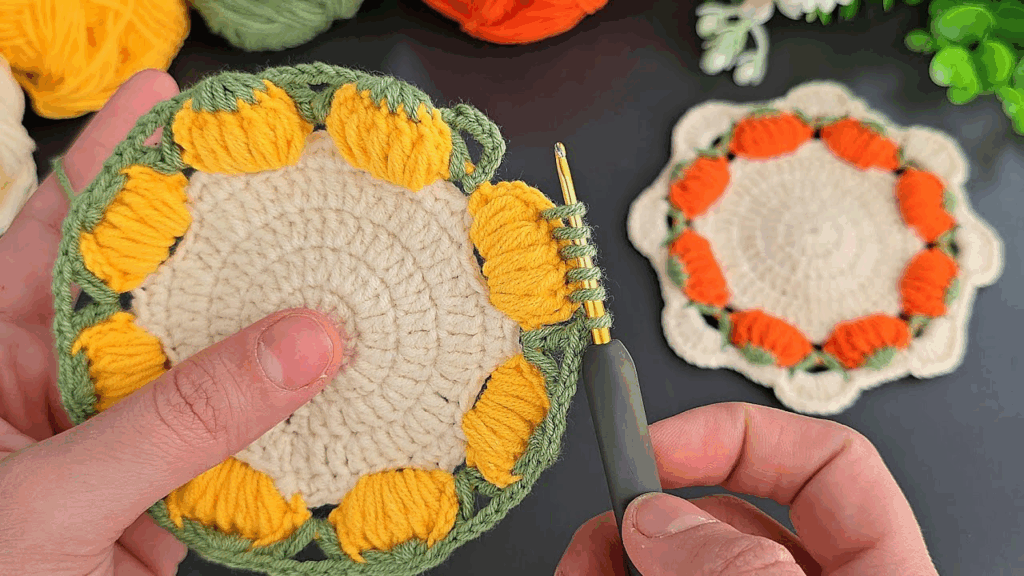
🍁 Part 3: Shape the Pumpkin Ridges
To give the pumpkin its classic “ribbed” look:
- Thread the long yarn tail onto your needle.
- Insert the needle from the top center through the bottom center.
- Pull the yarn snugly to form a dimple.
- Bring the yarn around the side of the pumpkin and back down through the center again.
- Pull tight to create a ridge.
- Repeat 6–8 times around the pumpkin, spacing evenly.
- Tie off and weave in the ends securely at the bottom.
🧵 The more tightly you pull the yarn, the more pronounced your pumpkin ridges will be.
🌿 Part 4: Crochet the Stem
Use brown or green yarn.
R1:
- Make a magic ring, 6 sc into ring. (6 sts)
R2–4:
- Sc in each st around. (6 sts)
Optional: Add an extra round or two for a taller stem.
Fasten off, leaving a tail. Lightly stuff the stem and sew it to the top center of the pumpkin.
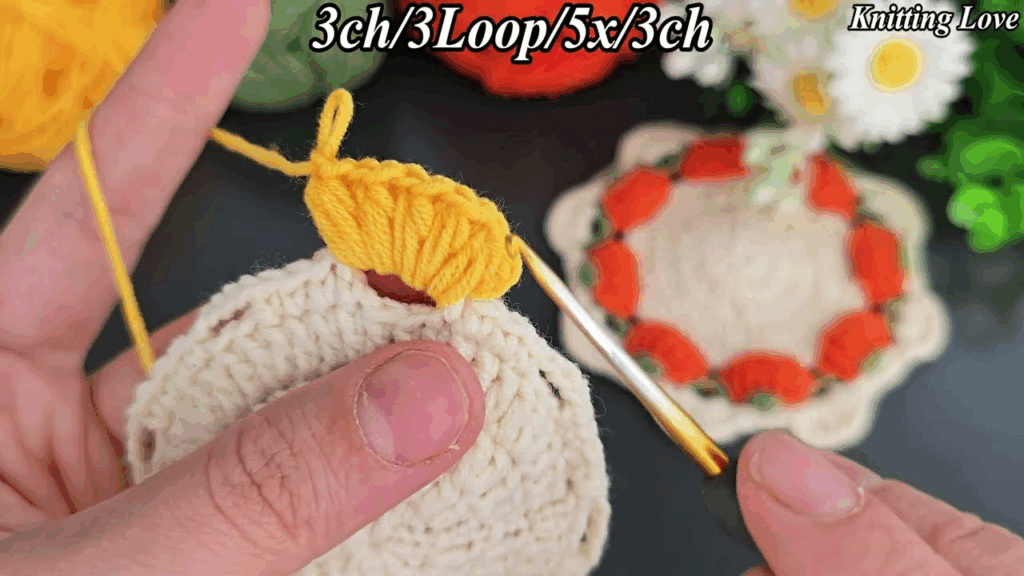
🍃 Optional Leaf (Easy)
Use green yarn.
R1:
- Ch 6.
R2:
- Sc in 2nd ch from hook, hdc in next, dc in next 2 chs, 3 dc in last ch.
- Working on the other side of the chain:
- Dc in next 2 sts, hdc in next, sc in last.
- Fasten off and attach next to the stem.
🧼 Finishing Touches
- Weave in all ends securely.
- You can lightly steam the pumpkin to shape it if necessary.
- Attach embellishments like a cinnamon stick stem, raffia ribbon, or a little tag.
- Make a set of 3 pumpkins in different sizes for a full fall table setup.
🎨 Variations to Try
| Theme | Variation |
|---|---|
| Halloween | Use black or dark purple yarn, add a spooky face (felt or embroidery) |
| Rustic Fall | Use cream, tan, or mustard yarn |
| Cute Décor | Add safety eyes and a smiley face |
| Giant Pumpkin | Use super bulky yarn and a 9 mm hook |
🕯️ How to Use Your Crochet Pumpkin
- Table centerpiece with leaves and candles
- Mantel decor with mini gourds
- Desk or shelf accent
- Fall gift basket filler
- Halloween treat display prop
You can even add dried spices or a sachet inside to make it scented!
✅ Summary
| Section | What You Did |
|---|---|
| Body | Worked in continuous rounds with increases/decreases |
| Ridges | Formed by wrapping yarn around pumpkin body |
| Stem | Simple tube sewn on top |
| Leaf (optional) | Decorative touch for realism |
🧵 Final Thoughts
Crocheting your own pumpkin table decor is a delightful way to welcome the fall season. It’s beginner-friendly, quick to make, and brings a handmade charm to your home or event. Whether you’re decorating for Halloween, Thanksgiving, or just love autumn vibes, these crochet pumpkins are sure to impress.
Once you’ve made one, you’ll want to create a whole pumpkin patch in every color and size!