 by
by 
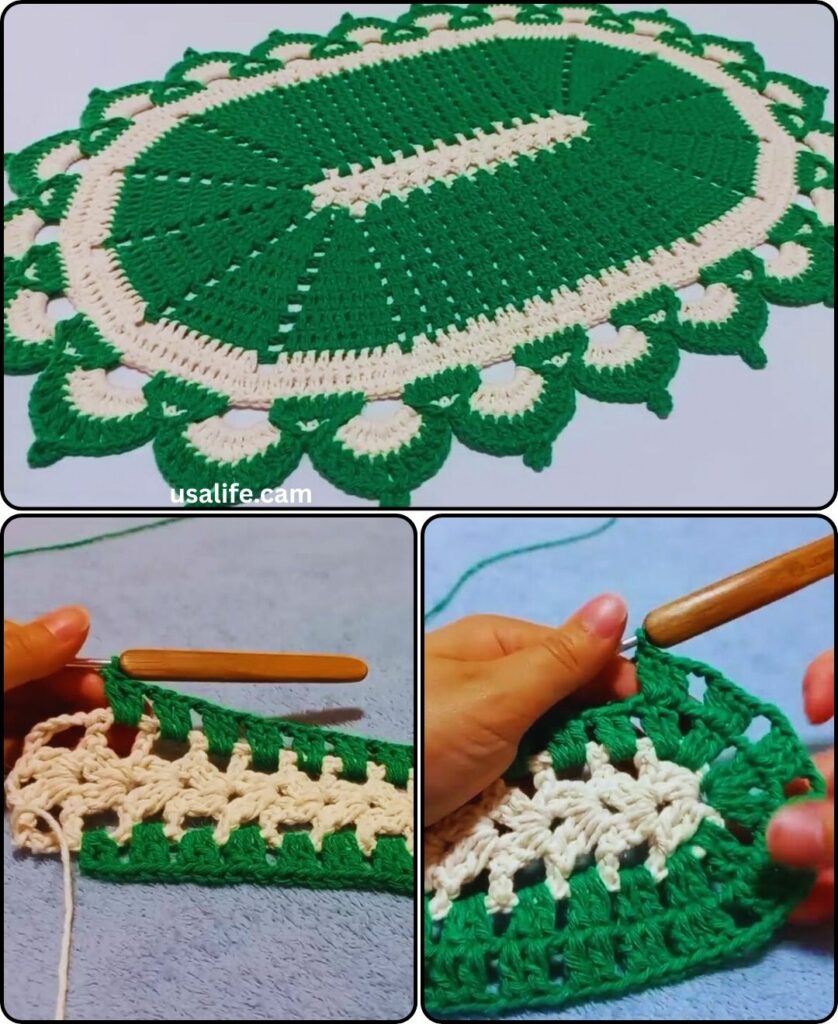
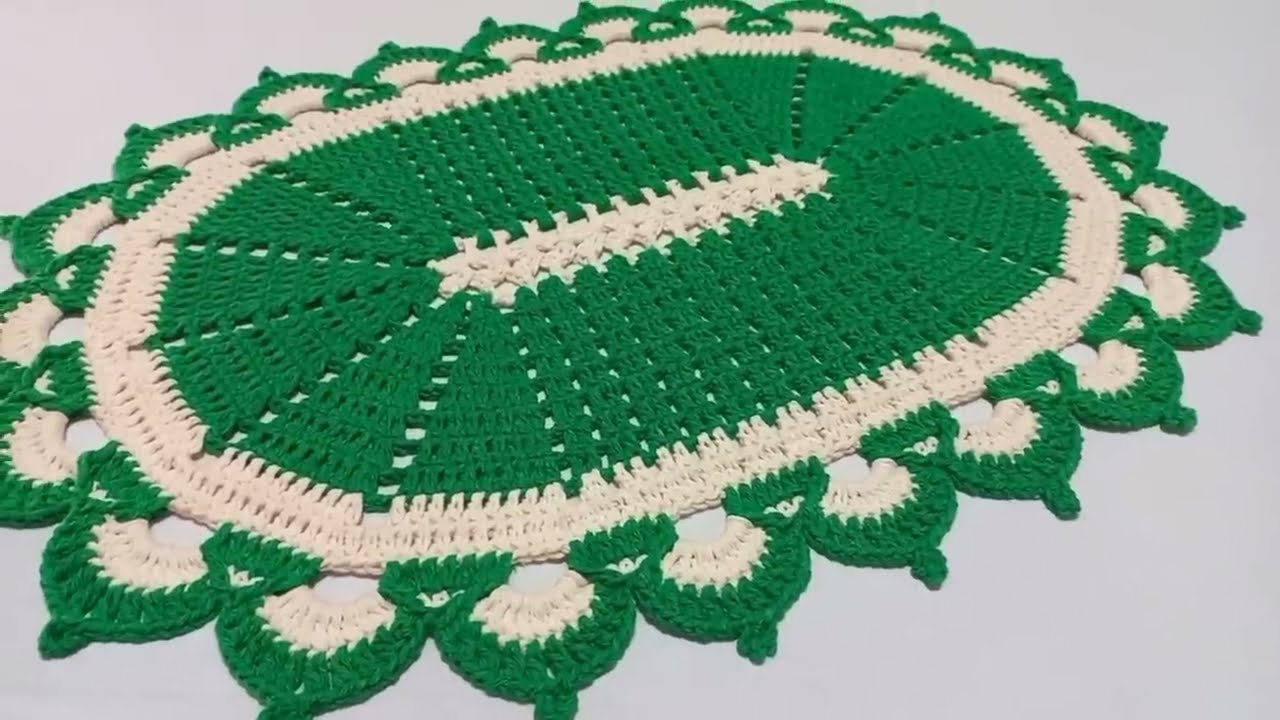
Adding a touch of handmade charm to your home decor is always satisfying, and what better way to do it than with a beautifully crocheted rug? Oval rugs are especially versatile, adding a unique touch to any room. They’re perfect for placing under a coffee table, in a bedroom, or even in a bathroom.
This blog post will guide you through the process of crocheting your own oval rug, step-by-step. We’ll cover everything from choosing materials and stitches to shaping the oval and adding finishing touches.
Materials:
- Worsted weight yarn in your desired colors (around 400-500 yards)
- Crochet hook in a size appropriate for your yarn weight (generally size H-8 or I-9)
- Tapestry needle
- Scissors
Stitches:
- Chain stitch (ch)
- Single crochet (sc)
- Double crochet (dc)
- Slip stitch (sl st)
Pattern:
- Foundation Chain: Start by making a chain of stitches that is about 1.5 times the desired width of your finished rug. For example, if you want your rug to be 30 inches wide, make a chain of 45 stitches.
- First Row: Work single crochets in each chain stitch across the foundation chain. Turn your work at the end of the row.
- Shaping the Oval: To create the oval shape, we will work increases and decreases at the beginning and end of each row. Here’s how:
- Increases: At the beginning of each row, make 2 single crochets in the first stitch. At the end of each row, work 2 single crochets in the last two stitches.
- Decreases: Skip the first stitch at the beginning of each row. At the end of each row, slip stitch together the last two stitches.
- Continuing the Rows: Continue working rows of single crochets, following the increase and decrease instructions at the beginning and end of each row. You will notice the oval shape taking form as you work.
- Changing Colors (Optional): If you want to add stripes or other color variations to your rug, you can change colors at any point. Simply tie a new yarn to the end of the old yarn and continue crocheting.
- Finishing the Rug: Once your rug has reached the desired length, work one final row of single crochets without any increases or decreases. Then, slip stitch to join with the first stitch of the first row.
- Weaving in Ends: Use a tapestry needle to weave in all yarn ends neatly on the back of your rug.
- Blocking (Optional): Blocking helps to even out your stitches and give your rug a more polished look. To block your rug, lay it flat on a damp towel and pin it into shape. Allow it to dry completely before removing the pins.
Video tutorial
Tips and Tricks:
- Use a stitch marker to mark the beginning and end of each row, especially when working the increases and decreases.
- If you are a beginner, you may want to start with a smaller rug.
- Experiment with different colors and stitches to create a unique and personalized rug.
- Don’t be afraid to make mistakes! Crocheting is a forgiving craft, and you can always pull out a few stitches and start over.
With a little patience and practice, you can create a beautiful and cozy oval rug that will add a touch of handmade charm to your home. So grab your yarn and hook, and get started!
I hope this blog post has inspired you to crochet your own oval rug. If you have any questions, please feel free to leave a comment below.
Happy crocheting!