 by
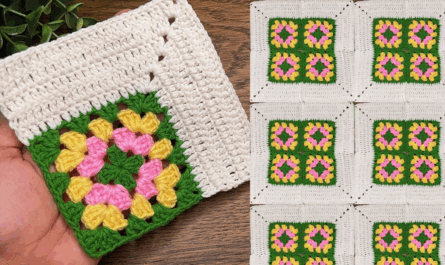
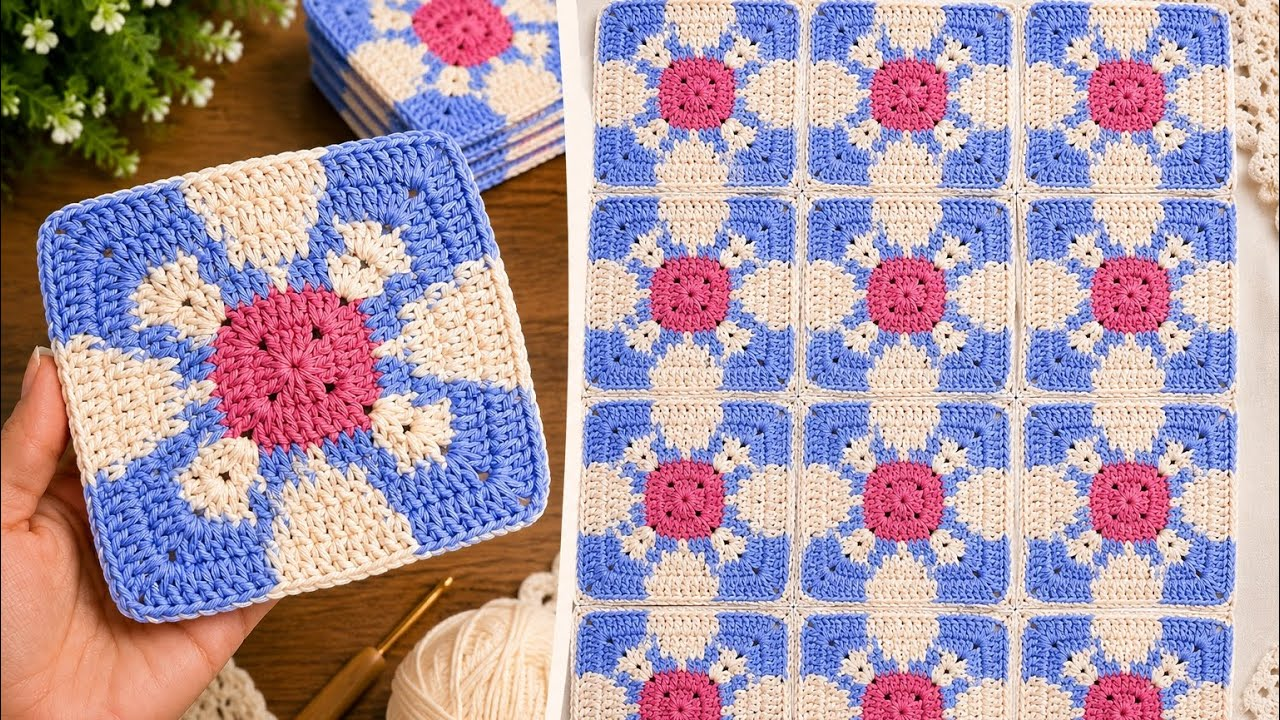
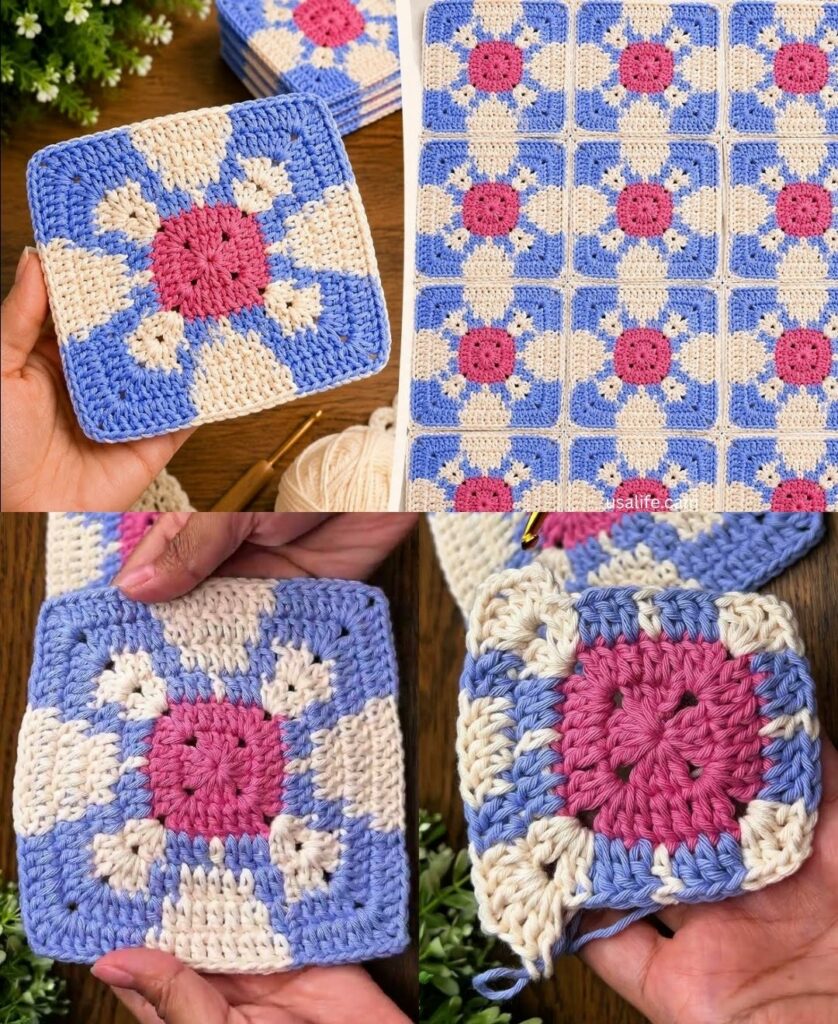
by The classic Granny Square is the foundation of crochet. It is modular, addictive, and incredibly versatile. By mastering this “cluster” technique, you can create anything from blankets and pillows to bags and cardigans.
This is the Classic Granny Square pattern, written for maximum clarity.

🧶 Your Toolkit
- Yarn: Any weight works, but Worsted Weight (Size 4) is best for beginners.
- Hook: Use the hook size recommended on your yarn label (usually 5.0 mm or 5.5 mm).
- Essentials: Scissors and a tapestry needle for weaving in your ends.
🔑 Stitch Key (US Terms)
- ch: Chain
- sl st: Slip Stitch
- dc: Double Crochet
- Cluster: A group of 3 dc stitches worked into the same space.
- Corner Space: The hole created by the
ch-2at the corners.

🛠 Step-by-Step Instructions
Round 1: The Core
- Start:
ch 4. Insert your hook into the first chain and join with asl stto form a small ring. - The Start:
ch 3(this counts as your firstdc). - The Work: Into the center of your ring, work 2 dc. Then,
ch 2(this creates your first corner). - The Pattern: Work a cluster of 3 dc into the ring, then
ch 2. Repeat this two more times. - Join:
sl stto the top of your initialch 3. You should have 4 clusters and 4 corners.

Round 2: Growing the Square
- Travel:
sl stacross the tops of the next 2 stitches and into the corner space. - First Corner:
ch 3(counts asdc),2 dc,ch 2,3 dc(all in that same corner space). - The Transition:
ch 1. - The Corners: In each of the next three corner spaces, work (3 dc, ch 2, 3 dc). Between each corner cluster, remember to
ch 1. - Join:
sl stto the top of your initialch 3.
Round 3: The Expanding Frame
- Travel:
sl stover to the nearest corner space. - Corner:
ch 3,2 dc,ch 2,3 dc(in the corner space). - The Side:
ch 1. Work a cluster of 3 dc into the side space (the gap created by thech 1in the previous round). - Repeat: Follow this rhythm around the square:
(3 dc, ch 2, 3 dc)in every corner, and3 dcin every side space, withch 1between each cluster. - Join:
sl stto the top of the initialch 3.

📐 3 Secrets for a Professional Finish
- The Turning Trick: To prevent your square from “twisting” or spiraling as it grows, turn your work after every round. This keeps your stitches perfectly vertical and creates cleaner corners.
- Blocking is Mandatory: If your square looks a bit wobbly when you finish, don’t worry! Pin your square to a foam board or towel using rust-proof pins, stretching it into a perfect 90-degree angle. Spritz with water and let it dry. This “sets” the fibers and makes the square perfectly flat.
- Weave as You Go: If you are changing colors, you will have many yarn tails. Use your tapestry needle to weave them into the back of your clusters as you finish each round. This saves you hours of work at the end of your project.
💡 How to Join Them
Once you have several squares, the easiest way to join them for a blanket is the Flat Slip Stitch Join:
- Hold two squares with the “right sides” facing you.
- Insert your hook through the back loops only of both squares.
- Pull up a loop and
sl stacross the edge. - This creates a clean, recessed seam that makes your blanket look professionally assembled.
Would you like me to explain how to calculate how many squares you need for a specific blanket size?